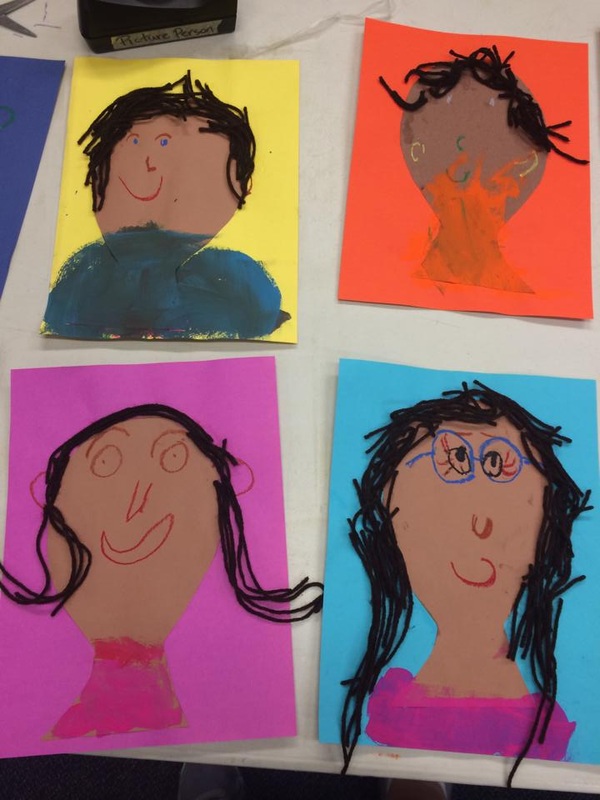
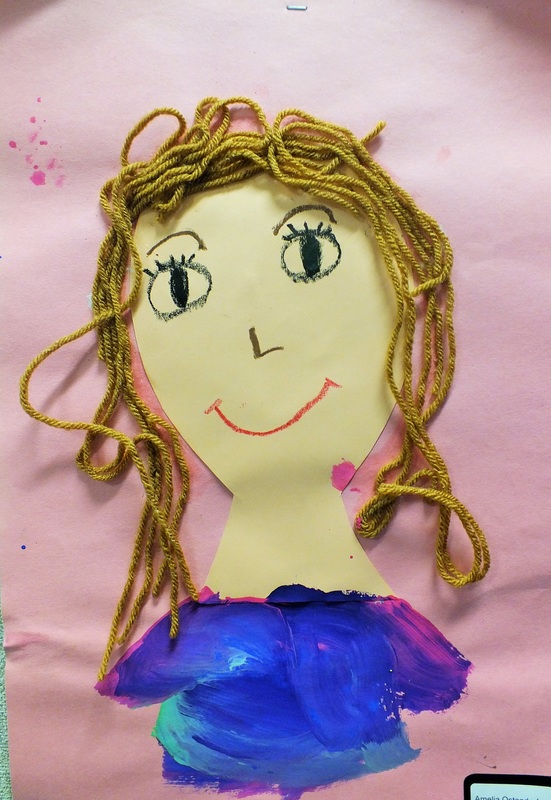
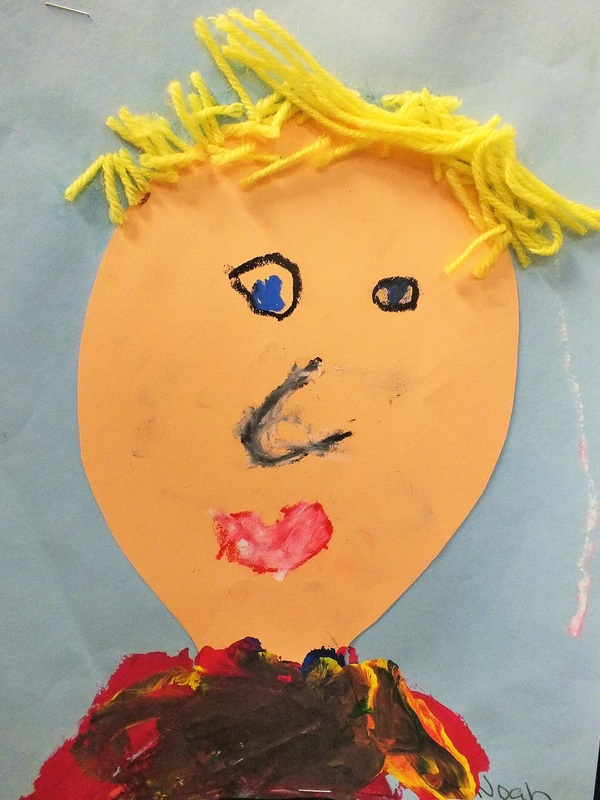
Kindergarten
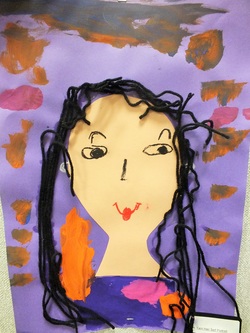
Self Portrait with Yarn Hair
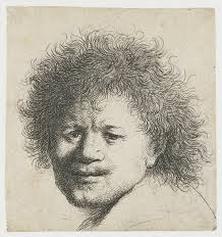
Rembrandt. Self-Portrait with Long Bushy Hair.
|
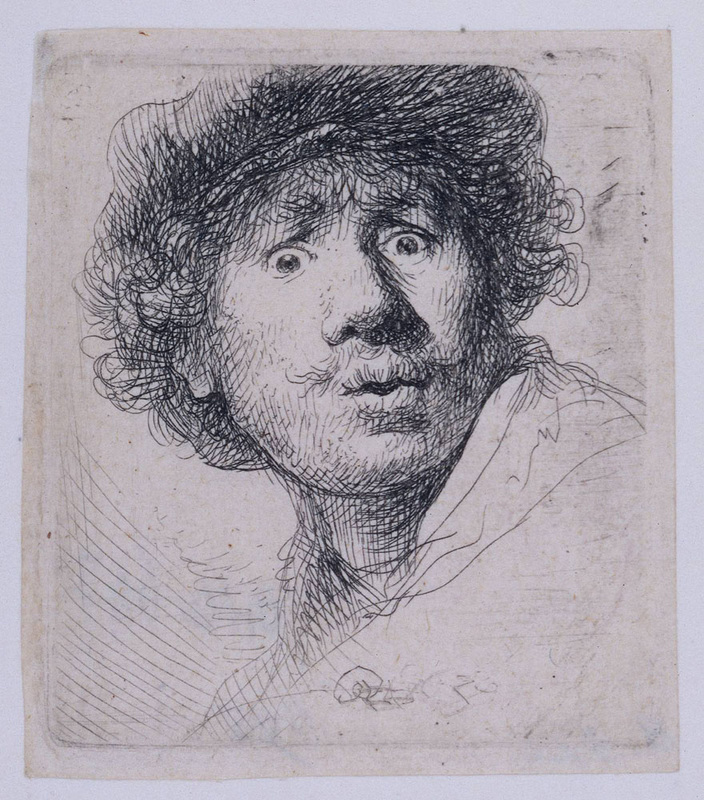
Rembrandt. Self-Portrait Surprised.
|
Rembrandt was a very talented artist who lived in Holland during the 1600s. Even though there were no cameras in Rembrandt's time, we know what he looked like because he was always painting pictures of himself, maybe more than any other famous artist (we don't know exactly how many there are, but at least 50, and some sources count it closer to 90!). When you make a picture of yourself, we call it a SELF-PORTRAIT. He also painted lots of portraits of other people, including portraits of large groups of people, as well as stories from the bible and landscapes. But Rembrandt is probably most famous for his self-portraits.
One of the artistic things Rembrandt is well known for is his use of light and dark in his paintings. This is called CONTRAST. The dark parts (shadows) really help the light parts (highlights) stand out. It even works in his drawings and etchings. Also notice how plain the backgrounds are. Rembrandt wants you to focus on the person, who in these cases, is HIM!
Rembrandt is also skilled at conveying emotion in his paintings. Have the students focus on the eyes. Can they tell what Rembrandt is feeling just by looking at the eyes? What other clues does Rembrandt give? (Hint: look at the lines, are they smooth or squiggly? is there more dark or light in a picture? what about the mouth?) One other thing to note is that Rembrandt's style changes as he gets older--notice that the brushwork gets looser and freer (and, as a result, I think there is even more feeling revealed in these later pictures).
Rembrandt is also skilled at conveying emotion in his paintings. Have the students focus on the eyes. Can they tell what Rembrandt is feeling just by looking at the eyes? What other clues does Rembrandt give? (Hint: look at the lines, are they smooth or squiggly? is there more dark or light in a picture? what about the mouth?) One other thing to note is that Rembrandt's style changes as he gets older--notice that the brushwork gets looser and freer (and, as a result, I think there is even more feeling revealed in these later pictures).
The Project
Prep – 1 hour
Print – Rembrandt, Self-Portrait with Long Bushy Hair
Materials
Head stencil (found in Kinder file cabinet drawer)
Different skin colored construction paper with head/neck stencil traced and cut out per student (use peach, light brown, and dark brown)
9 x 12 piece of brightly colored construction paper, one per student
Different colored yarn for hair (brown, black, orange, and yellow)
Oil pastels
Tempera paint, 3-4 colors
Small paint palettes (one per student table to share), Paint brushes
Glue sticks and Glue bottles (usually in class)
Parent Volunteer Prep
trace and cut out one head/neck out of construction paper per student. Use peach, tan, and brown for skin colors. Let each student choose their own head/neck the day of project. (You can take the traced heads/necks home to cut out, just leave the stencil in the file cabinet drawer)
Lesson
1. Talk about the self-portrait print. Ask the students what they see? What does every self-portrait have? Nose, eyes, mouth, hair. Think about what you look like? What do your eyes look like? Let students describe their eyes, hair, etc.
2. Model using a head/neck stencil what they will do to create their own yarn self-portrait. Glue it on a piece of brightly colored construction paper using a glue stick.
3. Model drawing eyes, nose, mouth, eyebrows with oil pastels. You can point out that eyes are actually at the center line of the head, not up on the forehead, but then don't stress out if the students put them up too high anyway.
4. Model gluing yarn on head for hair using a glue bottle.
5. Model painting a shirt on the bottom of their portrait.
Pass out art supplies
-pass out brightly colored paper, have students use it vertically and have them put their name on the back.
-pass out head/neck and have them glue it on to the paper (make sure the neck does not touch the bottom of the page so they have room to paint their shirt)
-when kids are ready to draw faces, pass out oil pastels (students can share boxes of pastels).
-have kids raise hands when done with oil pastels and faces so you can pass out yarn for hair.
-after face and hair are done, pass out paint and brushes so students can paint their shirts. Students can share paint palettes (one per table group), with 3-4 colors and a brush for each color so they won’t have to rinse brushes.
*have parent helpers wash out brushes and clean up supplies to be put away in the Art PREP room.