WHO WAS PORTRAIT PRoject
The "Who Was" Series of books is the inspiration for this project.
It is based on the 3rd grade Modigliani project. The students will each use their famous person to create a portrait.
It is based on the 3rd grade Modigliani project. The students will each use their famous person to create a portrait.
The art projet
Prep – 45 min. (included time to make sample)
Print – Modigliani, Gypsy Woman with Baby
Materials
12 x 18 piece of black construction paper for each student
White crayons
Oil pastels for each student (the larger boxes of pastels will offer more skin color choices for your students)
Lesson
Print – Modigliani, Gypsy Woman with Baby
Materials
12 x 18 piece of black construction paper for each student
White crayons
Oil pastels for each student (the larger boxes of pastels will offer more skin color choices for your students)
Lesson
- With this portrait we will be making the head extra large. Start by pinching the page into four sections to help the students with sizing. The head will be the top three sections of the paper with the neck and shoulders being the bottom fourth of the page.
- Explain that the oval for the head will be drawn very large and take up most of the space of their page.
- Go over where facial features will go on their face. Draw a long oval face on the white board and show them where the eyes will go. Remember, eyes are an almond shape, with 2 round shapes in center. The round shape in center of eye is pupil and it is black. The round shape the pupil is in is the iris and this is the colorful part of their eye. Remind them to add eyebrows.
- The nose will be longer. It can be drawn by using lines on the side and nostrils at the end. Share some examples of different types of noses. Have them look at their books for inspiration.
- Talk about the mouth and how some of the portraits have big smiles with teeth and others just small lines.
- Draw ears if your ears are seen.
- Draw a long neck down to the shirt they are wearing.
- Model a basic drawing for the students using a white crayon on the black paper and following the rules you just explained.
- Show the students how they will trace over their white crayon drawing with a black oil pastel.
- When the white crayon and black oil pastel are done it is time to color in the drawing with oil pastels.
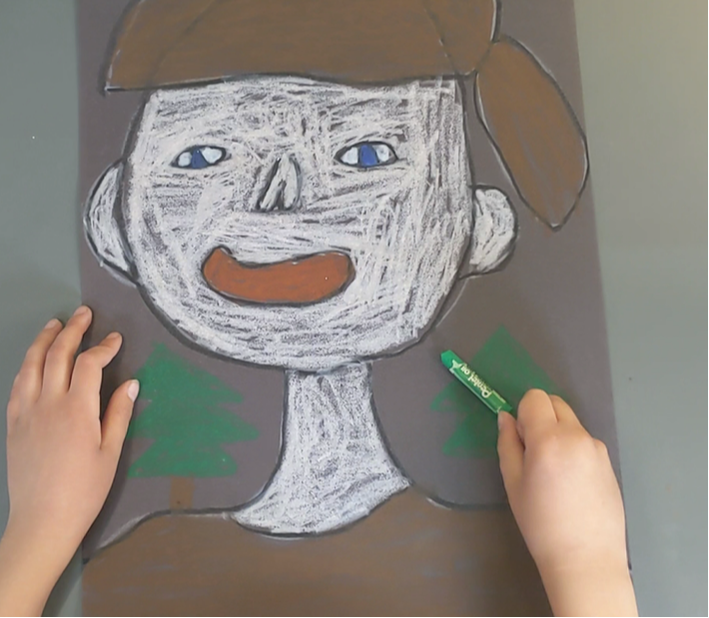
- In the background have the students include items or scenery that has to do with their famous person.
Art Project
-Pass out black paper and white crayons to each student.
-Students can draw in pencil first on black paper if they want and then trace over with white crayon.
-when students are done drawing with their white crayon, have them raise their hands so a parent volunteer can check to make sure they have drawn everything.
-pass out oil pastels to each student
-have students draw over their white crayon with their black oil pastel (some of the white crayon should show)
-students can now start to color in their drawings.
-encourage students to color darkly to show the bright colors of the oil pastels and cover up the black paper
-students can choose a bright color to use for their background
-when students are done, make sure they put their oil pastels back in the box correctly and slip lid on
