kindergarten
Color Mixing
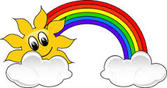
Most children are very familiar with the colors of the rainbow, but do they know why the colors belong in the particular order they do? The COLOR WHEEL can help explain color relationships. Think of the color wheel as a rainbow turned into a circle. In a circle, the color patterns can keep going all the way around, and don't stop when you get to the edge. Most artists think and talk about color in terms of a COLOR WHEEL.
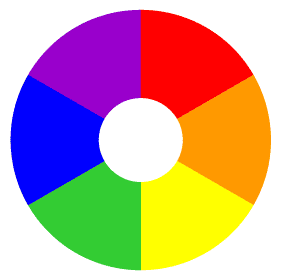
Today we will be talking about the most basic color relationships: those of PRIMARY colors and SECONDARY colors. The primary colors are red, yellow, and blue. These colors are the basic colors from which all other colors are mixed. Have the children note where the primary colors are on the color wheel. Note how they are not next to each other, but spaced out evenly around the circle.
When you mix any two of the primary colors together, you will get a secondary color. Each secondary color is made from the two primary colors closest to it on the color wheel. For example, when you mix red and yellow, you get orange, and so orange sits between yellow and red on the color wheel. Have the students notice which two primary colors make the other secondary colors. As you mix the color wheel colors in the right order, you will make all the colors of the rainbow!
When you mix any two of the primary colors together, you will get a secondary color. Each secondary color is made from the two primary colors closest to it on the color wheel. For example, when you mix red and yellow, you get orange, and so orange sits between yellow and red on the color wheel. Have the students notice which two primary colors make the other secondary colors. As you mix the color wheel colors in the right order, you will make all the colors of the rainbow!
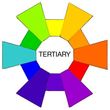
Note: most color wheels also show the tertiary or intermediate colors, which are achieved by mixing the primary and secondary colors next to them. Then you get colors like yellow-green or violet-red. But we won't be talking about those colors today....
See also Color Wheel Flower project in 1st grade for more information on color wheels!
See also Color Wheel Flower project in 1st grade for more information on color wheels!
| color_mixing_page.pdf |
| color_mixing_birds.pdf |
The project
PREP - 45 minutes to make sample, pull supplies and go over color wheel
Print - Color Wheel Chart
Materials -
-small paint pallettes, one per two kids
-primary color tempera paint: red, blue, and yellow
-Q-tips, at least 6 per kid
-print out of color mixing page ( 1 per student)
-print out of color mixing birds ( 1 per student)
-you may bring newspaper from home to cover tables
Lesson -
Show students the color wheel chart and talk about the colors, as discussed above.
Model for the students with the paint on the color mixing sheet how when you paint yellow in the square and then blue in the square, you have yellow and blue. Ask the students what color they think you will get when you mix yellow and blue together? Show students on the color mixing paper how to mix yellow and blue in the last square and you get green. Use the Q-tips, just as they will be doing. Continue to model this for the other colors: red and blue make purple, yellow and red make orange!
Have parent helpers pass out supplies to students. Each student should have a color mixing paper, have them put their name on it, a paint palette they will share, and Q-tips. Remind students to only use each Q-tip in only one color and then use a separate Q-tip to mix the colors together.
Guided Art Lesson
After students have their supplies, have them follow you in painting each square. This would be a guided art lesson: students will follow along as you step by step lead them in making their colors.
When students are done with their color mixing sheet, you can pass out the bird paper and they can work on their own to paint the primary colors on their birds and then practice mixing colors to paint the other 3 birds. (yes, some kids will have brown birds, it is ok, remember that they are practicing and using paint is exciting)
*when lesson is over, please have parent helpers collect paint pallettes and wash them out and set them to dry near sink in Art PREP room.

