second grade
Clay Jewelry Dish
Clay in Estonia
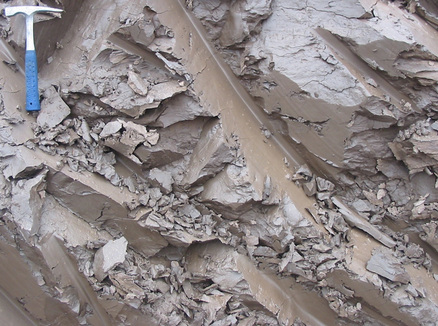
What is Clay? Clay is very fine particles of dirt which float in a stream or river and then sink to the bottom, where they press on each other and stick together.
What is so cool about clay is that it is squishy when it is wet, so you can make it any shape you like, and then it dries hard in the sun, pretty fast, as the water evaporates out. If you dry clay in the sun you can make it soft again just by throwing it in a bucket of water and waiting a week or two. But if you put your clay pot or sculpture in a fire, or in an oven (an oven for clay is called a kiln) and bake it for a while very hot, the clay is even harder and it will not get soft again even if you put it in water for a long time. This is called firing. People first began to fire clay about 6000 BC.
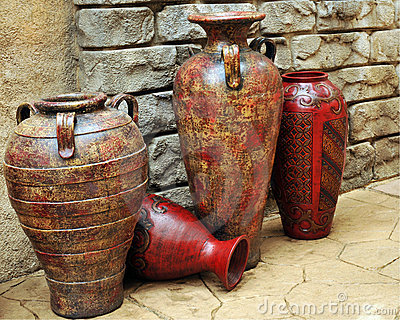
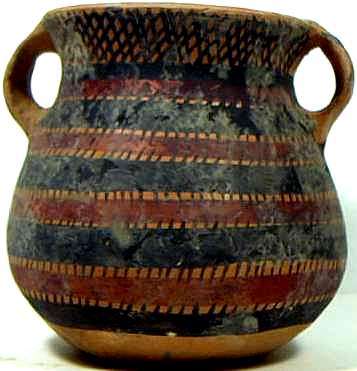
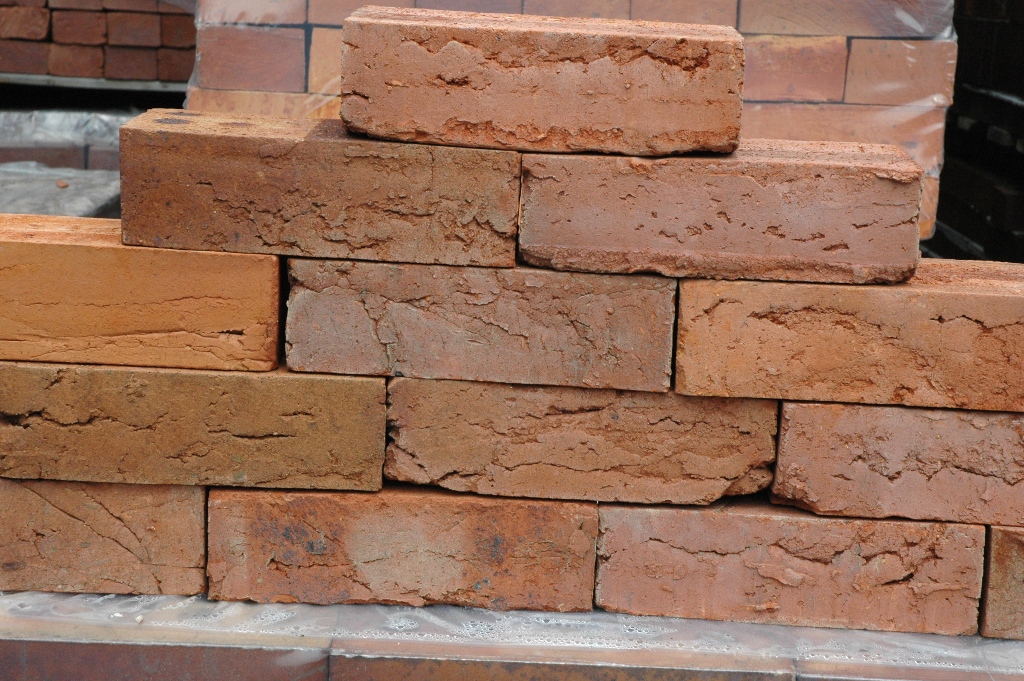
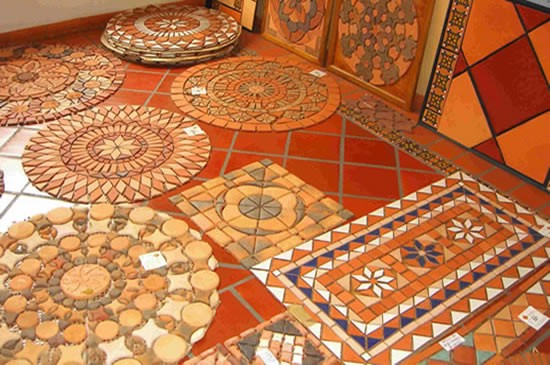
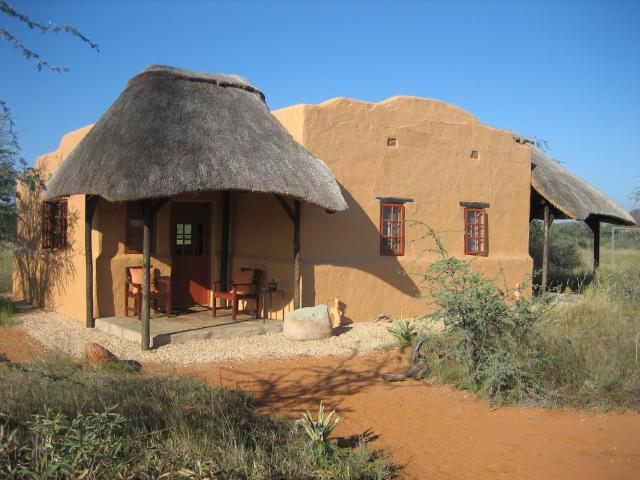
At our school we get to use clay to make a different art project every year. But clay is not just used for art projects. It can also used to make many useful objects, like pottery (including cooking pots, vases and dishware), construction products, bricks and wall and floor tiles. Clay can even be used to build houses (sometimes clay houses are called adobe)!
What is so cool about clay is that it is squishy when it is wet, so you can make it any shape you like, and then it dries hard in the sun, pretty fast, as the water evaporates out. If you dry clay in the sun you can make it soft again just by throwing it in a bucket of water and waiting a week or two. But if you put your clay pot or sculpture in a fire, or in an oven (an oven for clay is called a kiln) and bake it for a while very hot, the clay is even harder and it will not get soft again even if you put it in water for a long time. This is called firing. People first began to fire clay about 6000 BC.
At our school we get to use clay to make a different art project every year. But clay is not just used for art projects. It can also used to make many useful objects, like pottery (including cooking pots, vases and dishware), construction products, bricks and wall and floor tiles. Clay can even be used to build houses (sometimes clay houses are called adobe)!
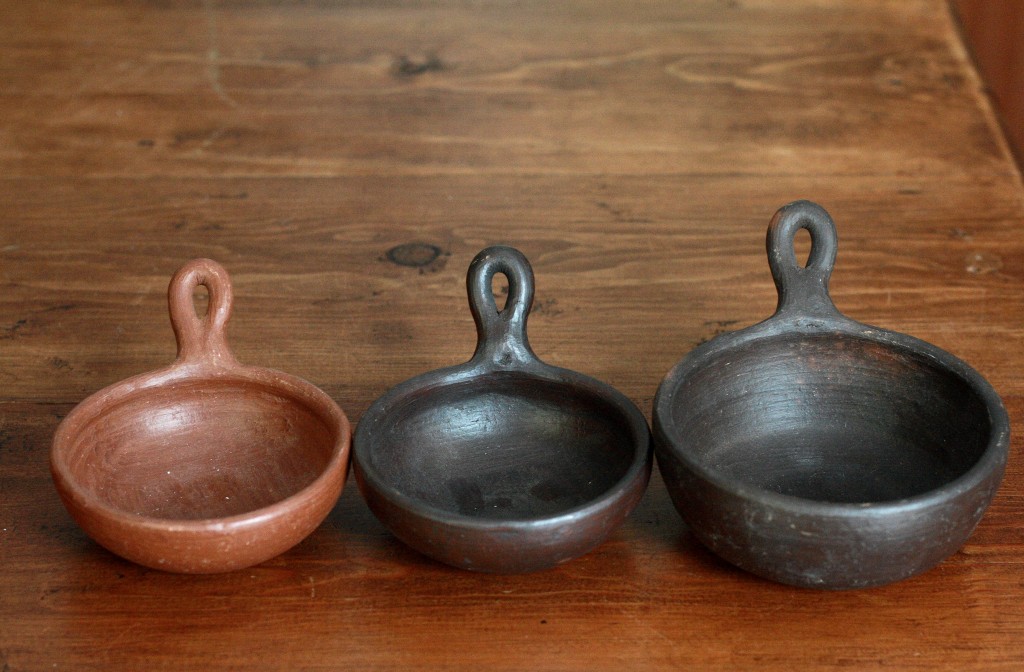


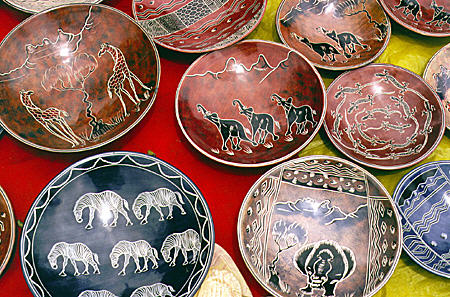
Today we are making a clay jewelry dish. This is a small bowl that is both useful and beautiful! You can use it to hold rings or earrings, coins, or other small items. Or you can just set it out to decorate your shelf. Many artists of different cultures also create small bowls of out clay for the same purpose. Here is a picture of some bowls made by African people near Kenya.
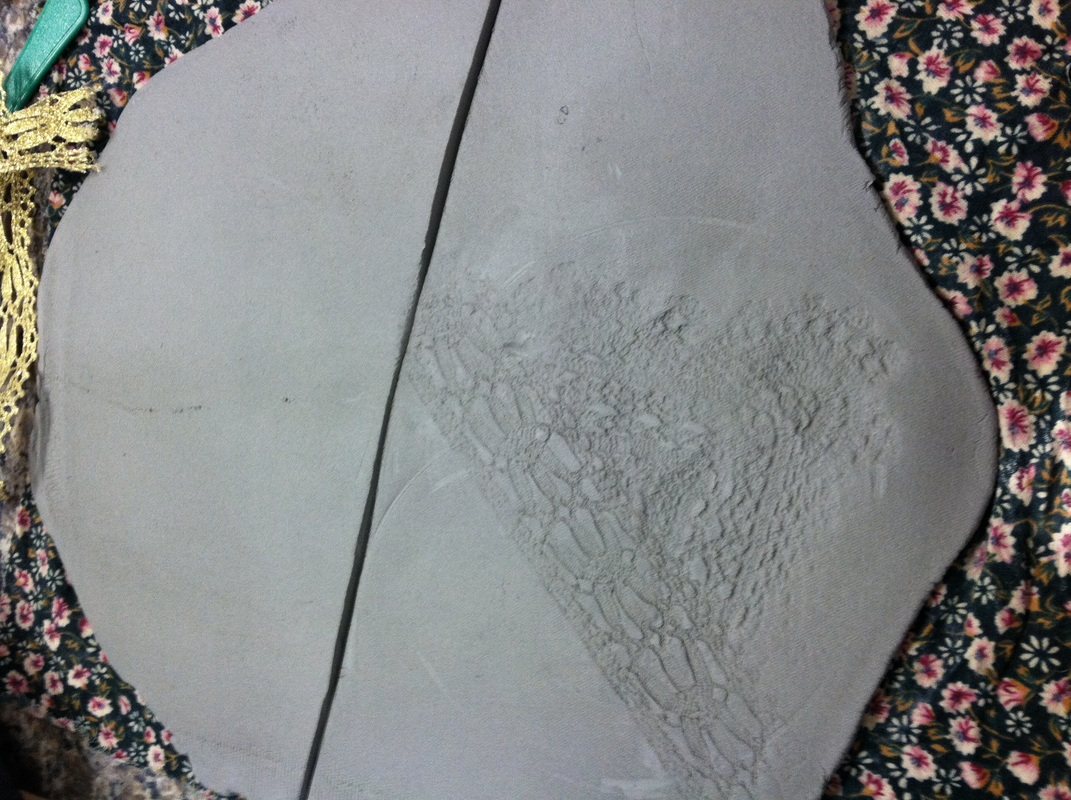
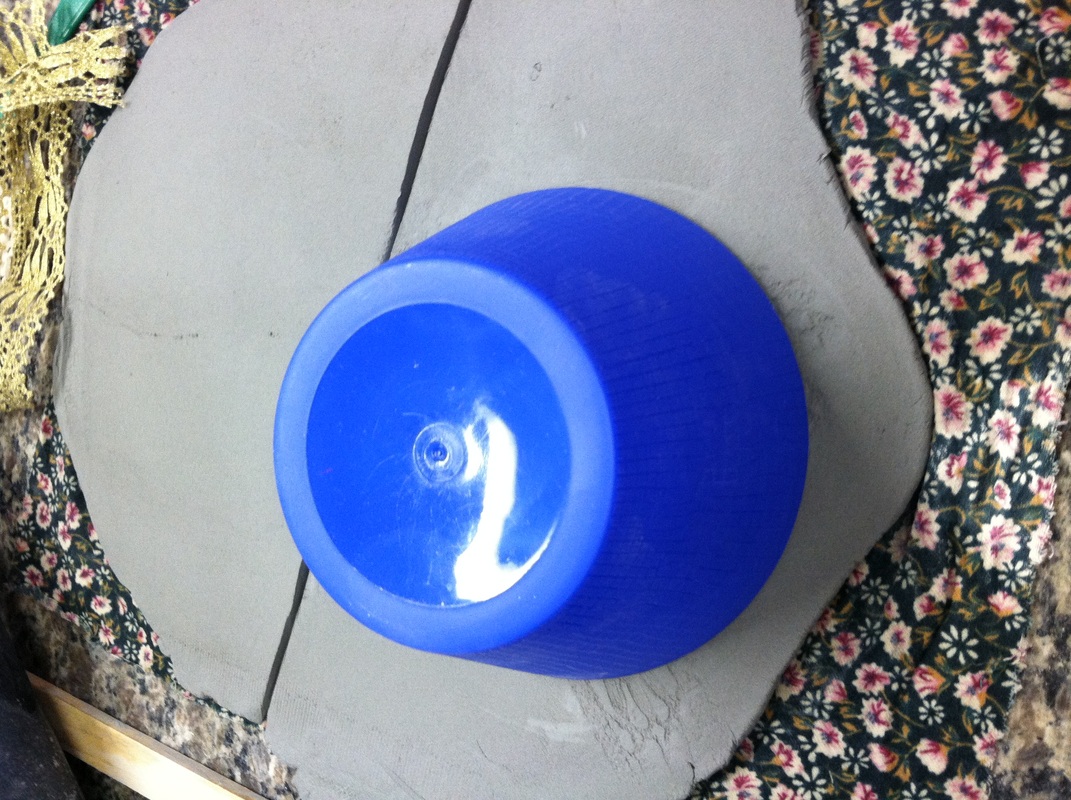
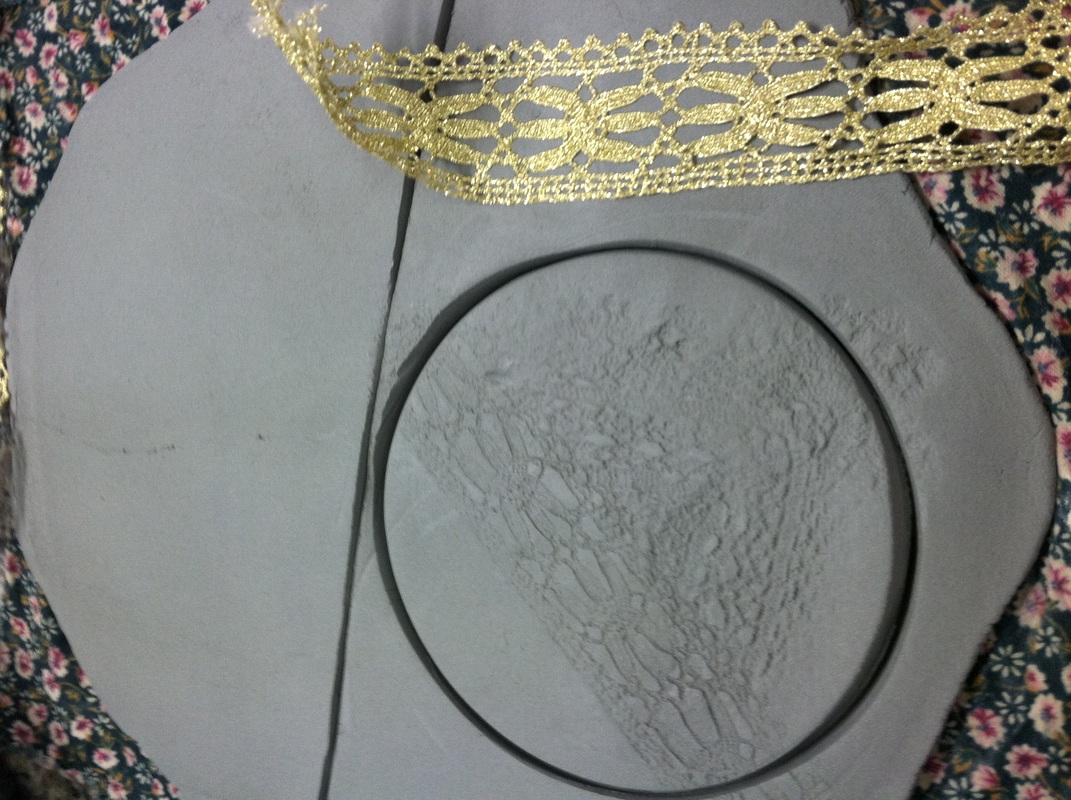
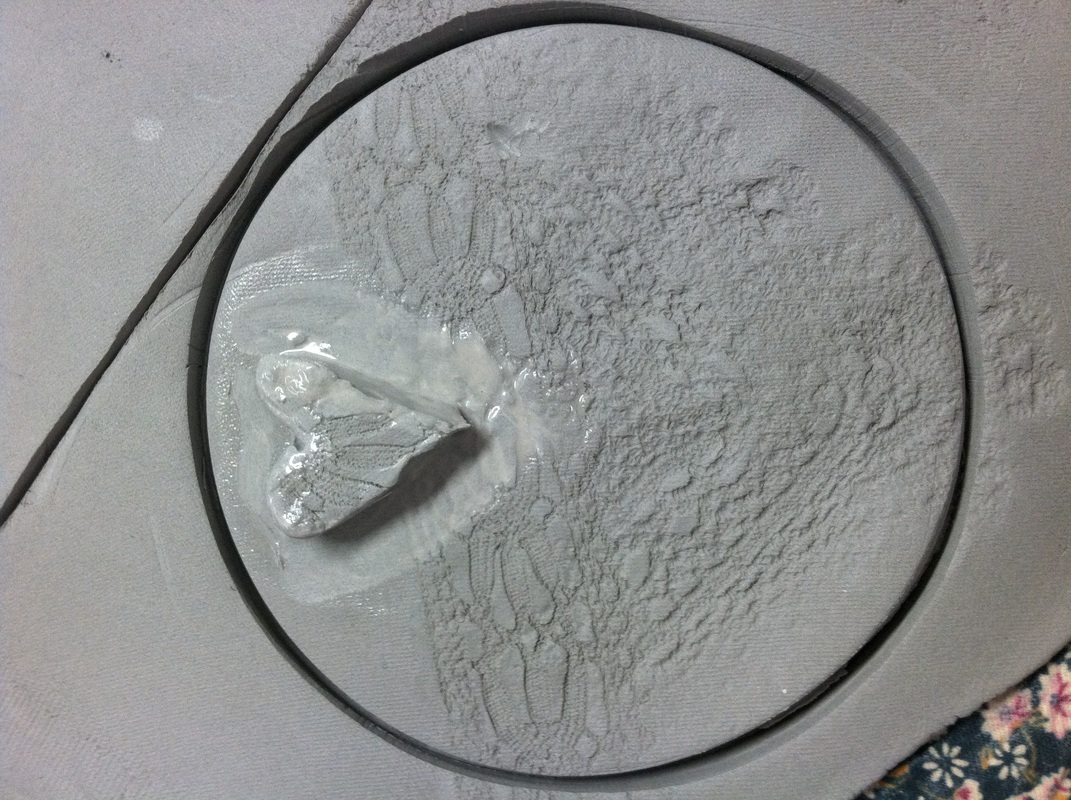
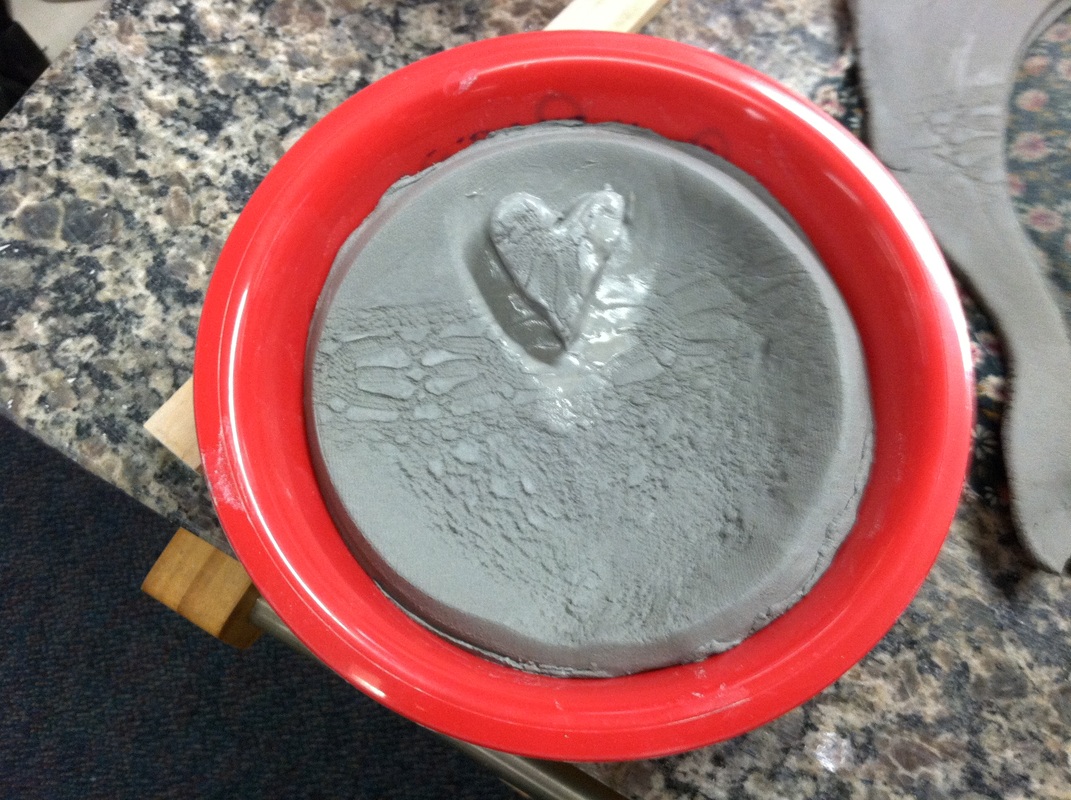
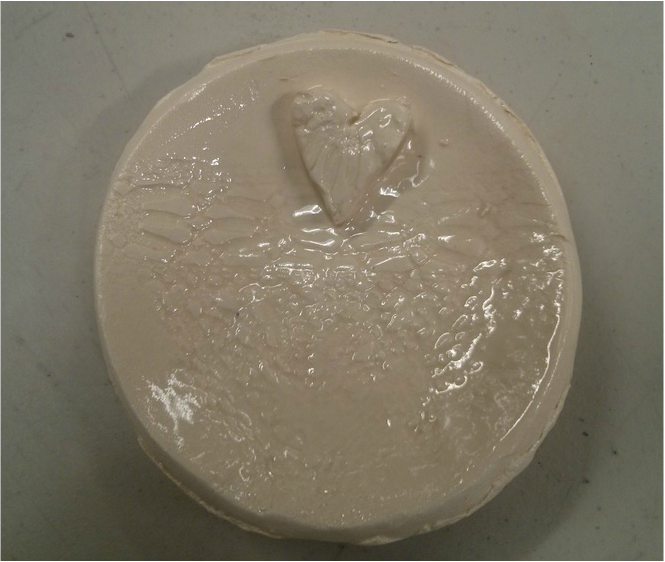
You will each have a slab of soft clay to work with. Because it is still soft, we can press designs into the clay and cut it in to the shape we want, which today is a circle. We can even scratch our names on the back. Remember not to press too hard into the clay, because then it can get too thin and break. When we are done, we will set the clay circles into a bowl which will bend the clay into the shape of a dish. The parent helpers will take the clay back to the art room and let them dry for at least two weeks. The clay will be hard enough to take out of the plastic bowls used for shaping, but still very breakable. Next, your bowls will be fired and glazed, and then they will look shiny and beautiful. The dishes will be much stronger, but they will still break if you drop them, so be careful when we bring them back to you. I'm sure one of your parents or other loved one will enjoy getting this special gift from you!
The Project


Prep
– 2 hours (prep can be done up to 3 days in advance as long as you seal the
Ziploc bags when you are done)
Print –
Materials
1 slab of clay per student
Lace, buttons, etc. to press into clay
Blue plastic bowls to cut out jewelry dish
Red plastic bowls, one per student, to put clay dish in
Heart cookie cutters
Plastic knives
Dixie cups (1 per 2 students) for water to glue on heart
Parent Prep
-show students clay bowls you made. Explain to them that they will be making their own clay creation today. Explain clay comes from the earth.
-have parent volunteers pass out a clay slab to each student.
-pass out lace, buttons, etc. to press into clay to make impressions.
-have parent helpers go around and help students cut out a circle with the blue plastic bowls. Have parent helpers put the students number on the back (teachers will have students numbers)
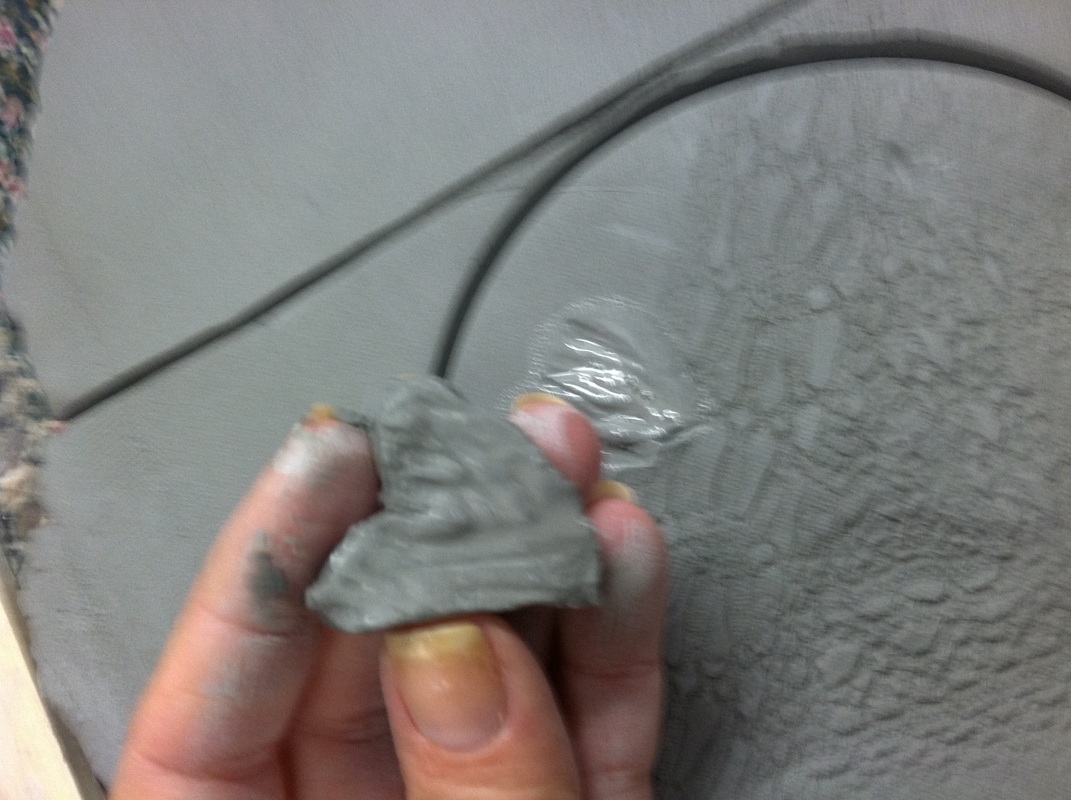
-when students are done, show them with an extra slab of clay how to press in the heart cookie cutter and make a heart.
-show students how to use the plastic knives to score the bottom of the heart and the place they want to put it on their dish. To score you make marks going one direction and then going the other direction - crosshatching.
-show students how to put water on their clay where they want the heart to be and water on the heart and then “glue” it down on the dish.
-put the dish once it is done in the red bowl to give it a rounded shape
-you can come back 3 or 4 days later and remove them from the bowls and put them in a cardboard box to dry.
-clay projects need to dry a minimum of 2 weeks before first firing.
Firing
-when the clay projects are dry you can schedule a date and contact the kiln helper to turn on the kiln for you once you have loaded it.
-it takes about 2 days for the kiln to run and cool, then you will unload it.
-glaze is kept in the clay cabinet with samples. You may glaze in whatever color you like, we usually do clear with this project. You may want to give the kids options of colors. It is up to you!
-make sure you don’t get any glaze on the bottom when painting on.
-glaze your clay projects and set them to fire again in the kiln by contacting a kiln helper and loading the kiln.
Print –
Materials
1 slab of clay per student
Lace, buttons, etc. to press into clay
Blue plastic bowls to cut out jewelry dish
Red plastic bowls, one per student, to put clay dish in
Heart cookie cutters
Plastic knives
Dixie cups (1 per 2 students) for water to glue on heart
Parent Prep
- If you have 3 or 4 helpers this prep will only
take an hour.
- Take block of clay and wire cutter and cut
thin slabs of clay.
- After
cutting first slab put it on clay cart with a piece of moist cotton fabric
under it and roll it to ¼ to ½ inch slab.
Do one of these for each student.
- Putting
a moist cloth on bottom and on top of clay while you roll makes it easier.
- I
leave the bottom cloth with clay and place rolled slab with bottom cloth in a
Ziploc bag. I can usually fit 3-4 slabs
in each bag.
- Make
2-3 samples of your own. You can show
these to the students and use them as extras in case any break in the kiln.
-show students clay bowls you made. Explain to them that they will be making their own clay creation today. Explain clay comes from the earth.
-have parent volunteers pass out a clay slab to each student.
-pass out lace, buttons, etc. to press into clay to make impressions.
-have parent helpers go around and help students cut out a circle with the blue plastic bowls. Have parent helpers put the students number on the back (teachers will have students numbers)
-when students are done, show them with an extra slab of clay how to press in the heart cookie cutter and make a heart.
-show students how to use the plastic knives to score the bottom of the heart and the place they want to put it on their dish. To score you make marks going one direction and then going the other direction - crosshatching.
-show students how to put water on their clay where they want the heart to be and water on the heart and then “glue” it down on the dish.
-put the dish once it is done in the red bowl to give it a rounded shape
-you can come back 3 or 4 days later and remove them from the bowls and put them in a cardboard box to dry.
-clay projects need to dry a minimum of 2 weeks before first firing.
Firing
-when the clay projects are dry you can schedule a date and contact the kiln helper to turn on the kiln for you once you have loaded it.
-it takes about 2 days for the kiln to run and cool, then you will unload it.
-glaze is kept in the clay cabinet with samples. You may glaze in whatever color you like, we usually do clear with this project. You may want to give the kids options of colors. It is up to you!
-make sure you don’t get any glaze on the bottom when painting on.
-glaze your clay projects and set them to fire again in the kiln by contacting a kiln helper and loading the kiln.
For more information on working with clay, see our media page on clay.
