second grade
Mosaic Turtles
Ancient Roman mosaics from around 100 BC are the inspiration for this project. I think it is especially fun at this grade level to focus on mosaic details that feature animals.
The Roman people lived 2000 years ago in Italy (and all over Europe as their Empire grew larger), and many of them lived in houses and apartments. Their homes did not have a lot of windows (they got light and air by building the rooms around inner courtyards that were open to the sky), so they weren't able to look out and see the view. Because of this, they liked to paint their walls with pretty scenes and create mosaics on their floors, at least if they had enough money to do those things. In fact, mosaic floors represented wealth and were used by rich people to show off a little bit. Mosaics are works of art that were also used in government offices and places of worship. Roman mosaics are usually colorful and beautiful as well as highly detailed.
The Roman people lived 2000 years ago in Italy (and all over Europe as their Empire grew larger), and many of them lived in houses and apartments. Their homes did not have a lot of windows (they got light and air by building the rooms around inner courtyards that were open to the sky), so they weren't able to look out and see the view. Because of this, they liked to paint their walls with pretty scenes and create mosaics on their floors, at least if they had enough money to do those things. In fact, mosaic floors represented wealth and were used by rich people to show off a little bit. Mosaics are works of art that were also used in government offices and places of worship. Roman mosaics are usually colorful and beautiful as well as highly detailed.
As the children look at these very old mosaics you can start by asking them about the animals in the pictures and then ask if they notice how these pictures were made. You might point out that they are different than a painting. Then you can talk about the tiny pieces of marble and other colored stones and bits of glass that combine to make the whole picture. They can see how all the small tiles work together to make the whole picture. Explain that making pictures this way can take a very long time and requires lots of tiny pieces of different colors and shades to make the images more detailed and realistic.
Next you can ask if they know the word for making a picture like this. My students thought the word was "puzzle." What a good guess! This is an apt comparison, but point out that with a puzzle the pieces fit tightly together, while in a mosaic the pieces don't touch each other but are held together with grout. Teach them the word MOSAIC.
Those tiny little pieces of stone and glass have a name too. They're called "tesserae," but second graders won't care about that, I don't think. That's just a bonus word for you parent helpers!
Notes:
*The letters on the dog picture in the slide show above spell "Cave Canem" (pronounced KA-way KA-nem in Latin) and mean "Beware the Dog." The kids might enjoying knowing that familiar phrase was used in homes so many years ago!
*The animal shown that you might not guess right off is a hyena.
The Project
Materials
1- 9x12" (half sheet) black construction paper
1" strips of yellow and brown (approximate width), about two strips each per student
1/2" strips of green paper, also two strips per student
scissors
glue stick
1- 9x12" (half sheet) black construction paper
1" strips of yellow and brown (approximate width), about two strips each per student
1/2" strips of green paper, also two strips per student
scissors
glue stick
Class Project Instructions:
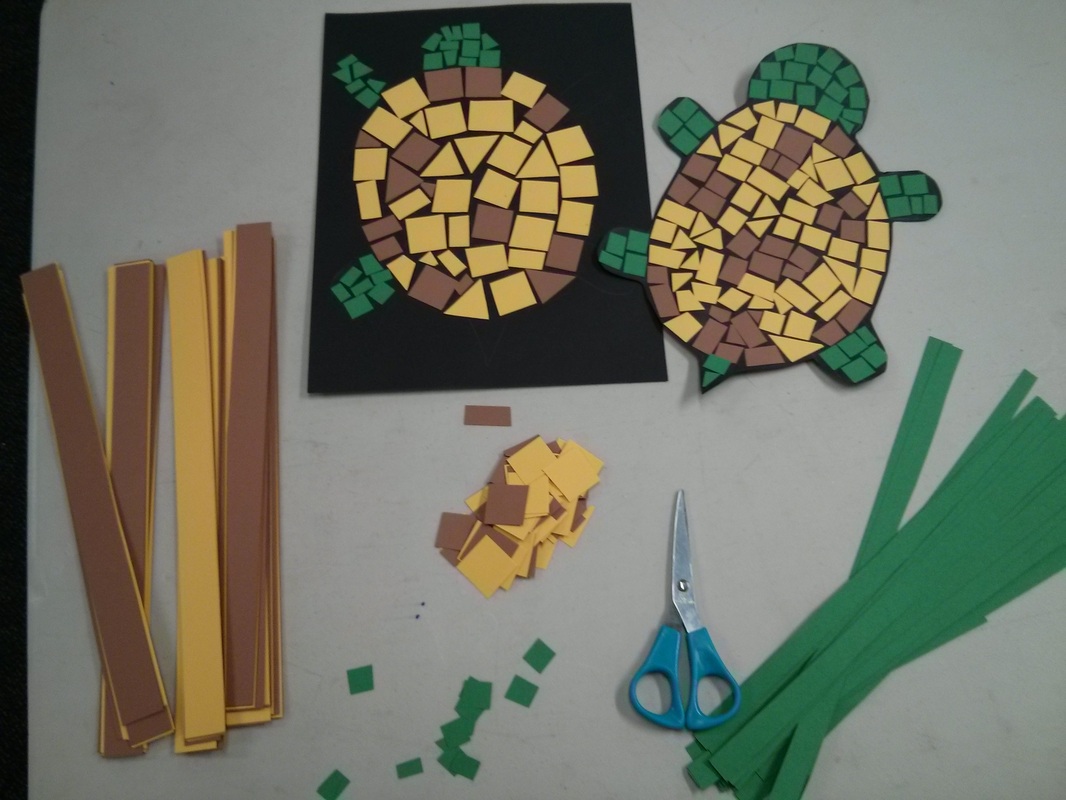
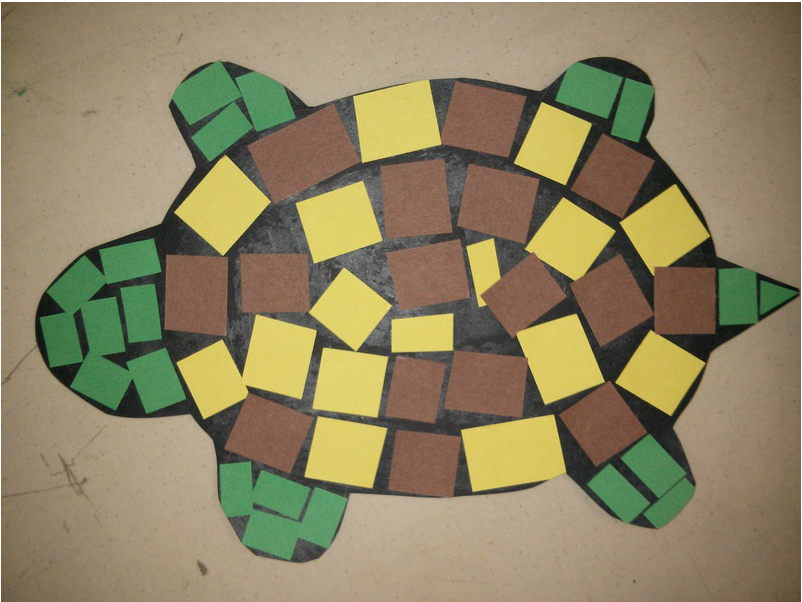
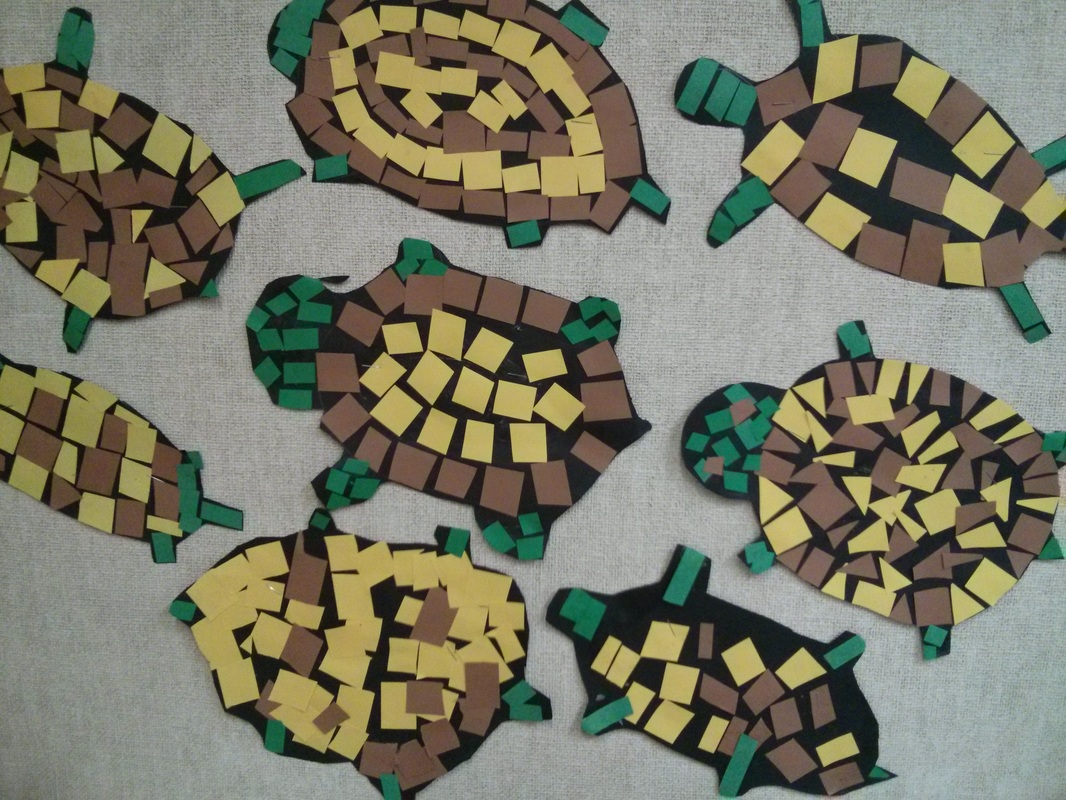
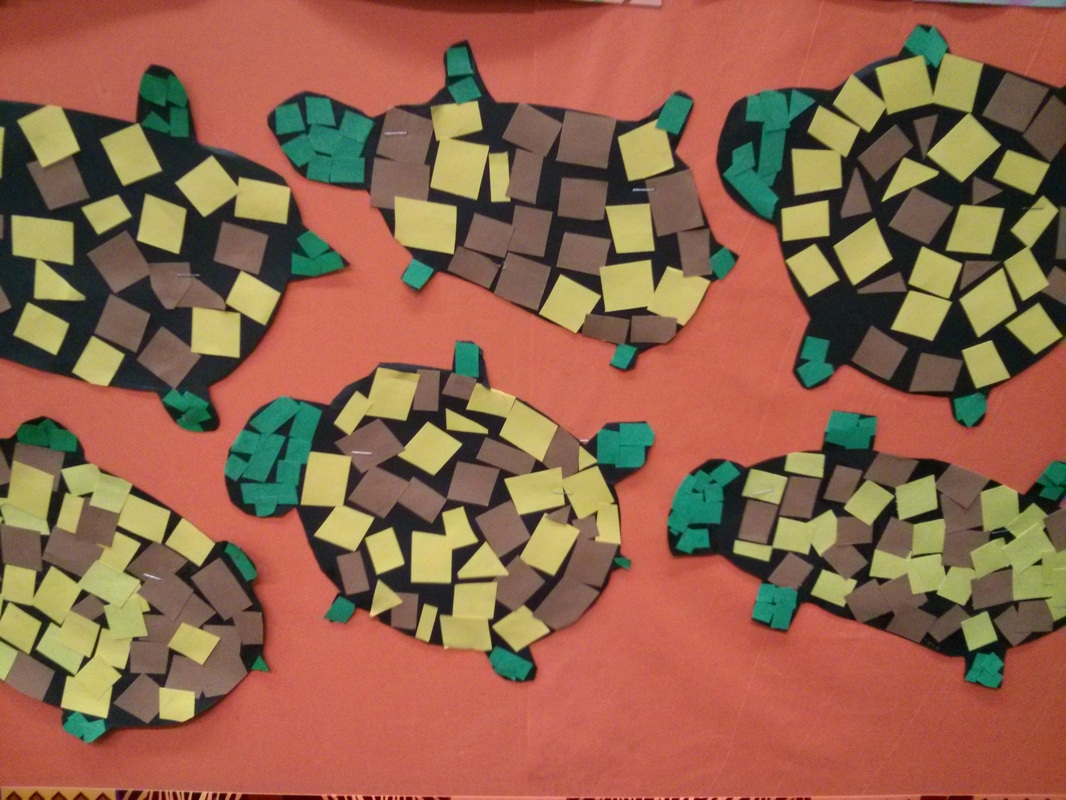
1. Have the students use a pencil to draw a large oval on the black paper, taking up most of the space. This will be the body of the turtle. Do not have them use white crayon. Explain that the pencil is just a guideline for our mosaic pieces that we don't really want to see in the finished picture. (Do NOT make a stencil for the body of the turtle. Let them draw their own. We want them all to look different!)
2. Next have them draw a half circle for the head at one end, a short pointy triangle for a tail at the other end, and four legs on the sides wherever they choose to put them. Make sure they are big enough to put at least one or two mosaic tile pieces in, if not more. They can always adjust the dimensions as they are working.
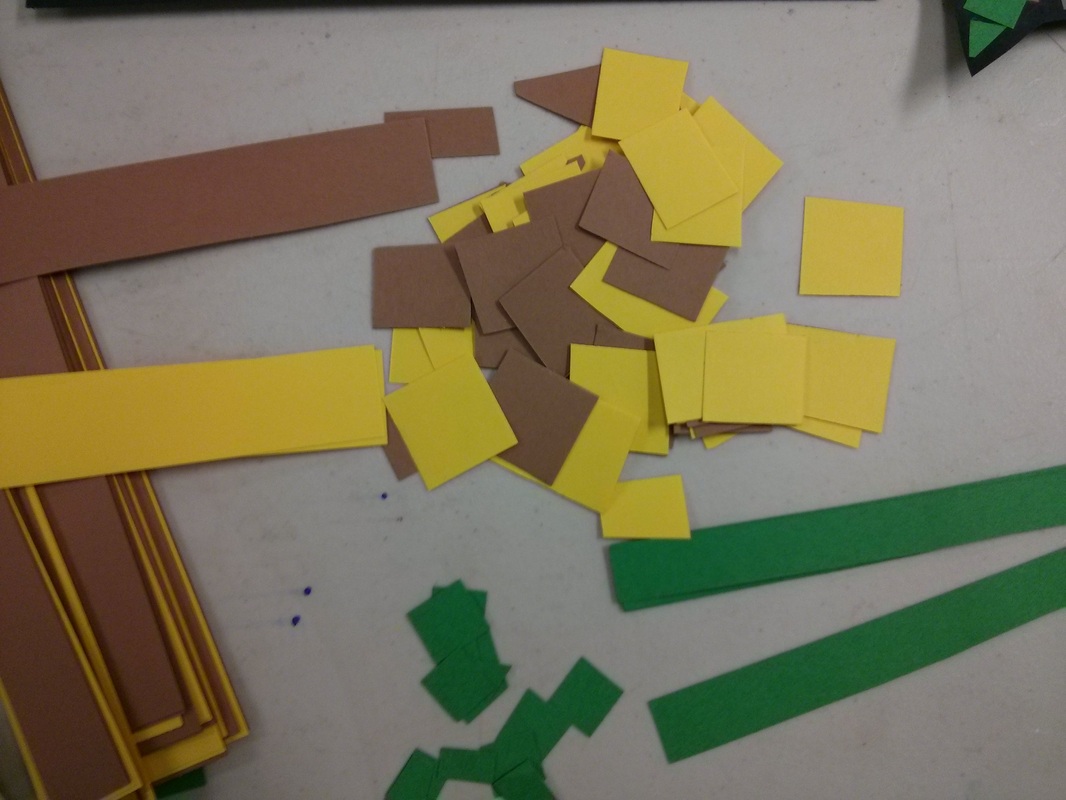
3. Starting with the yellow and brown strips, have the students cut small squares, rectangles or even triangles into a pile on their desks. Remind them that the bigger pieces will make the project a little easier and faster for them, and they can always cut some pieces smaller later as needed to fill in gaps.
4. When they have their pieces ready, have them use the glue stick to attach them to the body portion of the black paper. They can either glue each piece directly or apply glue to a section of the black paper to press the colored squares on. It's important that they don't glue too large an area or it will dry before they can get to it.
IMPORTANT: Remind them not to overlap the pieces, but to let the black paper show through like the grout lines in the Roman mosaic pictures.
They can use the yellow and brown pieces to make whatever design or pattern of the shell they choose.
5. When they have completed the shell, they can cut the thinner green strips into small pieces to fit the head, legs and tail sections of their drawing, then glue them in place.
6. Afterwards, they can use their scissors to cut out the mosaic from the black paper. This step is optional, but it provides you a way to trim any colored tiles that got wildly out of bounds. Plus it will allow you to display them on a nice blue surface, as if they are swimming!
7. As always, make sure they write their name and/or number on the back. Now would be a good time to use their white crayons!
1. Have the students use a pencil to draw a large oval on the black paper, taking up most of the space. This will be the body of the turtle. Do not have them use white crayon. Explain that the pencil is just a guideline for our mosaic pieces that we don't really want to see in the finished picture. (Do NOT make a stencil for the body of the turtle. Let them draw their own. We want them all to look different!)
2. Next have them draw a half circle for the head at one end, a short pointy triangle for a tail at the other end, and four legs on the sides wherever they choose to put them. Make sure they are big enough to put at least one or two mosaic tile pieces in, if not more. They can always adjust the dimensions as they are working.
3. Starting with the yellow and brown strips, have the students cut small squares, rectangles or even triangles into a pile on their desks. Remind them that the bigger pieces will make the project a little easier and faster for them, and they can always cut some pieces smaller later as needed to fill in gaps.
4. When they have their pieces ready, have them use the glue stick to attach them to the body portion of the black paper. They can either glue each piece directly or apply glue to a section of the black paper to press the colored squares on. It's important that they don't glue too large an area or it will dry before they can get to it.
IMPORTANT: Remind them not to overlap the pieces, but to let the black paper show through like the grout lines in the Roman mosaic pictures.
They can use the yellow and brown pieces to make whatever design or pattern of the shell they choose.
5. When they have completed the shell, they can cut the thinner green strips into small pieces to fit the head, legs and tail sections of their drawing, then glue them in place.
6. Afterwards, they can use their scissors to cut out the mosaic from the black paper. This step is optional, but it provides you a way to trim any colored tiles that got wildly out of bounds. Plus it will allow you to display them on a nice blue surface, as if they are swimming!
7. As always, make sure they write their name and/or number on the back. Now would be a good time to use their white crayons!
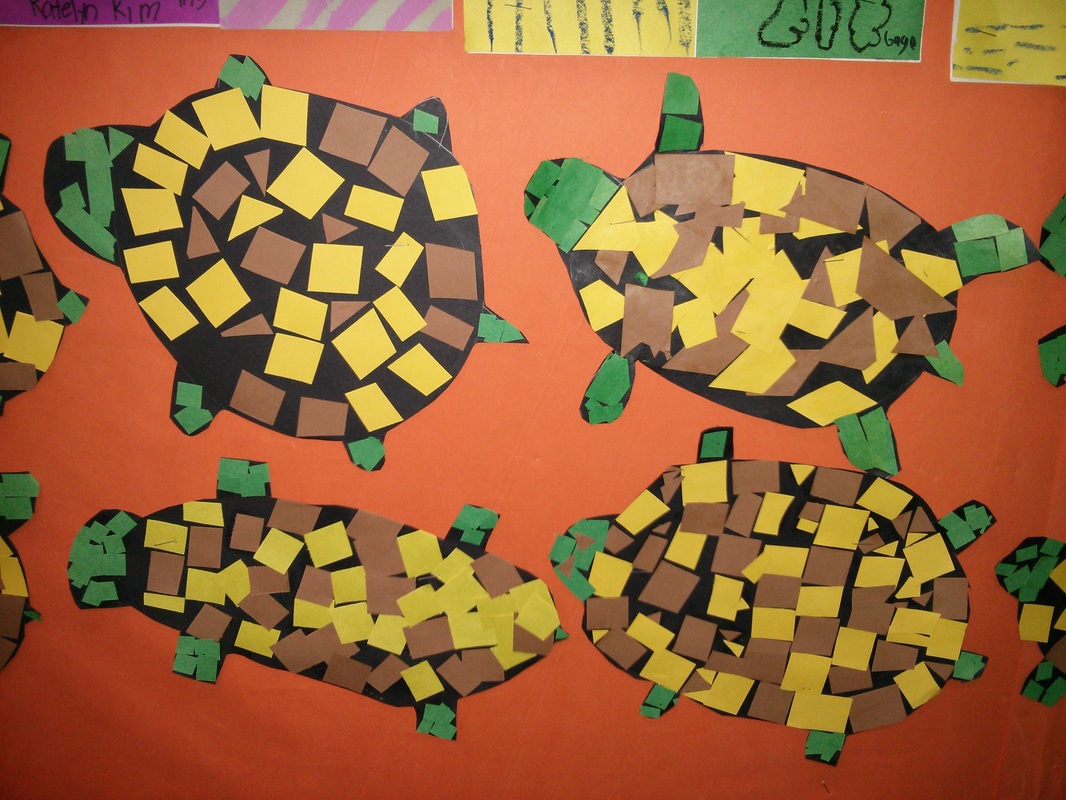
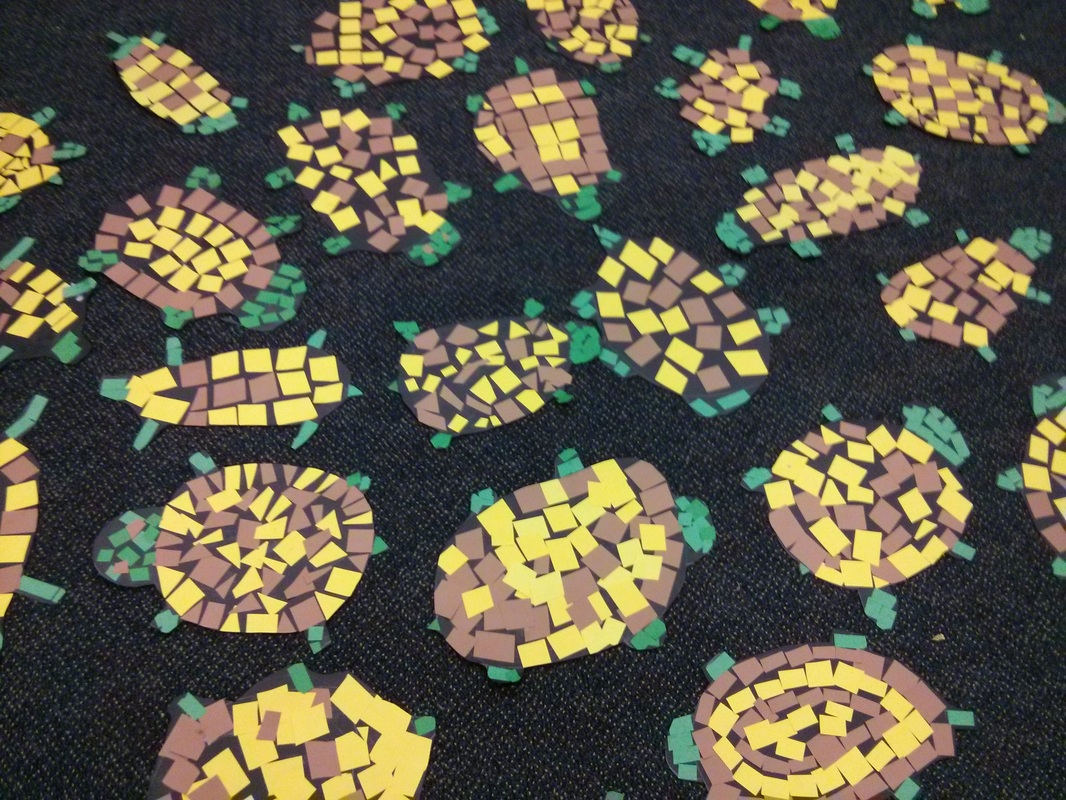
Here the turtles are displayed on the dark carpet of the classroom. Not the best effect, but at least you get to see a variety of examples.
