third grade
Clay - Suns
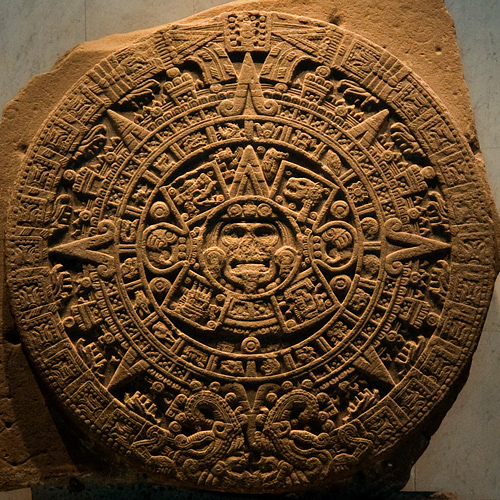

The Sun and its representation has been an important symbol to the people of Mexico for thousands of years, from the Pre-Columbian times until today. The Aztec Sun Stone, or Calendar Stone, is perhaps the most famous work of Aztec sculpture. In the center of the disc is the face of the Sun God. Surrounding that center circle are other symbols and designs representing the different eras of the Aztec people. The discovery of this stone proved that the ancient peoples of the Americas were smarter than many people thought--they possessed an advanced and remarkable knowledge of mathematics and astronomy.
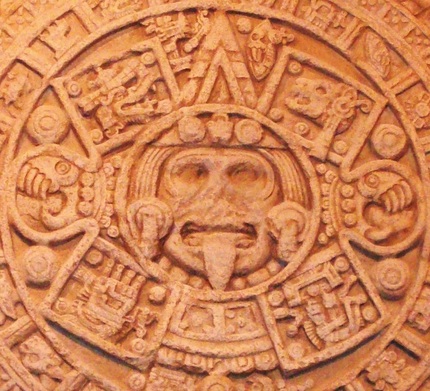
The face at the center represents the Sun God, called Tonatiuh, who was also called by the names "the shining one," "the beautiful child,"" the eagle that soars." All of the important times and gods were symbolized by animals (like jaguars and birds) and natural elements (like the sun and rain). Around the figure of Tonatiuh are the symbols of the Aztecs four-epochs. On the top right is the Jaguar Sun (Ocelotonatiuh) who symbolized the first of earth's four epochs. It was believed that in this era the world was inhabited by giants that were defeated by jaguars. On the top left, the Wind God (Ehecatonatiuh) symbolized the second era. At the end of that time there were many hurricanes and the survivors were transformed into monkeys. The God of this era is Quetzalcoatl. The third era on the lower left of the center is Tlaloc the god of rain and celestial fire. It was believed that at the end of this time period there was a rain of fire, and men who survived were converted into birds. On the lower right of the center is the forth epoch, represented by the Water God, Atonatiuh. At the end of this era it was believed that there was a great flood and the survivors turned into fish. This epoch is represented by a vessel of water, and the goddess Chalchiuhtlicue. There are many other intricate designs and symbols filling the rest of the sun stone, and they are carved in a precise, SYMMETRICAL pattern (radial symmetry actually--see radial pattern project).
The Aztec Sun Stone is now the showpiece in the Mexica room of the Museo de Antropologia in Mexico City. It has become a national symbol of Mexico, and the Mexican people sometimes refer to themselves as People of the Sun.
The Aztec Sun Stone is now the showpiece in the Mexica room of the Museo de Antropologia in Mexico City. It has become a national symbol of Mexico, and the Mexican people sometimes refer to themselves as People of the Sun.
the project
Prep
– 2 hours (with 3-4 parent helpers it will take less
time, you will also need as many parents as you can get to help the day of the
lesson)
Print –
Materials
2 blocks of red clay
Clay sun stencil (3rd grade file cabinet drawer)
Plastic knives for each student
Dixie cups
Cotton clothes for red clay (dampened)
Ziploc bags
Straws
Toothpicks
Parent Prep
-each student gets their own slab of rolled out clay; have them lay the sun stencil on top and cut around the edges with a plastic knife. Peel off the stencil when they are done.
-have them use the toothpick to write their name and date on the back of the sun. Turn it back to the top.
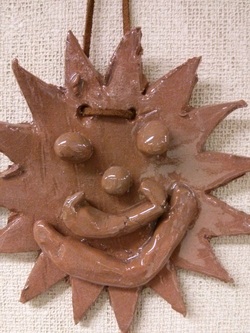
-use the cutaway bits of extra clay to make eyes, nose, and mouth and embellish face
-remind them of the importance of scoring the clay (both the sun and the face parts), as well as using a fingertip dab of water to make sure the face parts adhere to the sun surface (there are handouts in the folder that help the students visualize this process)
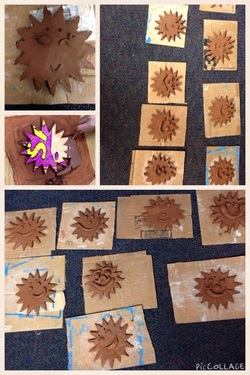
-parent helpers should use the straw to punch out holes (not too near the edges) which will be used to hang the suns after they are glazed and fired
-parent helpers may also want to double check for smooth edges (wet your finger in water and run it along the edges of the sun's rays) or cracks that can be fixed as you lay them out to dry in the art room
Print –
Materials
2 blocks of red clay
Clay sun stencil (3rd grade file cabinet drawer)
Plastic knives for each student
Dixie cups
Cotton clothes for red clay (dampened)
Ziploc bags
Straws
Toothpicks
Parent Prep
- Clay
needs to be prepped 2-3 days before, or day of lesson.
- Thin
clay slabs must be cut with wire cutter off of block of clay and rolled flat to
¼-1/2 inch thickness. Each slab must fit
the clay sun stencil. Cut and roll out
enough clay slabs to have one per student and 3 extras to make samples.
- To
roll out clay put one piece of moistened cloth down on the clay rolling table,
put down slab of clay to roll, cover with another moist cloth and roll.
- Put
rolled out slab with cloth on bottom still with it in large Ziploc bag.
- Continue
this process until all slabs are rolled out for class. You can fit 3 slabs with cloth in each bag.
- Make
2 sample suns that you can share with the class and also have if any of the
suns break in the kiln.
-each student gets their own slab of rolled out clay; have them lay the sun stencil on top and cut around the edges with a plastic knife. Peel off the stencil when they are done.
-have them use the toothpick to write their name and date on the back of the sun. Turn it back to the top.
-use the cutaway bits of extra clay to make eyes, nose, and mouth and embellish face
-remind them of the importance of scoring the clay (both the sun and the face parts), as well as using a fingertip dab of water to make sure the face parts adhere to the sun surface (there are handouts in the folder that help the students visualize this process)
-parent helpers should use the straw to punch out holes (not too near the edges) which will be used to hang the suns after they are glazed and fired
-parent helpers may also want to double check for smooth edges (wet your finger in water and run it along the edges of the sun's rays) or cracks that can be fixed as you lay them out to dry in the art room
WARNING: DO NOT ALLOW CLAY TO GO DOWN YOUR DRAIN!
For more information on working with clay, see our media page on clay.
For more information on working with clay, see our media page on clay.
