Fifth Grade
Grant Wood Landscapes
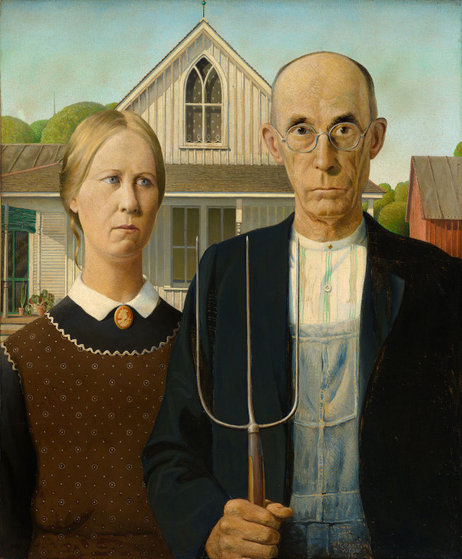 "American Gothic," 1930
The American Regionalist art movement came about at the end of the 1920s, during the time of the Great Depression. Instead of painting the world as dark, dirty, and hopeless as some other realist painters of the time did, Regionalists painted hopeful scenes of the American Midwest. The paintings often showed hard working people who were making it through the depression. They gave people hope that the future would be better.
Grant Wood (1891 - 1942) was born in Iowa, studied in Minnesota and Chicago (at the Art Institute) and finally returned to Iowa in 1919 to teach children. He taught middle school and high school art for 6 years and traveled to Europe during the summers. While traveling he visited many art galleries and learned about how art can turn the ordinary into something special. Back in Iowa he set up his own painting studio and started creating works in the Regionalist style, including his most famous painting of a farmer and his sister, "American Gothic." He also liked to paint landscapes of farmland and rolling hills.
Grant Wood (1891 - 1942) was born in Iowa, studied in Minnesota and Chicago (at the Art Institute) and finally returned to Iowa in 1919 to teach children. He taught middle school and high school art for 6 years and traveled to Europe during the summers. While traveling he visited many art galleries and learned about how art can turn the ordinary into something special. Back in Iowa he set up his own painting studio and started creating works in the Regionalist style, including his most famous painting of a farmer and his sister, "American Gothic." He also liked to paint landscapes of farmland and rolling hills.
Although in Europe abstract art was becoming popular (such as in works by Picasso or Matisse), the American Regionalists wanted to keep their art more realistic; however, it was more important that the objects in their paintings were easy to recognize than that their paintings looked exactly like what could be seen in real life.
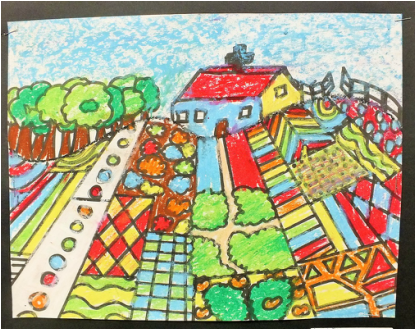
Notice how the Grant Wood's landscapes look just a little too simple to be real. It’s almost like a dream version of the American Midwest. He creates wonderful patterns and playful shapes that reflect the beauty and bounty of the farms of America's Heartland. The Depression may have caused many people to lose their jobs and savings, but people felt a little better by looking at Grant Wood's paintings of beautiful farmland and proud, hard-working families who helped make America great.
Notice how the Grant Wood's landscapes look just a little too simple to be real. It’s almost like a dream version of the American Midwest. He creates wonderful patterns and playful shapes that reflect the beauty and bounty of the farms of America's Heartland. The Depression may have caused many people to lose their jobs and savings, but people felt a little better by looking at Grant Wood's paintings of beautiful farmland and proud, hard-working families who helped make America great.
| grant_wood.pdf |
the project
Prep -
Print - Stone City Iowa
Supplies
1 - 9x12 white construction paper
pencil
ruler
oil pastels
Print - Stone City Iowa
Supplies
1 - 9x12 white construction paper
pencil
ruler
oil pastels
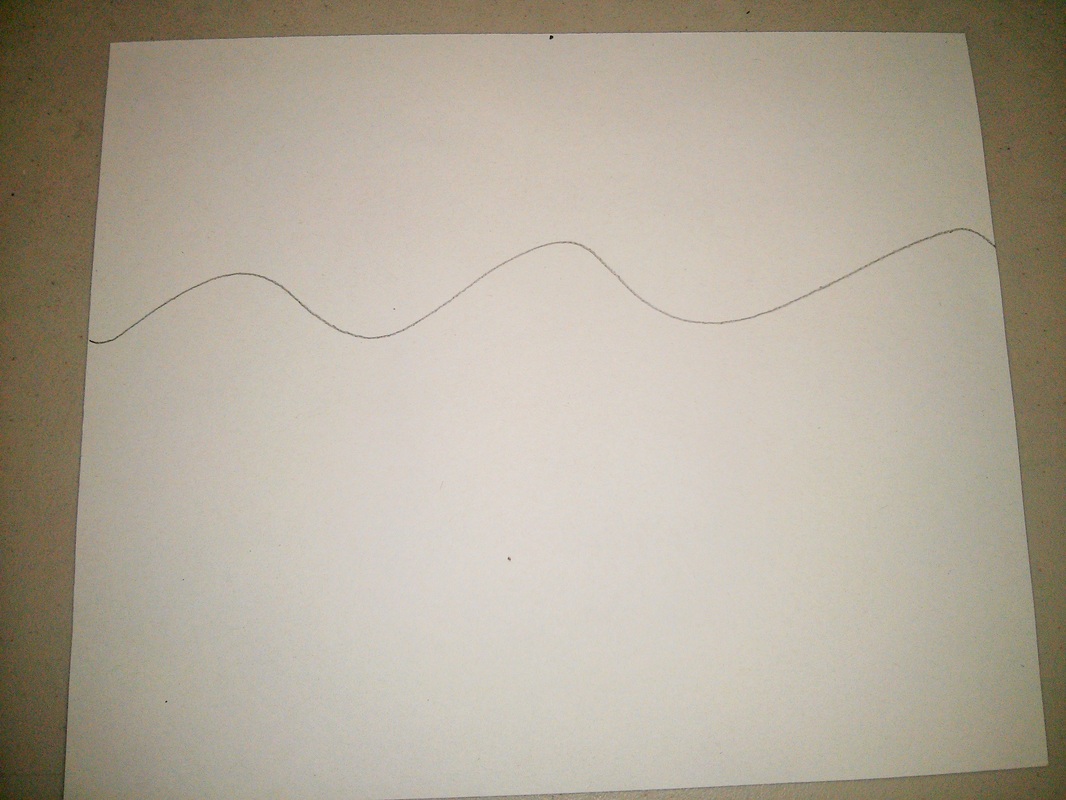
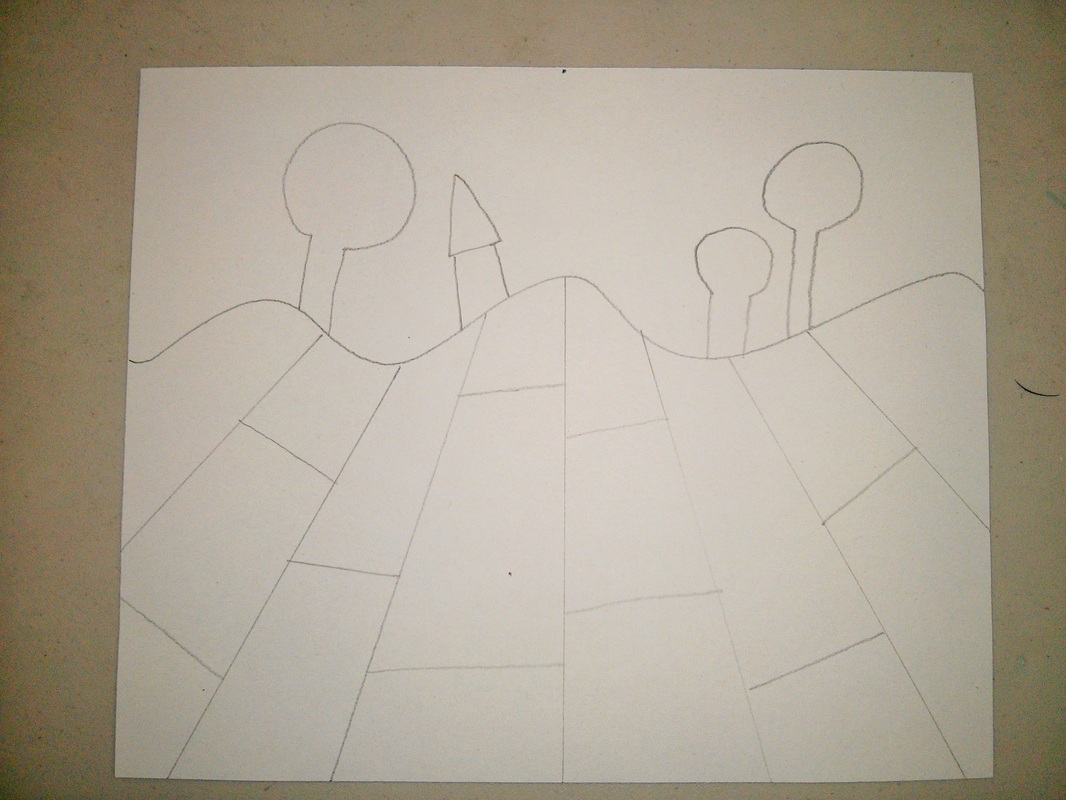
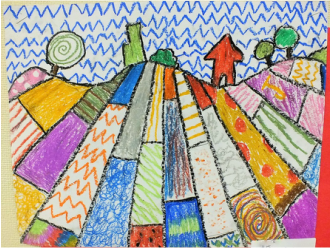
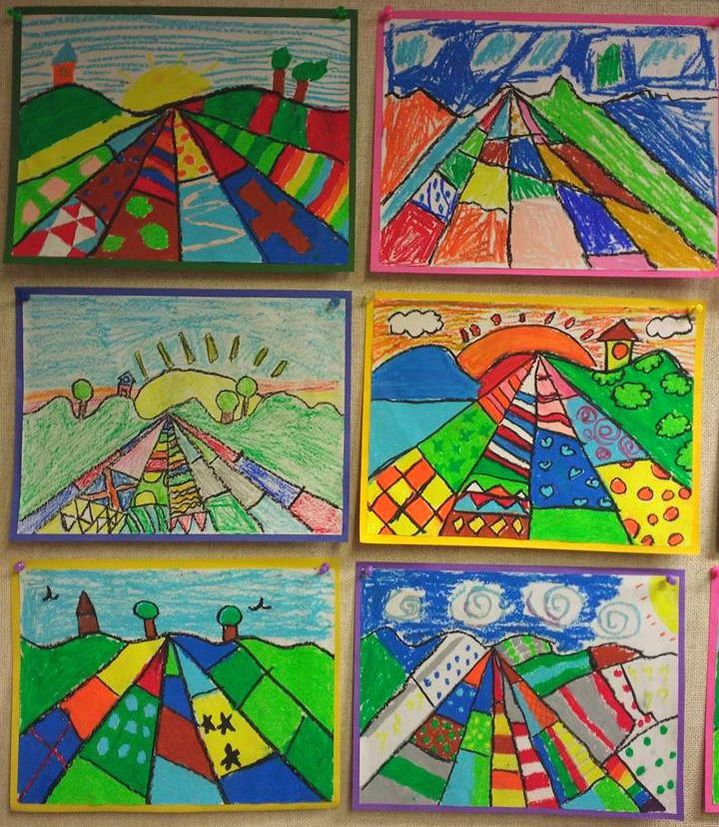
Use 9x12 white paper horizontal. In pencil, draw a wavy line horizontally about 1/3 of the way down from the top. Make a small reference dot (vanishing point) on or above the line. The student can choose where to put the dot. The closer the dot is to the wavy line, the more the lines will appear to recede.
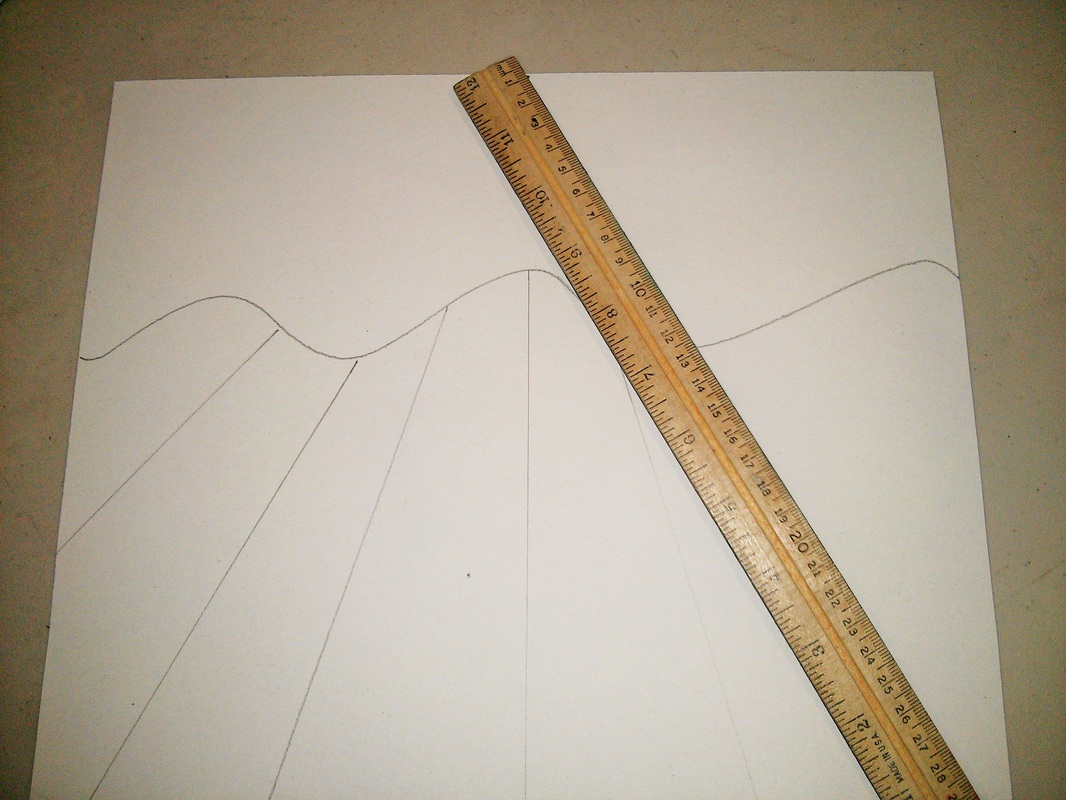
Holding a ruler against the dot, draw lines to segment the bottom part of the paper (below the wavy line), moving the ruler across the page to make successive lines. Always keep one end of the ruler next to the dot--the other end of the ruler moves across the bottom of the page. If your dot is above the wavy line, use the dot for alignment, but only make the pencil line from the wavy line on down. Remember: No matter where the student put the dot, all lines need to connect to it. This is creating LINEAR PERSPECTIVE, which creates a sense of depth to the picture.
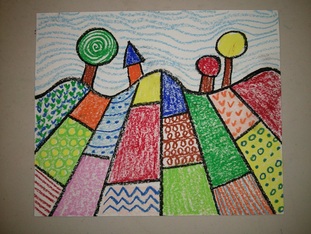
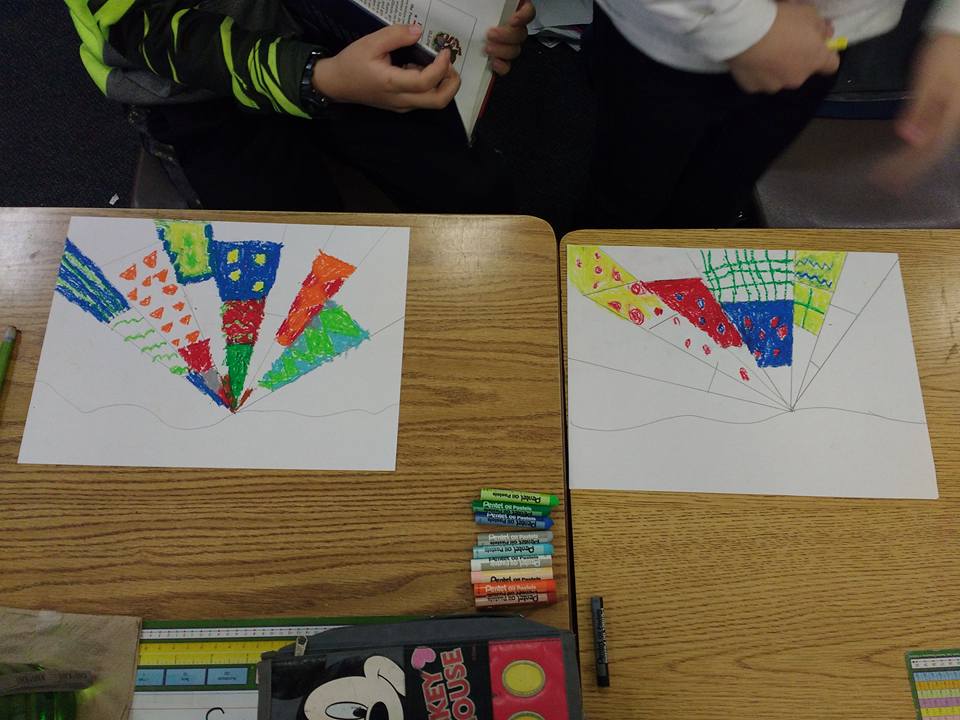
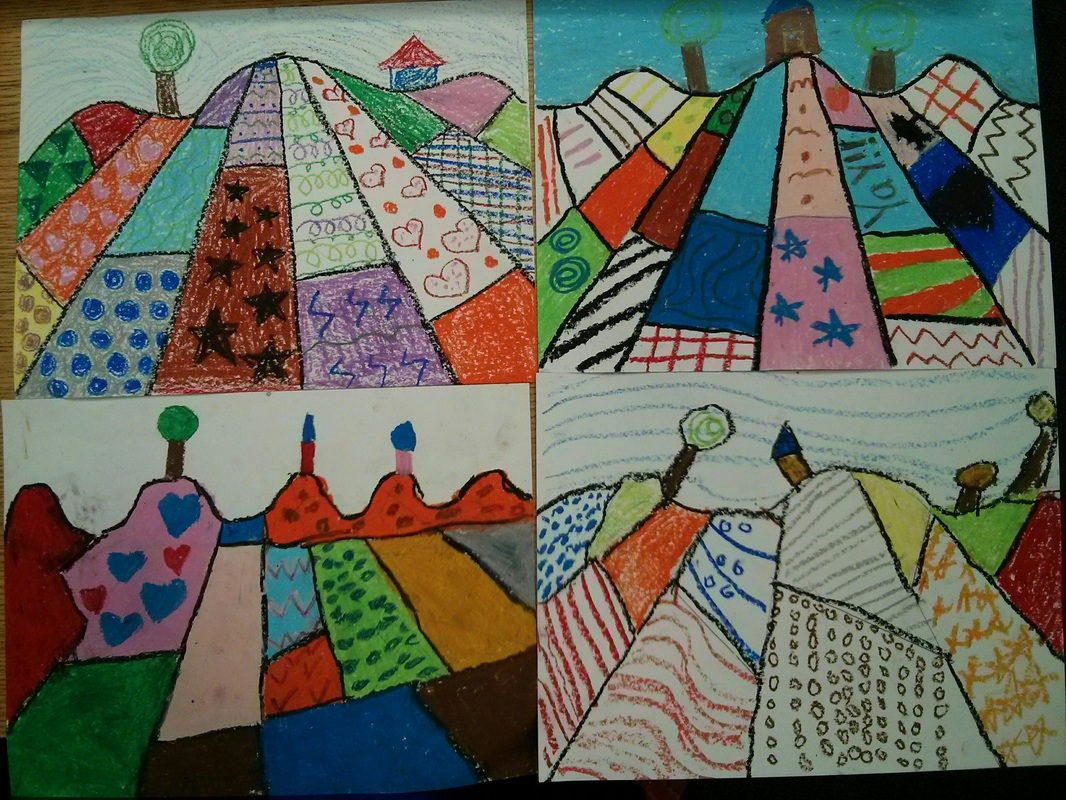
Next use a pencil to freehand further divisions (horizontally) to the "stripes" and add simple trees, bushes and/or farm structures to the top (stick to basic shapes like circles, square and triangles). Color in everything, including the sky, using colored oil pastels to create patterns within the segmented landscape. Remind the students that pressing harder with oil pastels will create bolder, smoother colors, while pressing lighter creates more crayon like finishes. The LAST step is to use the black oil pastel to go over all the pencil lines. Be sure to outline the main segments of your landscape, then outline any other details as desired. This is an important step and really brings the whole image together at the end.
NOTE: Make sure the students don't use the black pastel to outline everything until the very LAST, after everything else is colored. If the students use black first, it is too easy to smear the color and make the whole image look smudged.
Holding a ruler against the dot, draw lines to segment the bottom part of the paper (below the wavy line), moving the ruler across the page to make successive lines. Always keep one end of the ruler next to the dot--the other end of the ruler moves across the bottom of the page. If your dot is above the wavy line, use the dot for alignment, but only make the pencil line from the wavy line on down. Remember: No matter where the student put the dot, all lines need to connect to it. This is creating LINEAR PERSPECTIVE, which creates a sense of depth to the picture.
Next use a pencil to freehand further divisions (horizontally) to the "stripes" and add simple trees, bushes and/or farm structures to the top (stick to basic shapes like circles, square and triangles). Color in everything, including the sky, using colored oil pastels to create patterns within the segmented landscape. Remind the students that pressing harder with oil pastels will create bolder, smoother colors, while pressing lighter creates more crayon like finishes. The LAST step is to use the black oil pastel to go over all the pencil lines. Be sure to outline the main segments of your landscape, then outline any other details as desired. This is an important step and really brings the whole image together at the end.
NOTE: Make sure the students don't use the black pastel to outline everything until the very LAST, after everything else is colored. If the students use black first, it is too easy to smear the color and make the whole image look smudged.


|
|
Citations:
- Joan Stahl. American Artists in Photographic Portraits from the Peter A. Juley & Son Collection (Washington, D.C. and Mineola, New York: National Museum of American Art and Dover Publications, Inc., 1995). https://americanart.si.edu/artist/grant-wood-5470
- Grant Wood 1930, Stone city, Iowa. www.wikiart.org, https://www.wikiart.org/en/grant-wood/stone-city-iowa-1930
- Grant Wood 1931, Fall Planting. www.wikiart.org, https://www.wikiart.org/en/grant-wood/fall-plowing-1931
- Grant Wood 1939, Haying. www.wikiart.org, https://www.wikiart.org/en/grant-wood/haying-1939
- Grant Wood 1933, Near Sundown. www.wikiart.org, https://www.wikiart.org/en/grant-wood/near-the-sunset
- Grant Wood 1931, Young Corn. www.wikiart.org, https://www.wikiart.org/en/grant-wood/all-works#!#filterName:all-paintings-chronologically,resultType:masonry
- Grant Wood 1930, American Gothic. www.wikiart.org, https://www.wikiart.org/en/grant-wood/american-gothic-1930
- Unknown photographer, Nan Wood Graham and Dr. B.H. McKeeby next to American Gothic, 1942. Courtesy of the Cedar Rapids Museum of Art Archives. Artsy.net, https://www.artsy.net/article/artsy-editorial-grant-woods-menacing-mesmerizing-portrait-rural-america
