First Grade
Youtube Video Links -
History - youtu.be/Be9GezTjIzQ Demo -
History - youtu.be/Be9GezTjIzQ Demo -
Claude Monet, "Water lilies"
Claude Monet (pronounced mo-nay), 1840-1926, was a French artist who lived in Paris in the 1800's. Around 1860, Monet and many of his artist friends wanted to try something new in the way they created art. They felt like what they were learning in art school was very old fashioned and restrictive. They wanted their art to be modern and reflect the new cities that were growing around them. Monet was also really excited about light and color.
Monet loved water and painted it all the time (boats, oceans, ponds and lakes were some of his favorite subjects). He also saw that most artists painted water blue, right? But Monet said that if you looked closely at actual water, you would see so many more colors than blue, depending on what was being reflected in it as well what the weather was like. If it was bright and sunny, the light would wash out some things, but if it was dark and rainy, the colors would also be darker. Monet loved painting the same scenes over and over again, trying to capture the different colors and effects of the light. He would go out in the snow, or first thing in the morning, or again after lunch, trying to capture how things REALLY looked. The other thing he did to capture those light effects was to take his paints and canvas outside with him. Then he would paint really really quickly to make sure he got the right impression before the light changed. As a result, his brushwork is very loose and even messy.
A lot of critics laughed at this new technique and thought Monet's paintings looked unfinished and the subject matter was too common. One critic called the style "Impressionism" based on these observations. Monet and his artist friends loved that term and kept it. So that quick brushwork style of painting outdoors and trying to capture the effects of light on the colors we see is called Impressionism.
By the time Impressionism caught on with people and they started liking it, many of the Impressionist artists were ready to try other things, but Monet always painted in the same style until he died. But one thing he did do was move from Paris to a house in Giverny, about 40 miles away. At first he planted a small garden because he loved to garden almost as much as he loved to paint. Besides he loved the color of flowers. He also put in a pond. As time went on, he made it all bigger and bigger and bigger, until his whole yard became a large water garden. He hired gardeners to come every day to keep everything looking perfect. As Monet got older his garden became the only thing he painted, and as he started having trouble with his eyesight, he had to make his paintings bigger and bigger. One of his favorite things to paint in his garden were the water lillies on his pond. Some of his "Water Lilies" paintings are over 6 feet high and 14 feet long! Then he would take several of these very large paintings and hang them next to each other on all the walls, so you would be surrounded by the pictures and feel like you were in the middle of the pond! He wanted you to see the colors in the water, and to feel the light and movement of the sky reflected in it.
The Project
Materials:
-9x12" white construction paper
-oil pastels (greens and blues only)
-liquid watercolor (turquoise blue), mix 1 part watercolor with 4 parts water and prepare several containers at a painting station
-paper towels for blotting
-Large and small paintbrushes
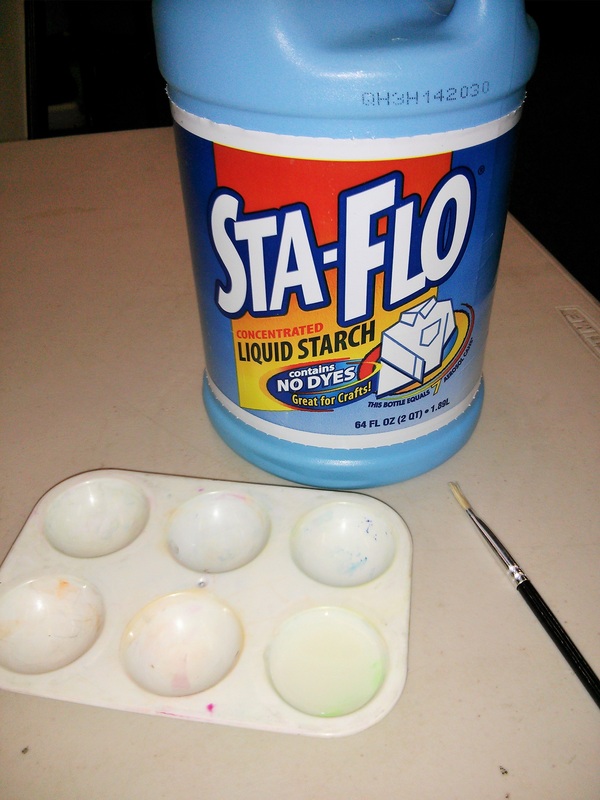
-small trays of starch (can be shared among students)
-tissue paper lily pads (use various greens to pre-cut these for the students) - 10-20 lily pads per student
-small tissue paper squares in a variety of flower colors
-Pencils with eraser ends
-a few glue bottles in case some of the lily pads aren't sticking at the end and need reinforcing
-dark blue construction paper for mounting
-9x12" white construction paper
-oil pastels (greens and blues only)
-liquid watercolor (turquoise blue), mix 1 part watercolor with 4 parts water and prepare several containers at a painting station
-paper towels for blotting
-Large and small paintbrushes
-small trays of starch (can be shared among students)
-tissue paper lily pads (use various greens to pre-cut these for the students) - 10-20 lily pads per student
-small tissue paper squares in a variety of flower colors
-Pencils with eraser ends
-a few glue bottles in case some of the lily pads aren't sticking at the end and need reinforcing
-dark blue construction paper for mounting


Art Project:
1. Hand out 9x12" white paper to each student.
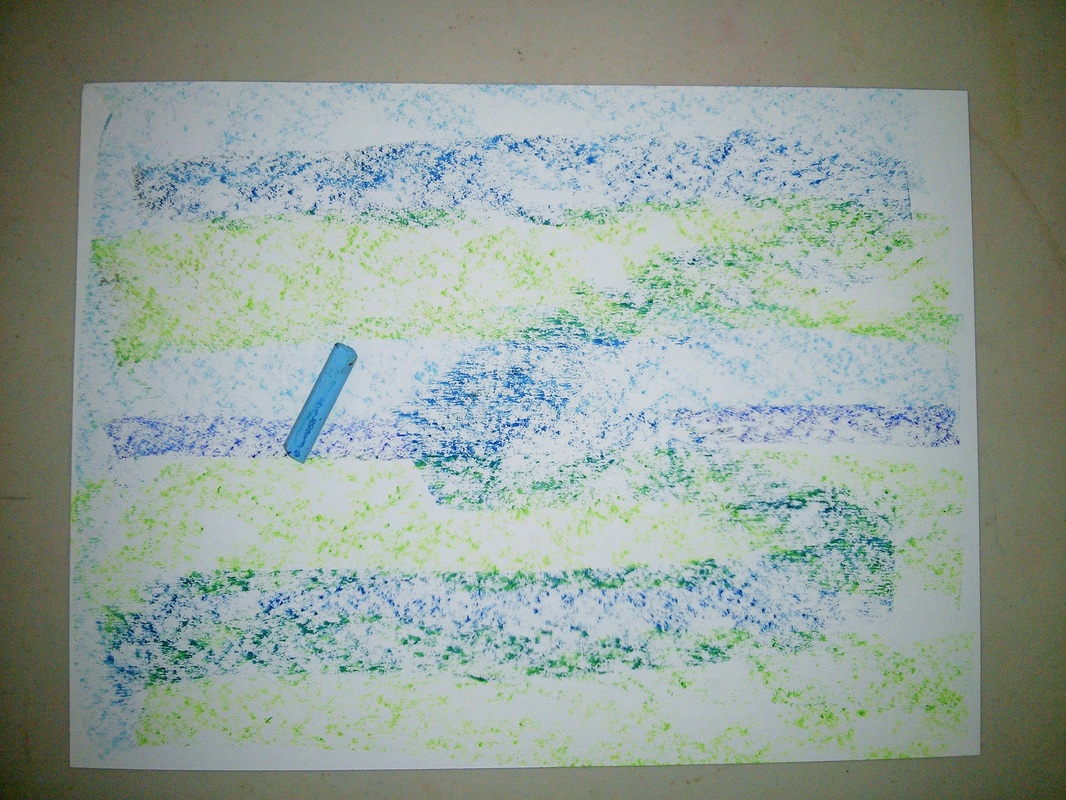
2. Unwrap blue and green oil pastels and using the sides, rub them across the page. Also use a darker blue pastel to sign their names in the bottom corner (the final picture will be mounted, so their name should be on the front like a signature).
3. Have the students take turns going to the watercolor painting station (have several containers pre-mixed so the students can come up several at a time). Using the large paintbrushes, have them spread the paint lightly over the oil pastel rubbing. Use paper towels to blot excess or pooling paint, if necessary. The paper doesn't need to be completely dry for the next step, so the students can take it back to their desks while they get the supplies for the next part.
1. Hand out 9x12" white paper to each student.
2. Unwrap blue and green oil pastels and using the sides, rub them across the page. Also use a darker blue pastel to sign their names in the bottom corner (the final picture will be mounted, so their name should be on the front like a signature).
3. Have the students take turns going to the watercolor painting station (have several containers pre-mixed so the students can come up several at a time). Using the large paintbrushes, have them spread the paint lightly over the oil pastel rubbing. Use paper towels to blot excess or pooling paint, if necessary. The paper doesn't need to be completely dry for the next step, so the students can take it back to their desks while they get the supplies for the next part.
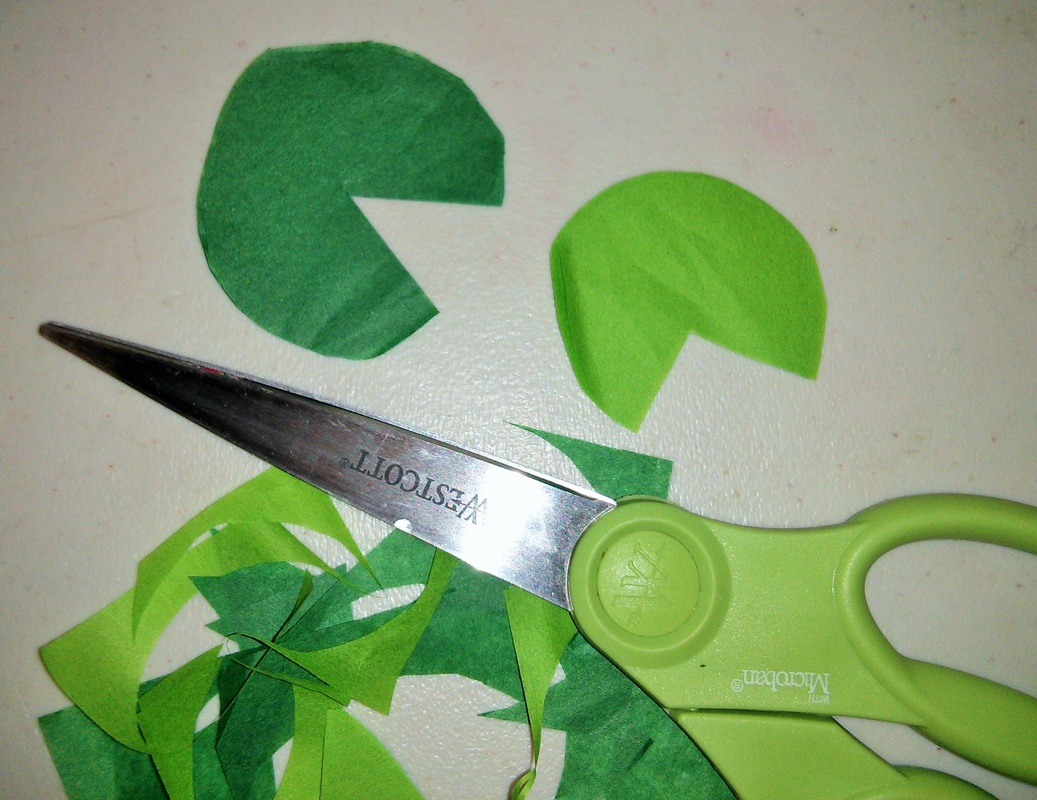

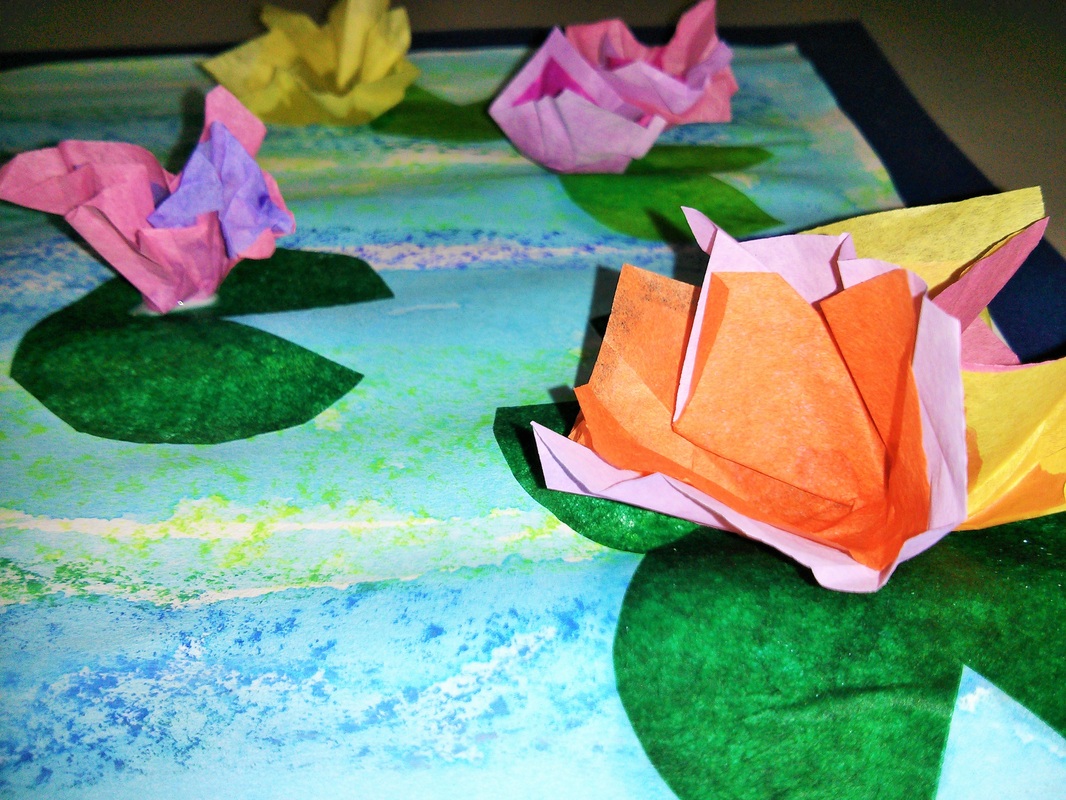
4. Pass out 10-20 of the lily pads per student, along with a pencil, a small paintbrush and a small tray of liquid starch (fill two sections and the students can share with their neighbor). You can also pass out a selection of colorful tissue paper squares or have a bin that the students can choose from. The students will need 20-30 of these squares. Note: let the students decide how many lily pads and how many flowers they want in their picture.
5. Have the children arrange the lily pads where they want them on their picture. Using the small paintbrush dipped in the liquid starch, have them "paint" on top of the lily pad. This will wet the tissue paper and "glue" it to the paper.
5. Have the children arrange the lily pads where they want them on their picture. Using the small paintbrush dipped in the liquid starch, have them "paint" on top of the lily pad. This will wet the tissue paper and "glue" it to the paper.
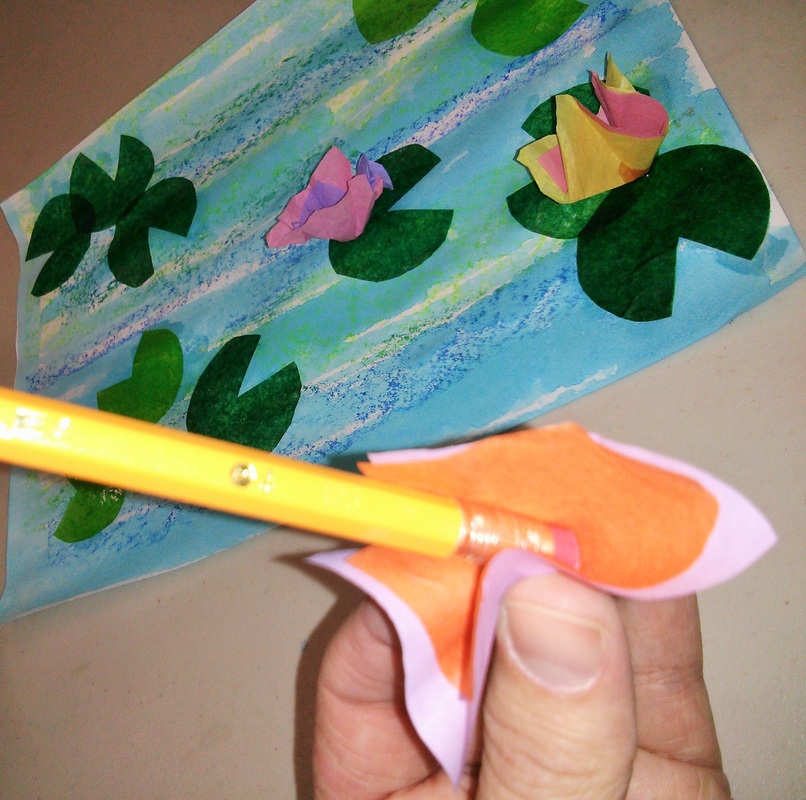
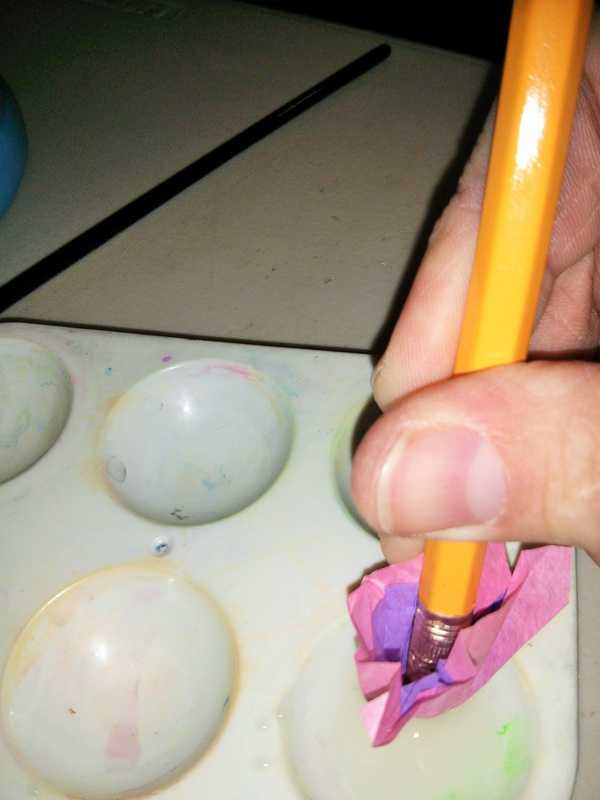
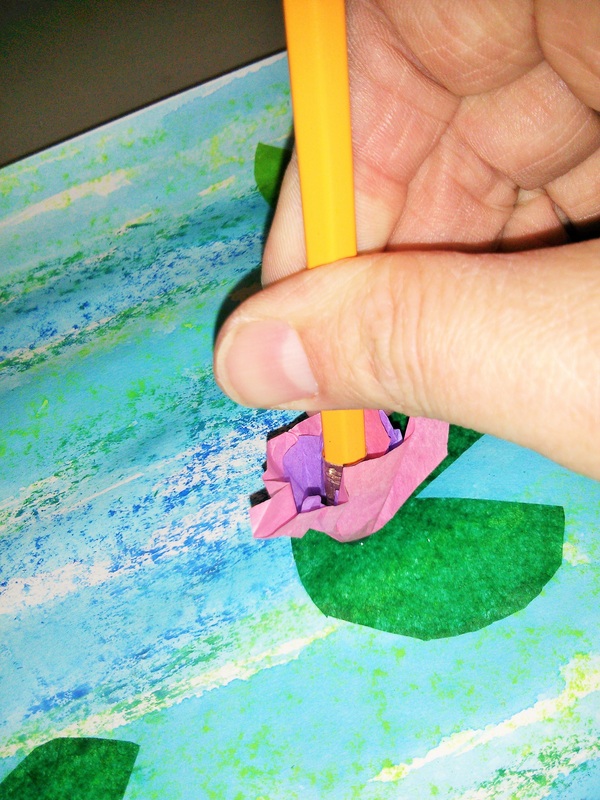
6. Using the eraser end of pencil, have the students fold two different colored squares of tissue paper over the end. Smoosh the tissue paper up against the pencil. Dip it into the starch, then place it down on one of the lily pads on their paper. The starch should hold it in place. If needed, they can use their small paintbrushes to dab extra starch the center of the "flowers" on the paper. Repeat for as many flowers as they want to place on their pictures.
Note: if the students still have trouble getting the flowers to stick before they are dry, have some glue bottles handy to glue them in place. Some parents suggest skipping the starch altogether, and just dipping straight into the glue.
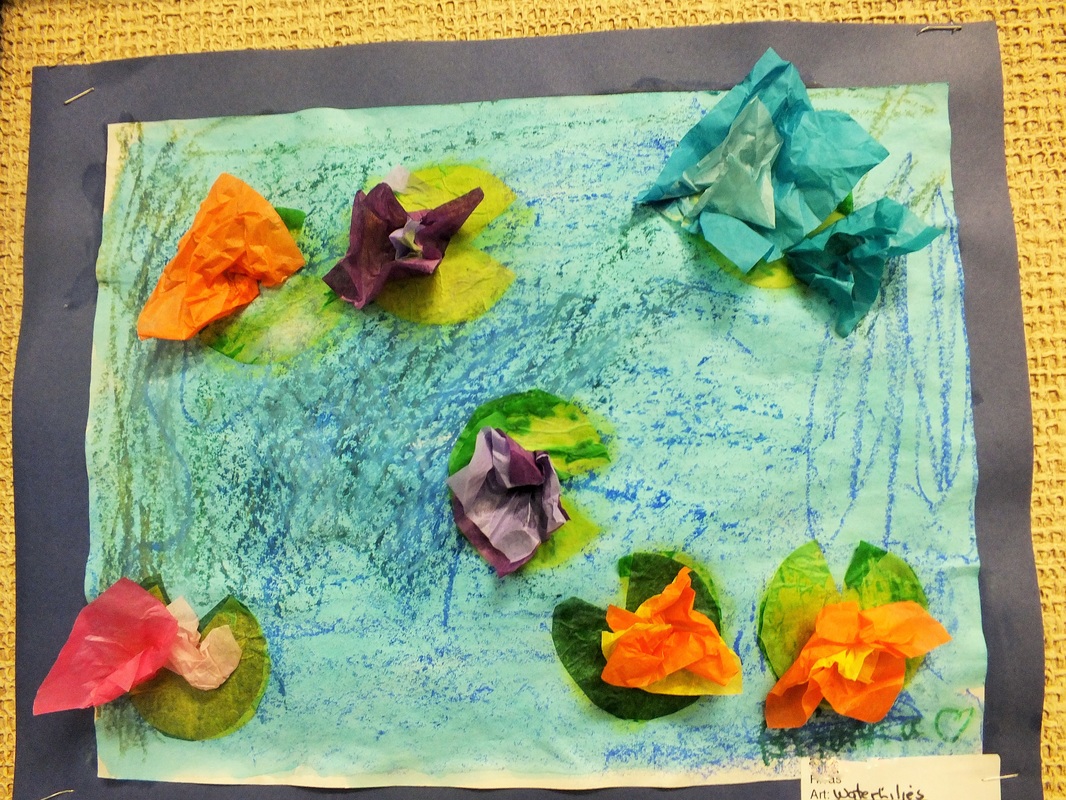
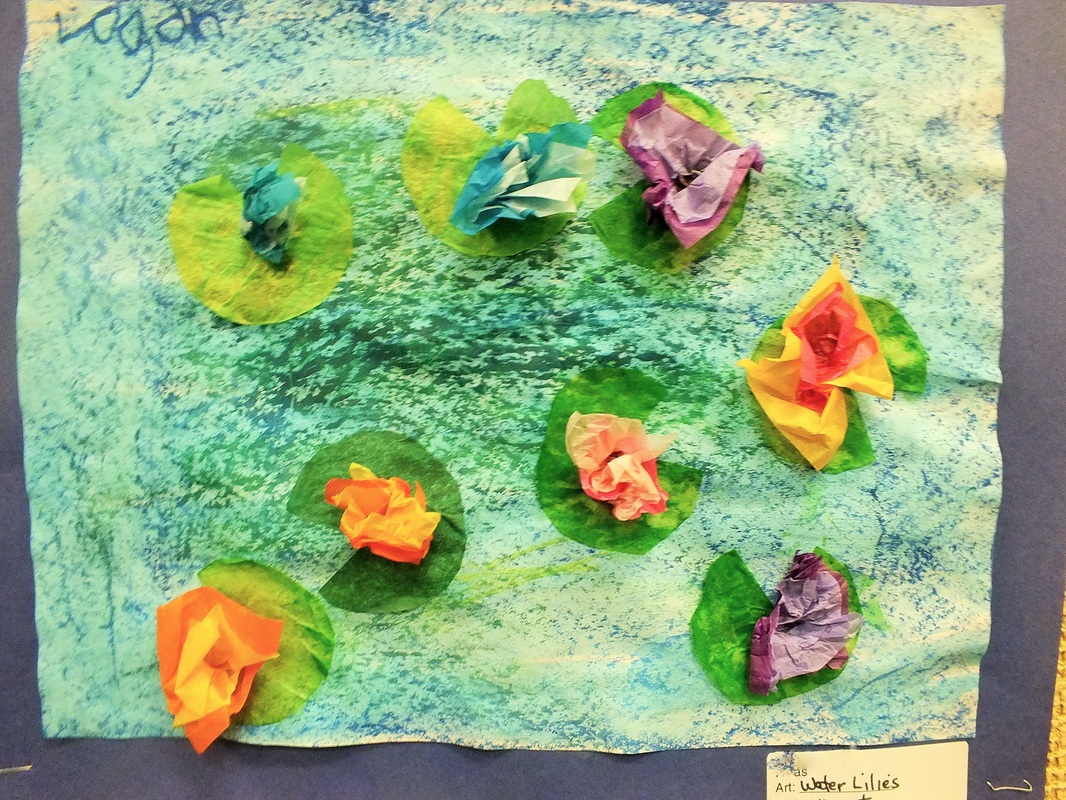
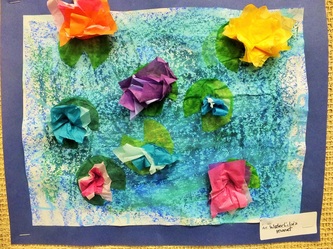
7. Set aside the pictures to dry. Because of the watercolor and starch, the papers will probably wrinkle and warp as they dry, so it is a good idea to mount the pictures on a dark blue construction paper to finish them before hanging.
Note: if the students still have trouble getting the flowers to stick before they are dry, have some glue bottles handy to glue them in place. Some parents suggest skipping the starch altogether, and just dipping straight into the glue.
7. Set aside the pictures to dry. Because of the watercolor and starch, the papers will probably wrinkle and warp as they dry, so it is a good idea to mount the pictures on a dark blue construction paper to finish them before hanging.