Fourth Grade
Van Gogh's "Starry Night"
Vincent van Gogh (1853 - 1890) was born in Holland to a family that either worked in the art world or as ministers. Van Gogh tried being a preacher (along with other jobs) before he settled on becoming an artist. His first paintings are kind of dark and sad because they were about the poor people he was trying to serve as a preacher. But even in these early paintings he used strong lines and shapes that helped show how he felt about the people in the art.
Vincent was very close to his brother Theo, who worked in Paris in an art gallery. They wrote many letters to each other (which is how we know so much about the things van Gogh painted) and Theo sent Vincent money to help him live and create his art. Theo was the one who told van Gogh about a new style of painting called Impressionism (see Monet's Water Lilies) that used free-flowing and loose brushwork as well as bright, happy colors. Van Gogh was very inspired by these Impressionists, but he took those ideas and pushed them farther to be more expressive and filled with feelings. Van Gogh's lines are more forceful and thick, and his colors burst with intensity and emotion. He always wanted the lines and colors of his paintings to show his emotions, what he was thinking and feeling (see also his "Sunflowers.")
Vincent was very close to his brother Theo, who worked in Paris in an art gallery. They wrote many letters to each other (which is how we know so much about the things van Gogh painted) and Theo sent Vincent money to help him live and create his art. Theo was the one who told van Gogh about a new style of painting called Impressionism (see Monet's Water Lilies) that used free-flowing and loose brushwork as well as bright, happy colors. Van Gogh was very inspired by these Impressionists, but he took those ideas and pushed them farther to be more expressive and filled with feelings. Van Gogh's lines are more forceful and thick, and his colors burst with intensity and emotion. He always wanted the lines and colors of his paintings to show his emotions, what he was thinking and feeling (see also his "Sunflowers.")
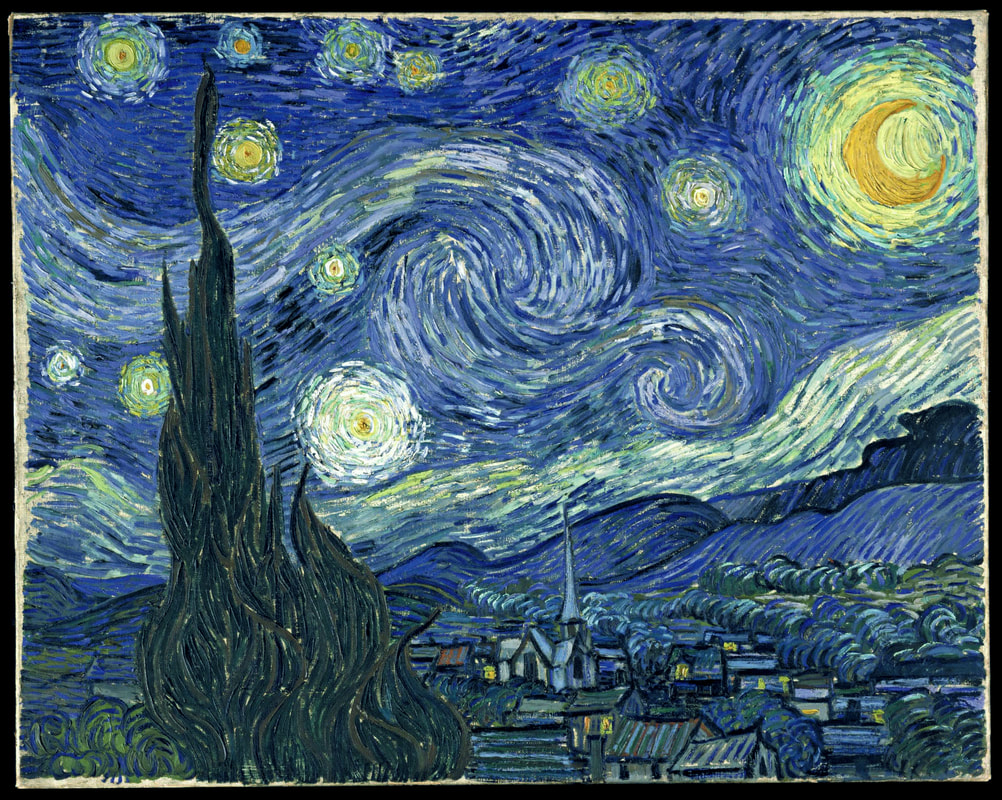
Vincent van Gogh, "Starry Night," 1889.
When van Gogh painted "The Starry Night," he was living in a health sanatorium in the south of France. It is true that van Gogh suffered from different ailments that caused him to be depressed and even have hallucinations, but the scenery and gardens at the asylum inspired him to paint some of his greatest masterpieces. He often spent hours at night looking at the landscape, writing to his brother once about how "The night is more alive and more richly colored than the day." His resulting painting conveys the surging movement of the heavens through curving brushwork, and the stars and moon seem to explode with energy. Although the sky is animated and restless, the overall picture feels peaceful and balanced.
The large dark form in the left foreground is a towering cypress tree (we have these tall slender spire-like trees all over Southern California too), and the way it pierces the sky is echoed by the steeple of the church (remember the ministers in van Gogh's family). These vertical elements connect the sleepy town with the sky above, and join heaven and earth in prayerful gratitude to the wonders of the world around us. The brightness of the orangey-yellow moon in the top right corner balances the darkness of the tree, and the swirling lines of white, yellow and light blue connect everything together. Van Gogh is using the thickness of his brushwork and the depth and intensity of color to express his own feelings, both happy and sad, and we are left to interpret the churning colors and lines in whatever way it makes us feel too.
The large dark form in the left foreground is a towering cypress tree (we have these tall slender spire-like trees all over Southern California too), and the way it pierces the sky is echoed by the steeple of the church (remember the ministers in van Gogh's family). These vertical elements connect the sleepy town with the sky above, and join heaven and earth in prayerful gratitude to the wonders of the world around us. The brightness of the orangey-yellow moon in the top right corner balances the darkness of the tree, and the swirling lines of white, yellow and light blue connect everything together. Van Gogh is using the thickness of his brushwork and the depth and intensity of color to express his own feelings, both happy and sad, and we are left to interpret the churning colors and lines in whatever way it makes us feel too.
|
PowerPoint presentation:
|
| ||
The Project
Prep – 30 min. (this includes making the sample)
Print – Vincent Van Gogh, The Starry Night
Materials
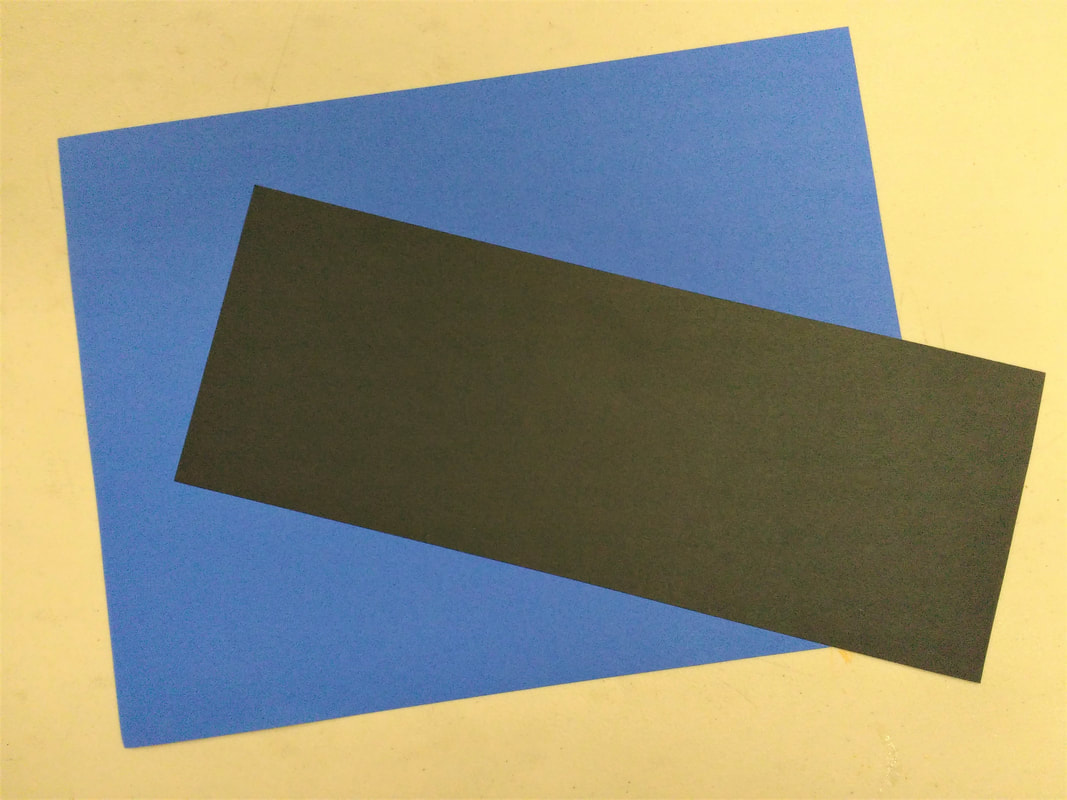
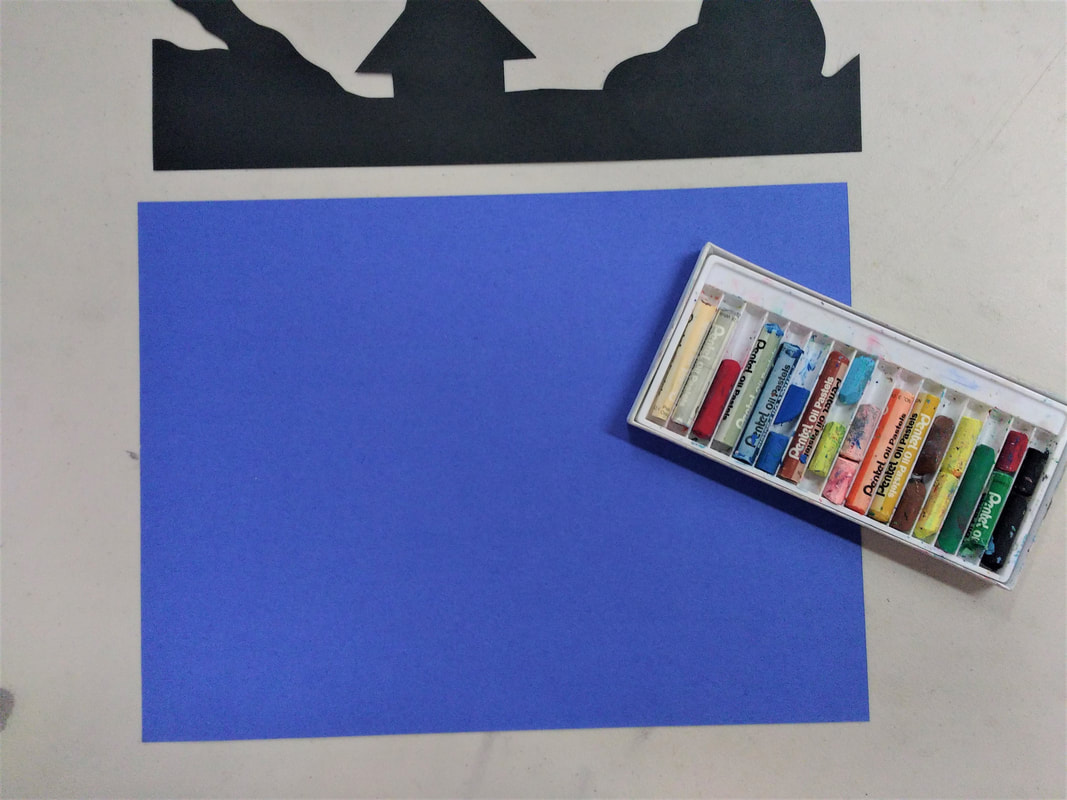
-9 x 12" piece of dark blue construction paper for each student
-4-1/2 x 12" piece of black construction paper for each student
-pencil and scissors
-Oil pastels
-Glue bottles
-Gold glitter
-Sequins + coffee filter to pass sequins around in (sequins are optional)
-Cardboard box or plastic bin (to do glitter in)
Lesson
Print – Vincent Van Gogh, The Starry Night
Materials
-9 x 12" piece of dark blue construction paper for each student
-4-1/2 x 12" piece of black construction paper for each student
-pencil and scissors
-Oil pastels
-Glue bottles
-Gold glitter
-Sequins + coffee filter to pass sequins around in (sequins are optional)
-Cardboard box or plastic bin (to do glitter in)
Lesson
- Show students "The Starry Night" print, which they have probably seen before and discuss what they see in the print. Talk about movement of the sky. Talk about the tree in the left corner. Point out how the colors and shapes balance each other, and about how the sky has color and movement while the city is like a shadow.
- You can also download the presentation link above and use that to discuss the visual aspects of the painting with the students.
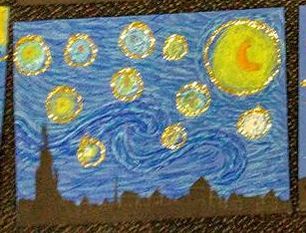
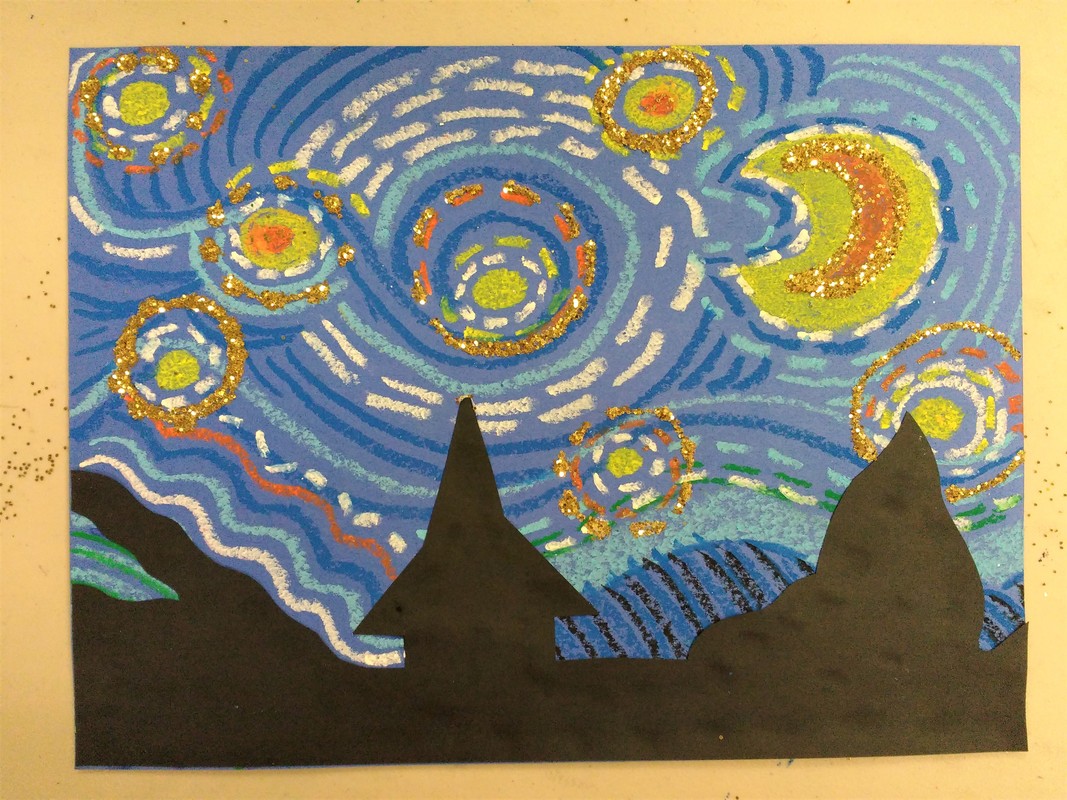
- Show students your sample and talk about how they will make theirs.
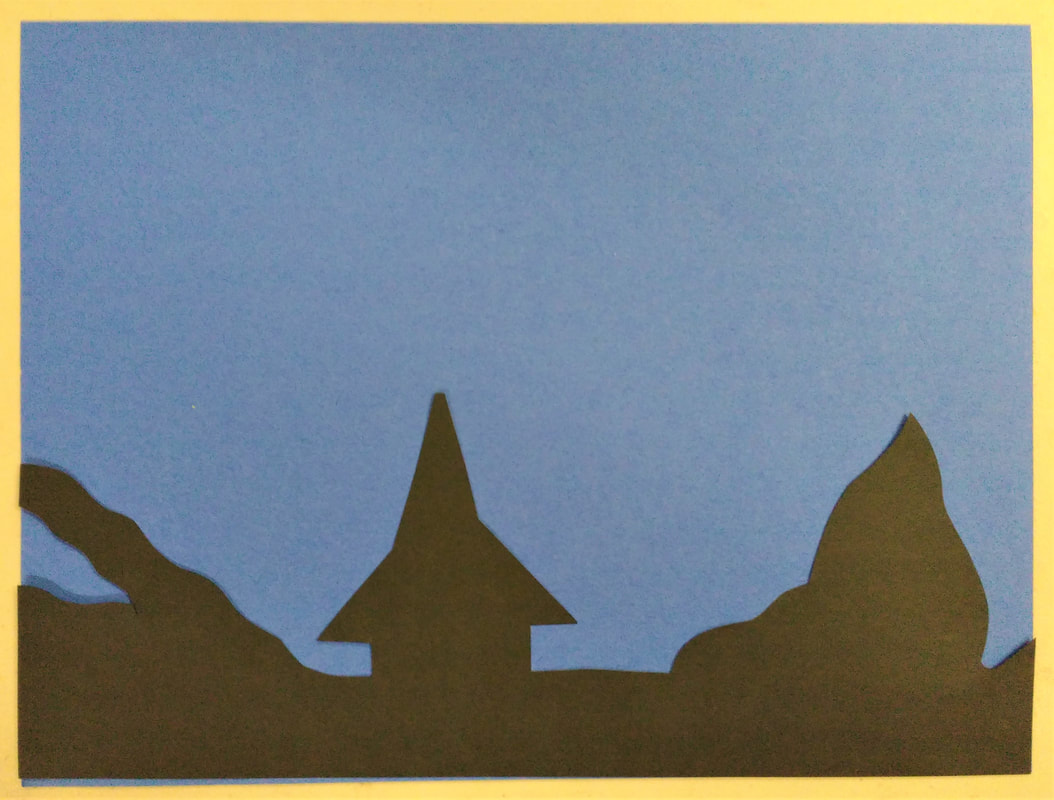
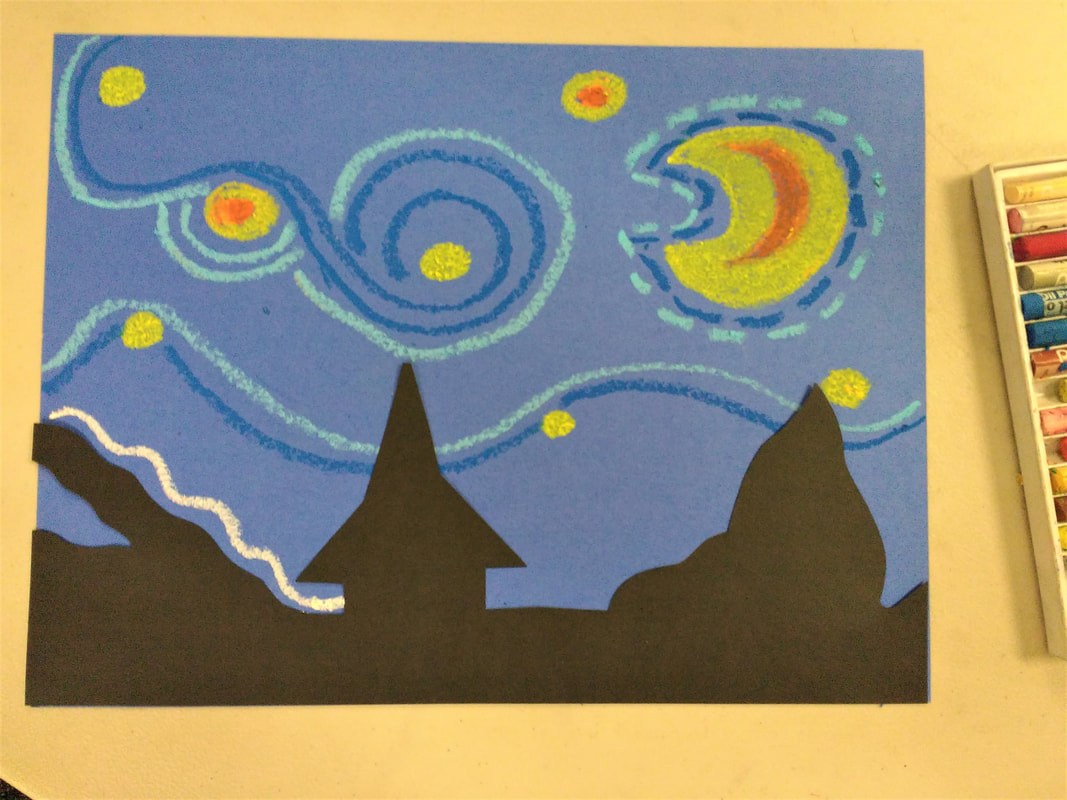
- They will draw with pencil and then cut out a silhouette of a town or landscape. At least one element of the landscape should go the full height of the black paper.
- Tell them they will use oil pastels to make lines in motion to create the sky with stars. They will draw sky all the way to the bottom of the page.
- After the town is cut out they can glue it on and add glitter and sequins to their sky.
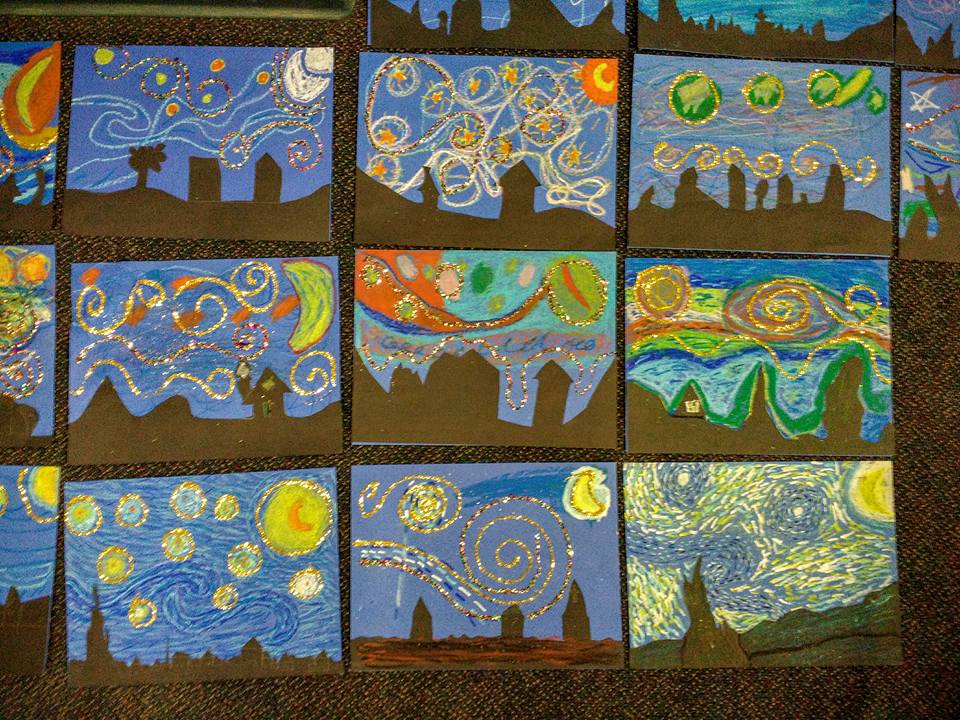
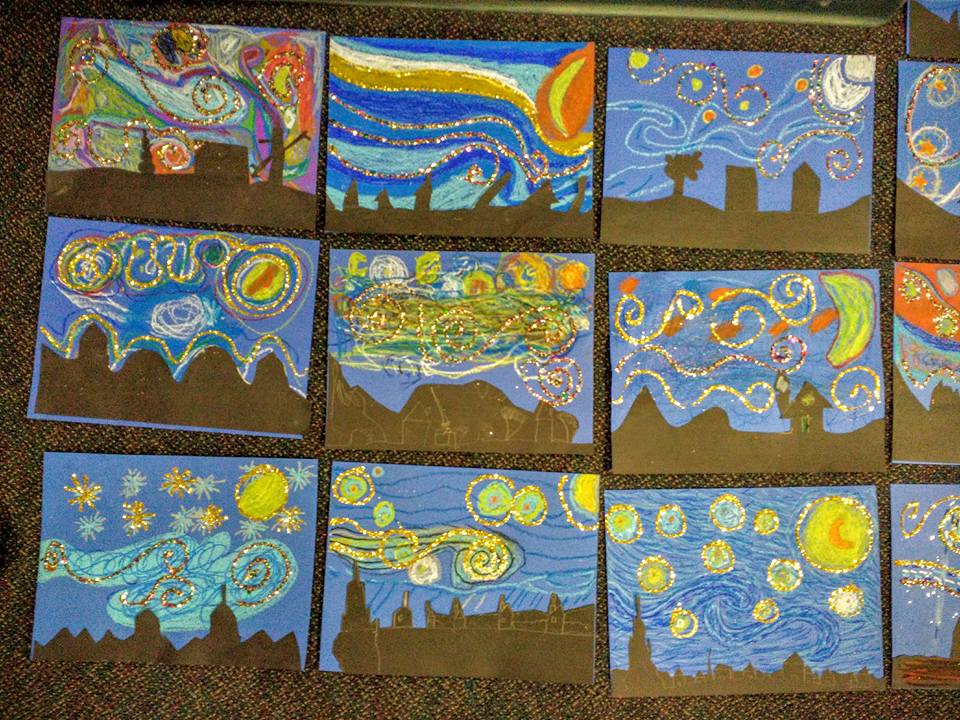
Art Project
-pass out blue and black papers to each student, have them put their name on the back of the blue paper.
-starting with the black piece of paper, have the students use a pencil to draw an outline of a town, mountains, bushes and trees, or whatever landscape they choose. Remind them that some of the elements should be taller and some lower. They should NOT be adding details with the pencil--This is just a guideline for cutting. (If the students do want details like windows or doors, they can be added later with the pastels.)
- have students raise their hands when they are done cutting out their silhouetted landscape. This is the most challenging part for some students, so have extra black paper in case a re-do is needed.
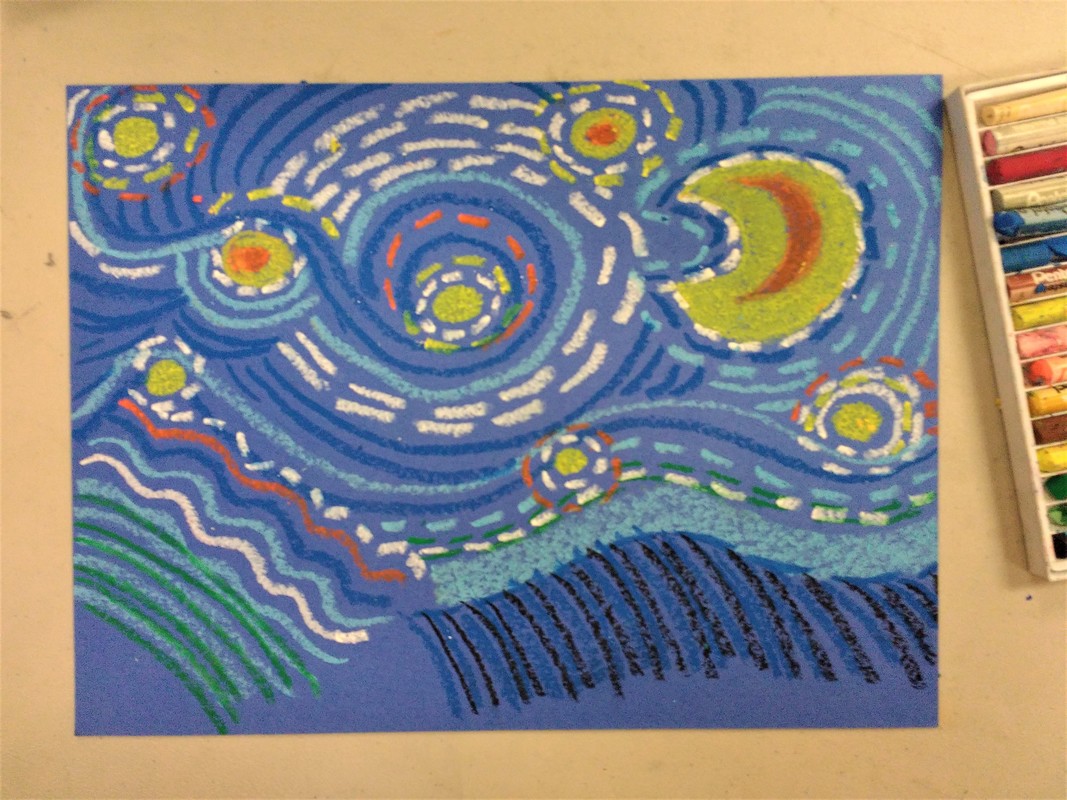
-When their black paper is completely cut out, pass out the oil pastels and point out that they will only be using colors for their sky, including the stars and moon: all shades of blue, plus yellow, white, and orange.
-As the students work on their sky, tell them to have a minimum of 3 stars, plus lots of swirly lines. Point out that if the stars are placed on their picture first, they can use the placement of those objects to swirl the other lines around.
-make sure they continue lines down to bottom of page, using their black silhouette as a guideline if they want.
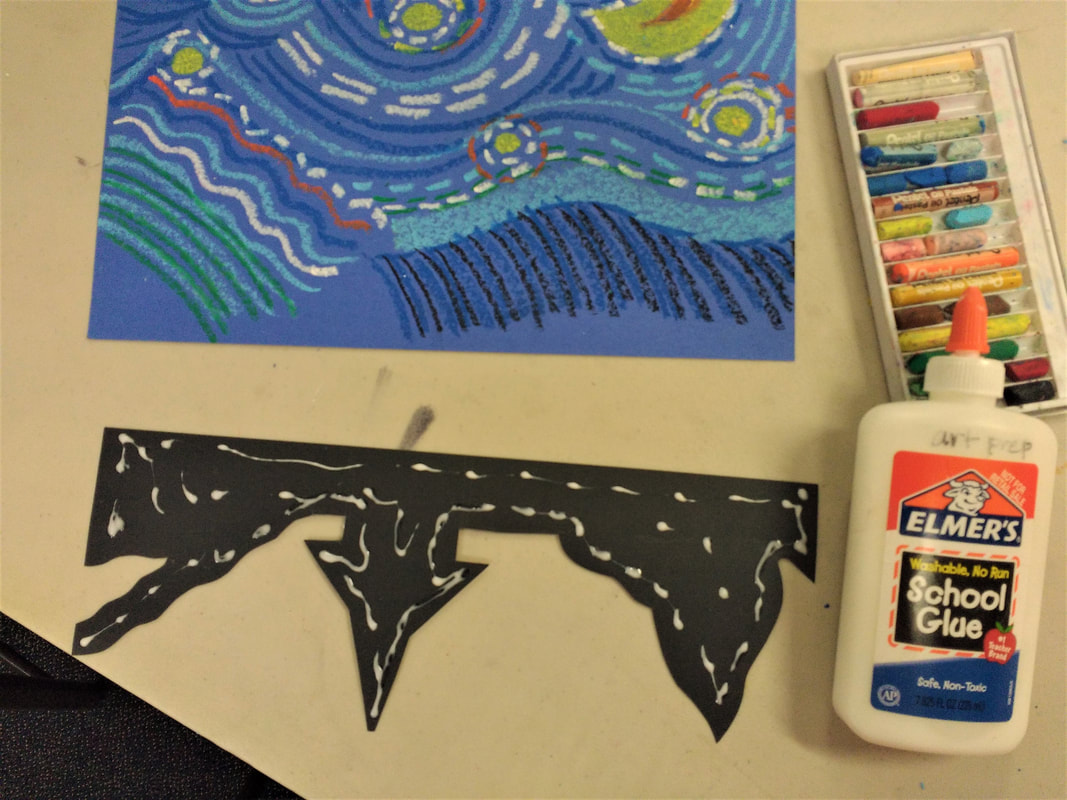
-have the students use bottle glue (not glue sticks, which will not stick well over the oil pastels) to glue the black silhouette to the very bottom of the blue page.
-when students are done and the black silhouette is glued on, have them return their oil pastels and throw away their scraps. Have them double check to make sure their name is on the back.
-have a parent go around and sprinkle glitter over area students put glue and shake off over cardboard box. Alternatively, have a parent or two set up a glitter station in a free spot of the classroom. When the students are ready they can come to the glitter station.
-pass out sequins for students to add 4-5 on their art work with glue, if they wish.
* have parent volunteers return all supplies to Art Room and put back in the correct cabinets.
-pass out blue and black papers to each student, have them put their name on the back of the blue paper.
-starting with the black piece of paper, have the students use a pencil to draw an outline of a town, mountains, bushes and trees, or whatever landscape they choose. Remind them that some of the elements should be taller and some lower. They should NOT be adding details with the pencil--This is just a guideline for cutting. (If the students do want details like windows or doors, they can be added later with the pastels.)
- have students raise their hands when they are done cutting out their silhouetted landscape. This is the most challenging part for some students, so have extra black paper in case a re-do is needed.
-When their black paper is completely cut out, pass out the oil pastels and point out that they will only be using colors for their sky, including the stars and moon: all shades of blue, plus yellow, white, and orange.
-As the students work on their sky, tell them to have a minimum of 3 stars, plus lots of swirly lines. Point out that if the stars are placed on their picture first, they can use the placement of those objects to swirl the other lines around.
-make sure they continue lines down to bottom of page, using their black silhouette as a guideline if they want.
-have the students use bottle glue (not glue sticks, which will not stick well over the oil pastels) to glue the black silhouette to the very bottom of the blue page.
-when students are done and the black silhouette is glued on, have them return their oil pastels and throw away their scraps. Have them double check to make sure their name is on the back.
-have a parent go around and sprinkle glitter over area students put glue and shake off over cardboard box. Alternatively, have a parent or two set up a glitter station in a free spot of the classroom. When the students are ready they can come to the glitter station.
-pass out sequins for students to add 4-5 on their art work with glue, if they wish.
* have parent volunteers return all supplies to Art Room and put back in the correct cabinets.
Citations:
- Vincent Van Gogh, Self-Portrait 1886. www.wikiart.org, https://www.wikiart.org/en/vincent-van-gogh/self-portrait-1886
- Vincent Van Gogh, Cypresses (Sketch on a Letter to Theo Van Gogh) 1889. www.wikiart.org, https://www.wikiart.org/en/vincent-van-gogh/cypresses#
- Vincent Van Gogh, Self-Portrait 1887. www.wikiart.org, https://www.wikiart.org/en/vincent-van-gogh/self-portrait-1887-8#
- Vincent Van Gogh, Large Plane Trees 1889. www.wikiart.org, https://www.wikiart.org/en/vincent-van-gogh/large-plane-trees-1889
- Vincent Van Gogh, Olive Trees with Yellow Sky and Sun 1889. www.wikiart.org, https://uploads0.wikiart.org/images/vincent-van-gogh/olive-trees-with-yellow-sky-and-sun-1889.jpg
- Vincent Van Gogh, The Starry Night 1889. www.wikiart.org, https://www.wikiart.org/en/vincent-van-gogh/the-starry-night-1889
- Vincent Van Gogh, The Stone Bench in the Garden at Saint-Paul Hospital 1889. www.wikiart.org, https://www.wikiart.org/en/vincent-van-gogh/the-stone-bench-in-the-garden-at-saint-paul-hospital-1889#
- Vincent Van Gogh, Houses with Thatched Roofs, Cordeville 1890. www.wikiart.org, https://www.wikiart.org/en/vincent-van-gogh/houses-with-thatched-roofs-cordeville-1890
- Vincent Van Gogh, Thatched Cottages in the Sunshine Reminiscence of the North. www.wikiart.org, https://www.wikiart.org/en/vincent-van-gogh/thatched-cottages-in-the-sunshine-reminiscence-of-the-north-1890#
- Vincent Van Gogh, Head of a Man (Possibly Theo van Gogh) 1887. www.wikiart.org, https://www.wikiart.org/en/vincent-van-gogh/head-of-a-man-possibly-theo-van-gogh-1887#
