third grade
Rainforest lizard
Folk Art is a kind of art that is made by indigenous peoples (those who are native to a certain place and have strong ties with that land and location), or by peasants or other tradespeople. The main way that folk art differs from what we call "high art" is that folk art is mostly useful objects, like bowls, baskets, jewelry, and other ordinary things made for daily use, and then the folk artist makes those items very decorative. It also might include wood carvings or masks of animals or other creatures that reflect the artist's land or culture. The colors and designs used in folk art also represent each people's culture and traditions. Many times, folk art is sold to tourists to remind them of their travels to wonderful locations.
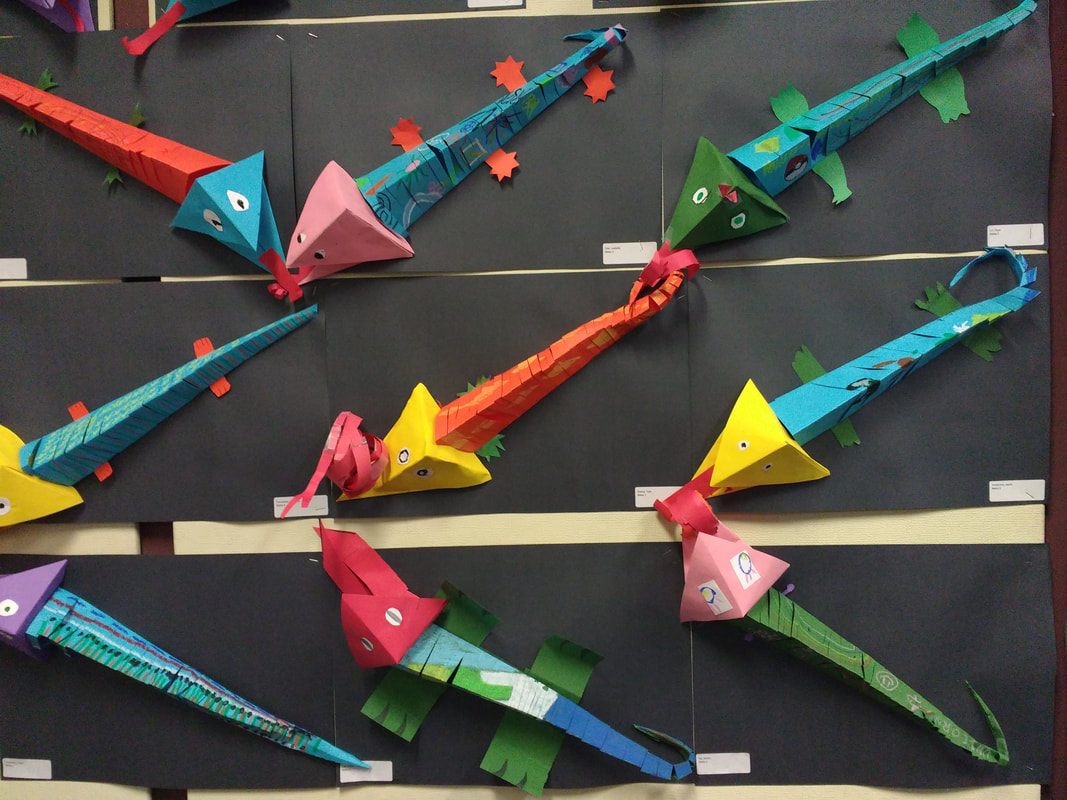
There are folk artists creating different styles all around the world, from the totem poles of the Eskimos to African tribal necklaces to Central American Folk Art Lizards. The Zapotec people of the Mexican state of Oaxaca (Wa-HA-ka) are known for their woodcarvings. In fact, Oaxacan carvings, of which lizards are a popular design, have become such an international craze, that although Oaxaca was once one of the poorest states in Mexico, it is now becoming a competitive marketplace of folk artists producing these sculptures for people all over the world.
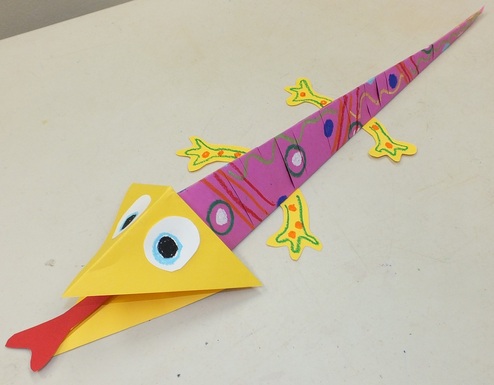
The lizard shapes are full of curves, angles and points that make them very appealing. They are painted in delightfully bright colors, which reflects a long tradition of bold color use in Central American history. Geometric designs as well as motifs from nature are equally popular in covering the carvings with rich pattern and texture. These wonderful folk art carvings represent a vibrant culture with a rich heritage and a bright future.
The lizard shapes are full of curves, angles and points that make them very appealing. They are painted in delightfully bright colors, which reflects a long tradition of bold color use in Central American history. Geometric designs as well as motifs from nature are equally popular in covering the carvings with rich pattern and texture. These wonderful folk art carvings represent a vibrant culture with a rich heritage and a bright future.
the project
Supplies:
1 sheet 12x18 construction paper, cut in half diagonally (only one triangle needed for body of lizard, so 1 sheet will make two bodies)
2 - 6" squares of different colored paper
scraps of paper for eyes, tongue and legs
oil pastels
scissors
glue bottles
1 sheet 12x18 construction paper, cut in half diagonally (only one triangle needed for body of lizard, so 1 sheet will make two bodies)
2 - 6" squares of different colored paper
scraps of paper for eyes, tongue and legs
oil pastels
scissors
glue bottles
Art Project
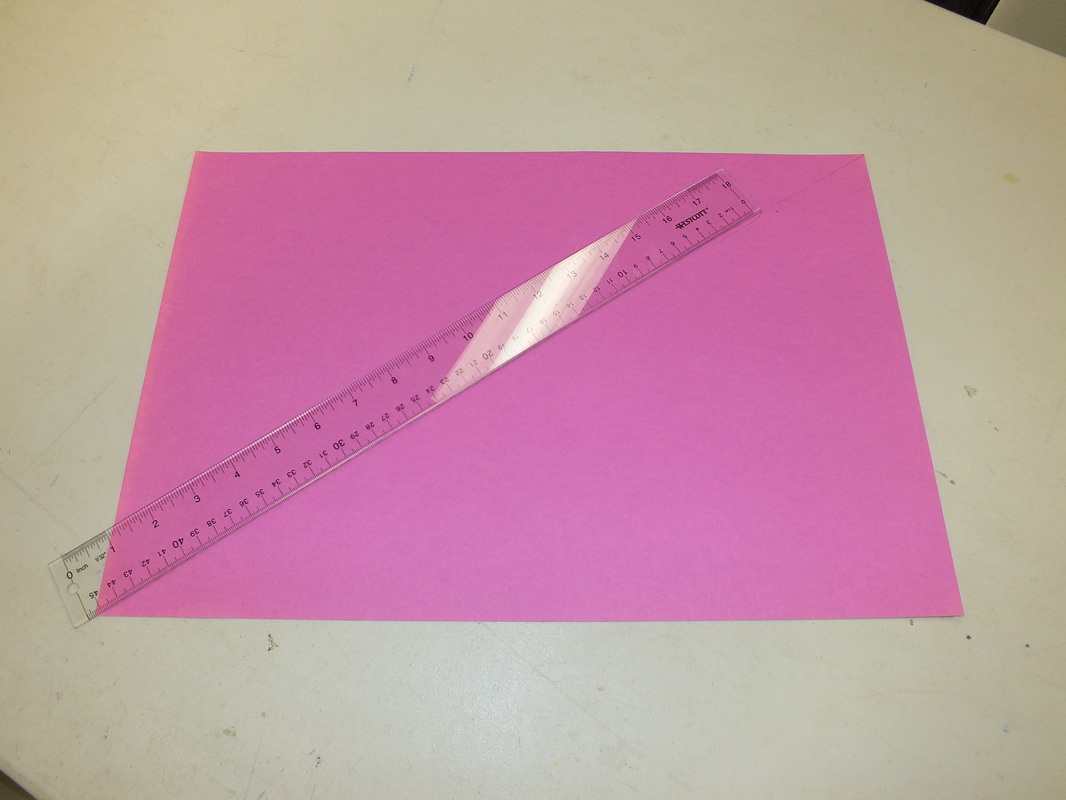
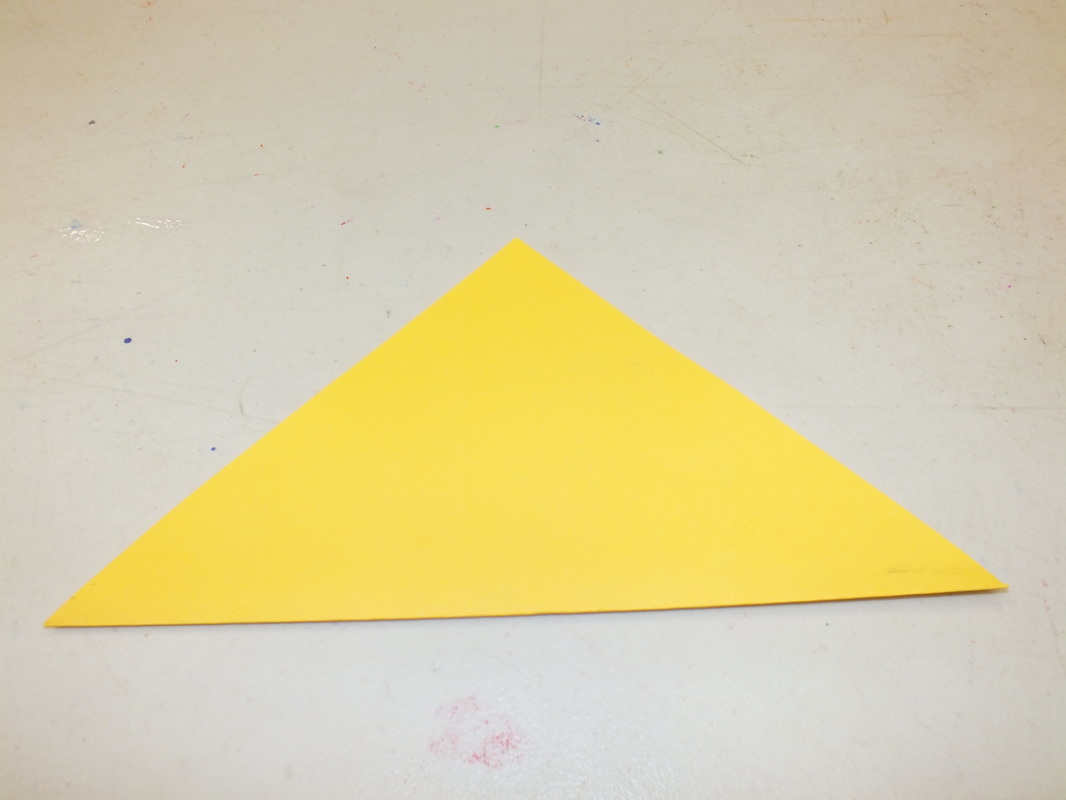
1. Parents should precut the large 12x18" construction paper into diagonal halves. Each student should get one triangle for the body of their lizard. These should be cut from a variety of colors.
2. I suggest pre-folding the lizards for the students. It may be difficult for some third graders to manage the large paper with enough precision to get the tail point.
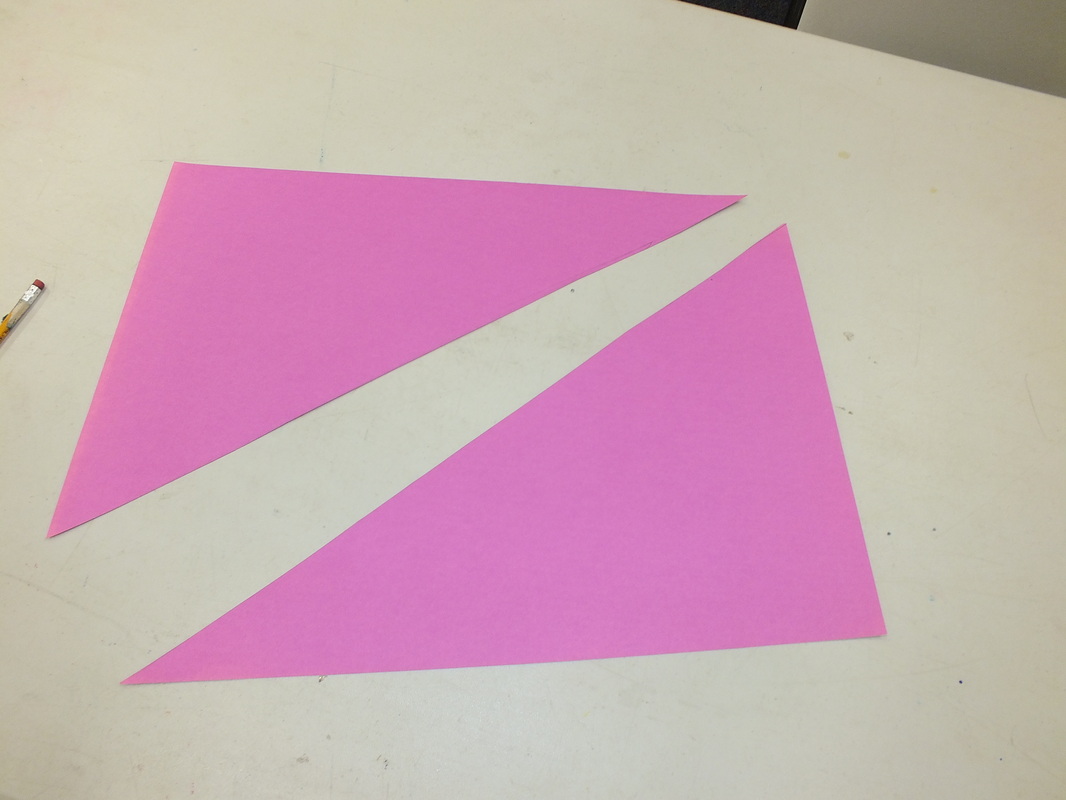
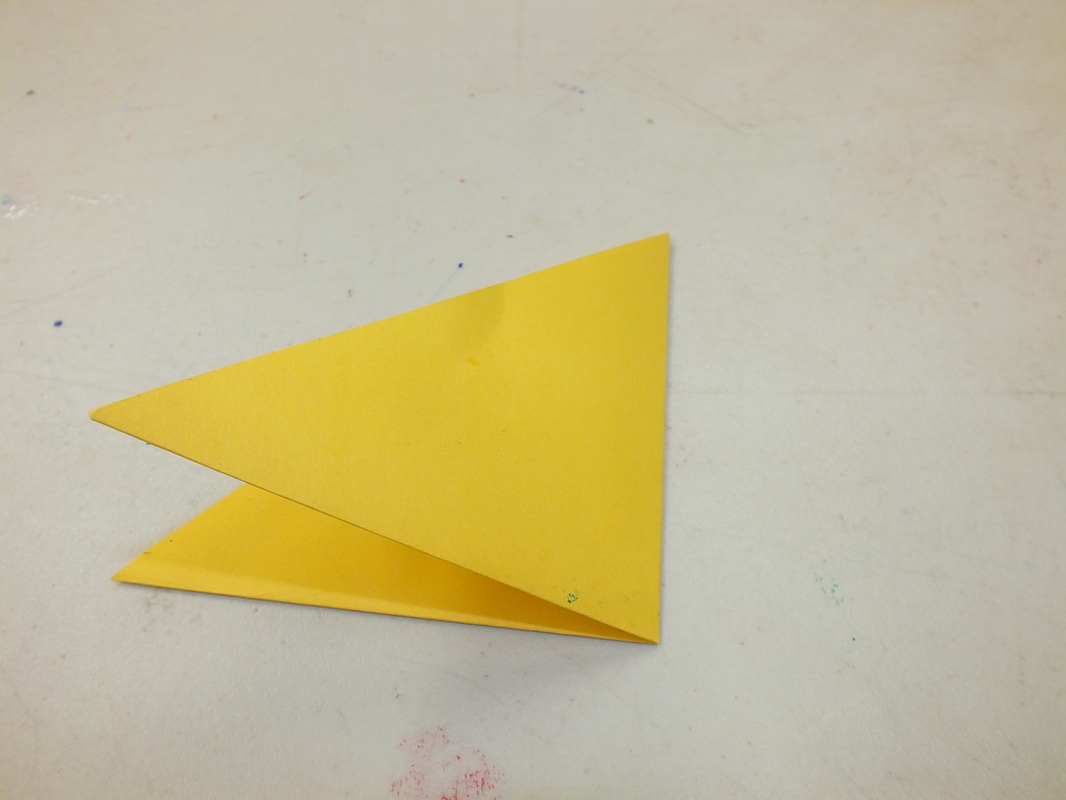
* Fold the triangle in half to the long point. There will be a bit of extra paper on one end - don't cut this off yet (though it can be trimmed once you have your additional fold marks, so that a tab of paper is left that you can use to attach the head later - see pictures below).
*Open up, then fold each side the long way to the center fold mark.
*Open the folds up once again to return to a flat triangle.
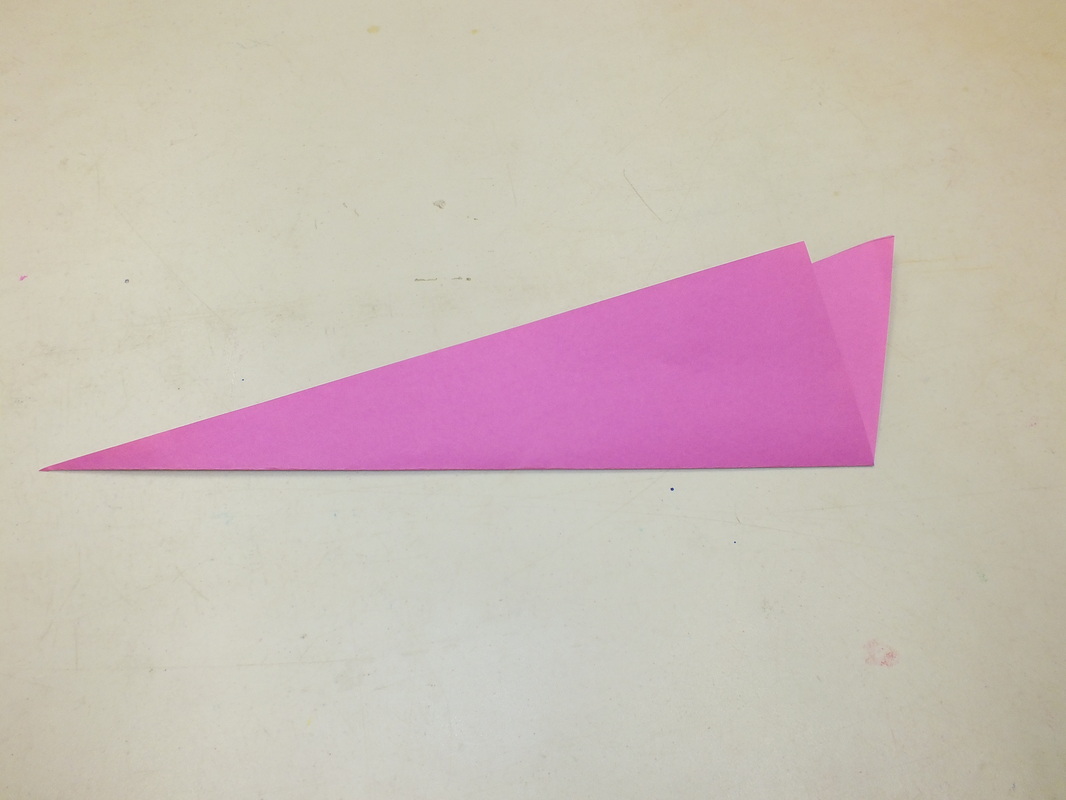
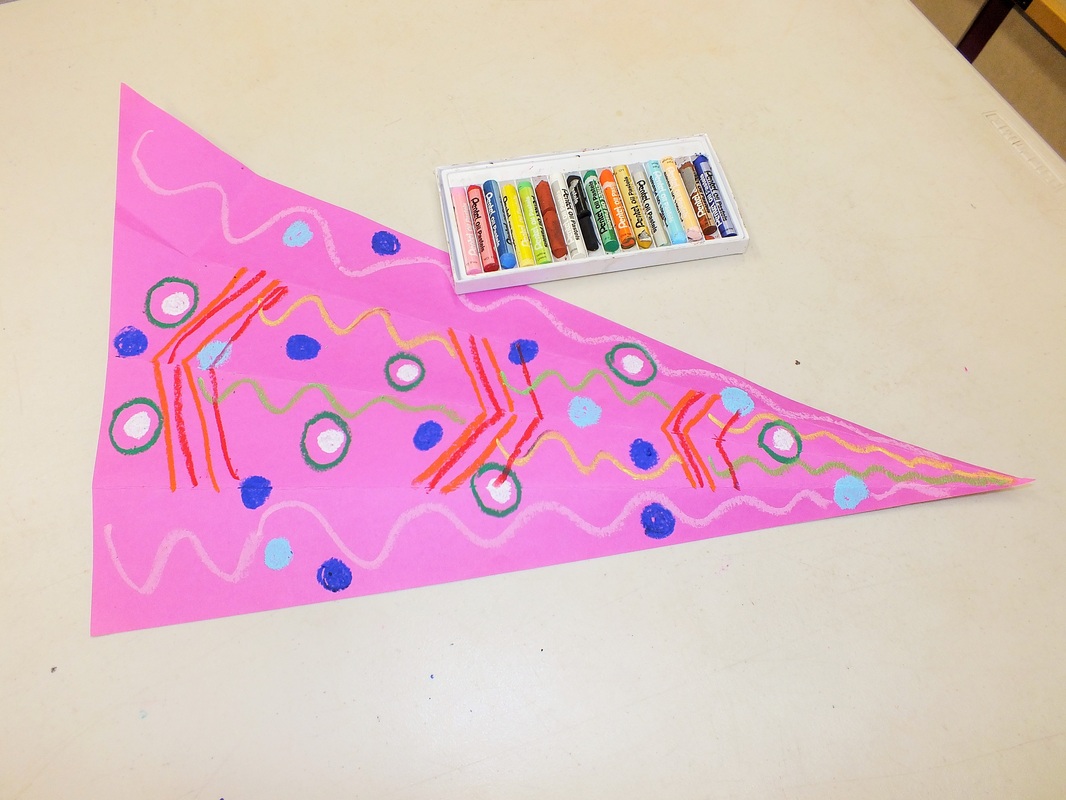
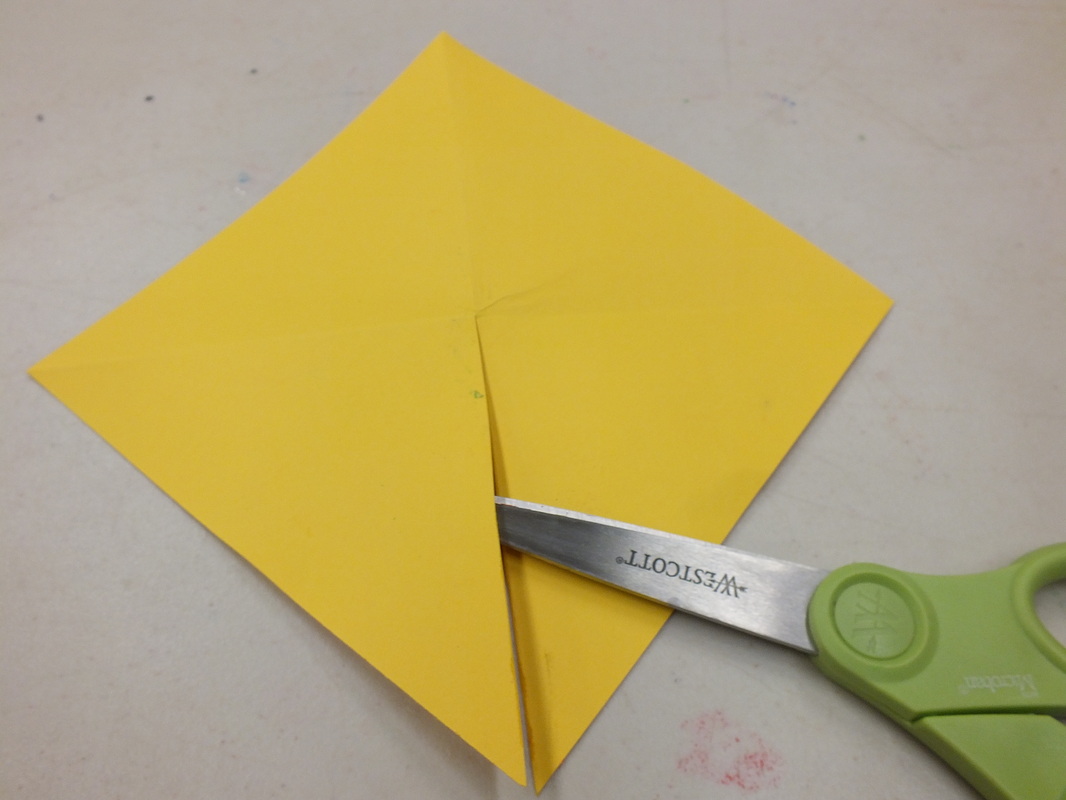
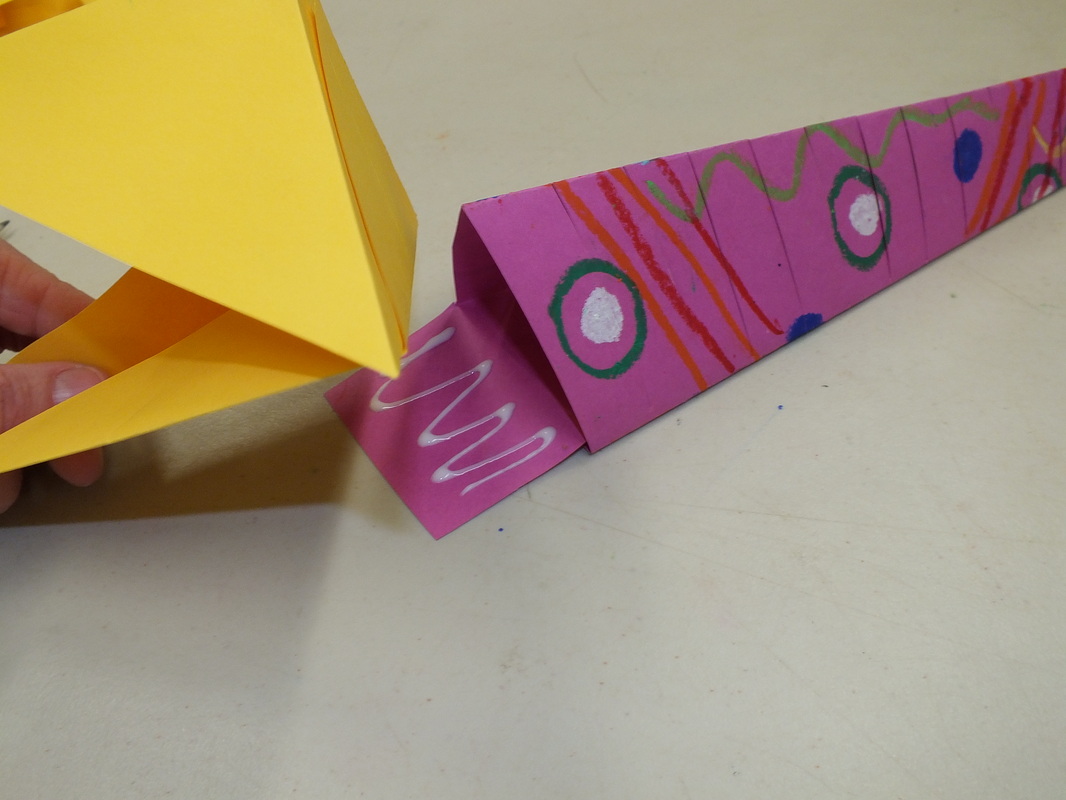
3. Pass out the pre-folded body triangles. With the paper flat, have the students use the oil pastels to color patterns and designs on one side.
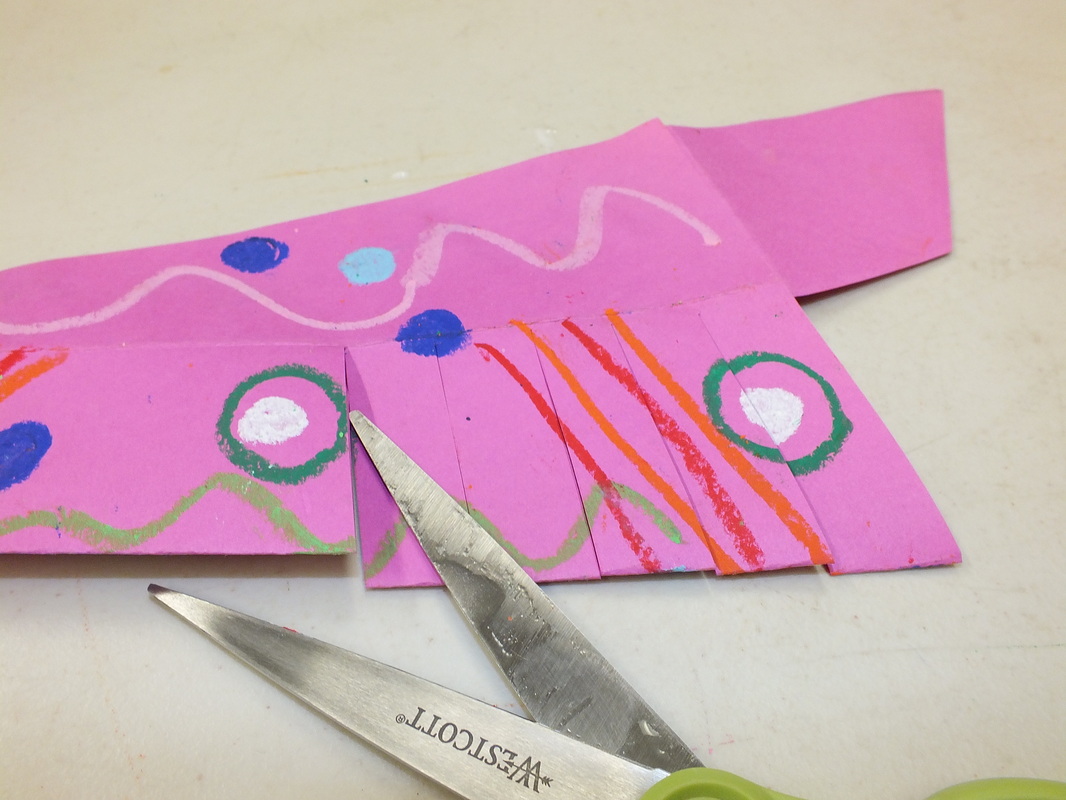
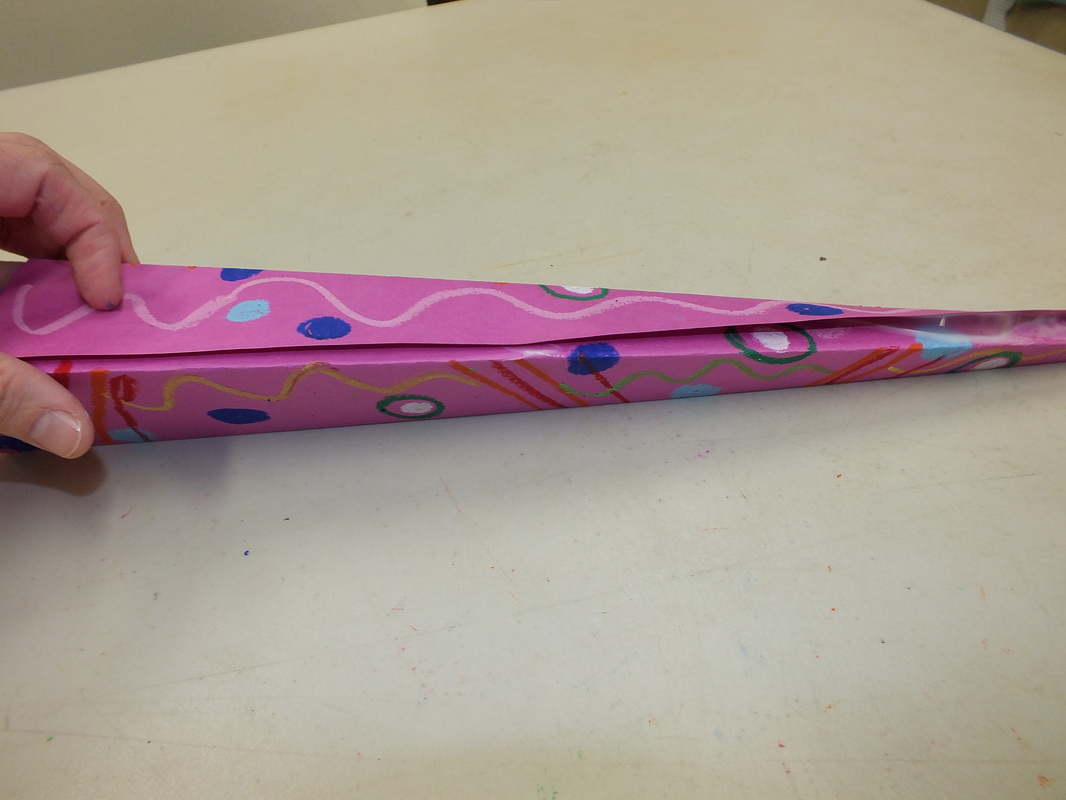
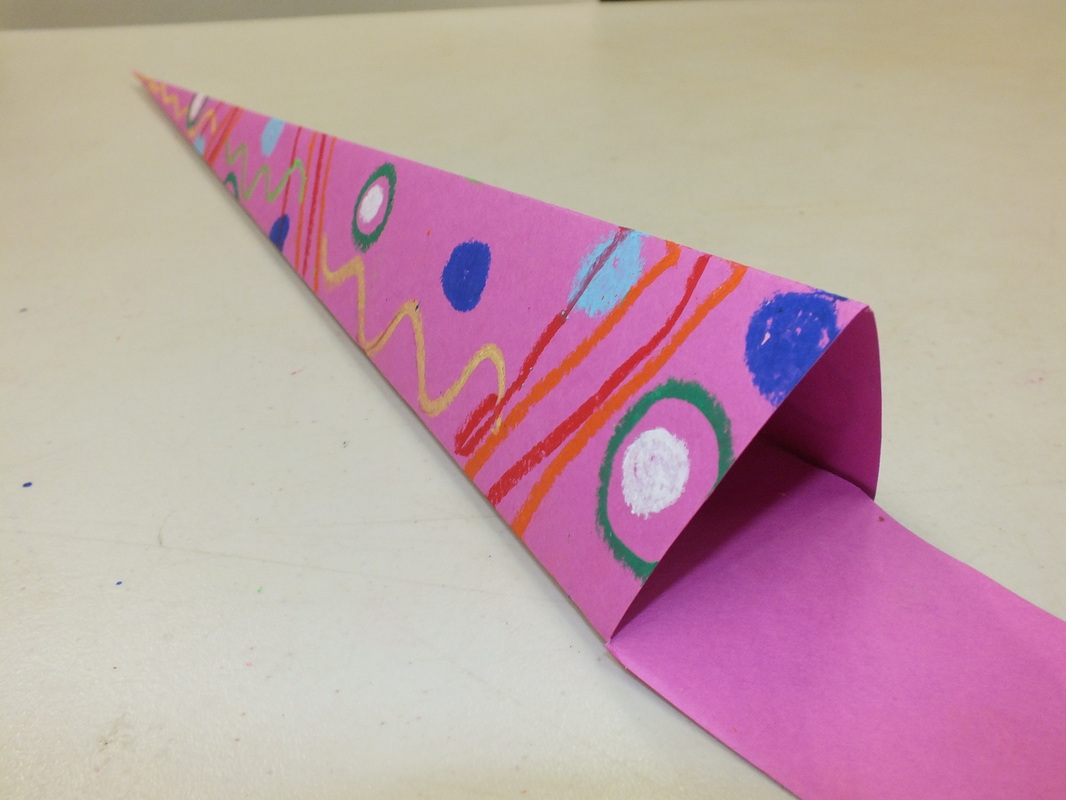
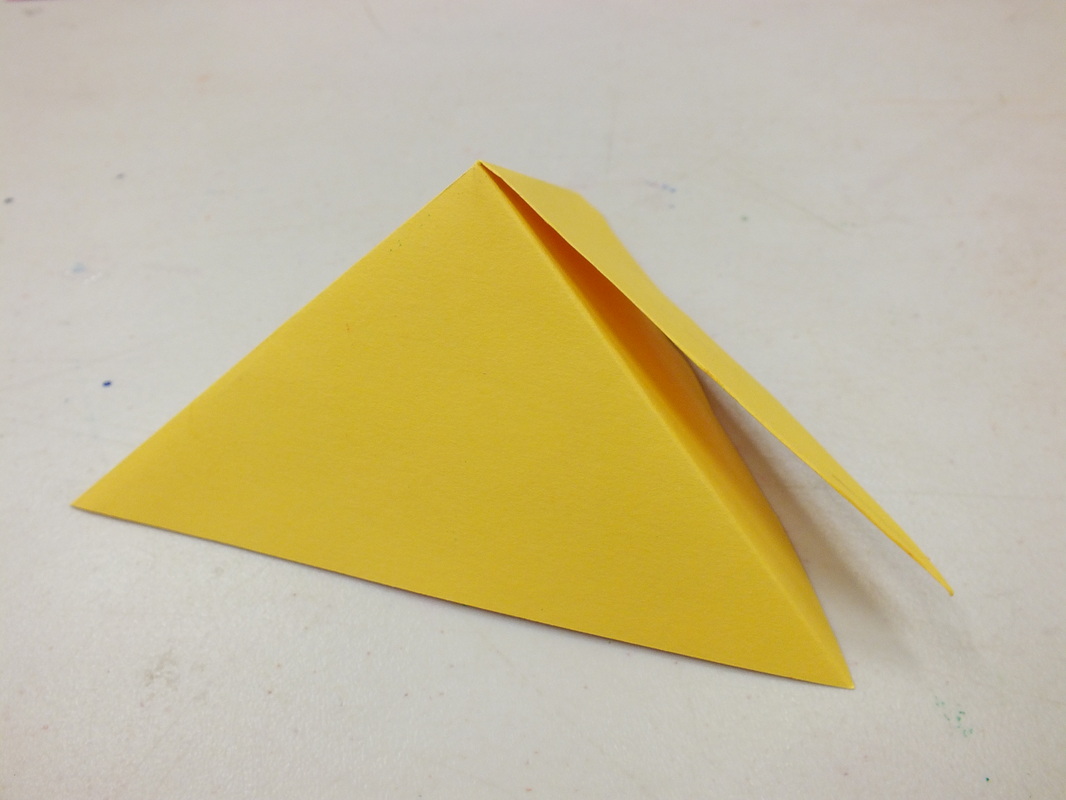
4. When their design is complete, have the students fold the triangle in half along the pre-creased center line. Using scissors, cut through the folded edge to the next fold line. Overlap the two remaining uncut sides and glue them together to form a long pyramid.
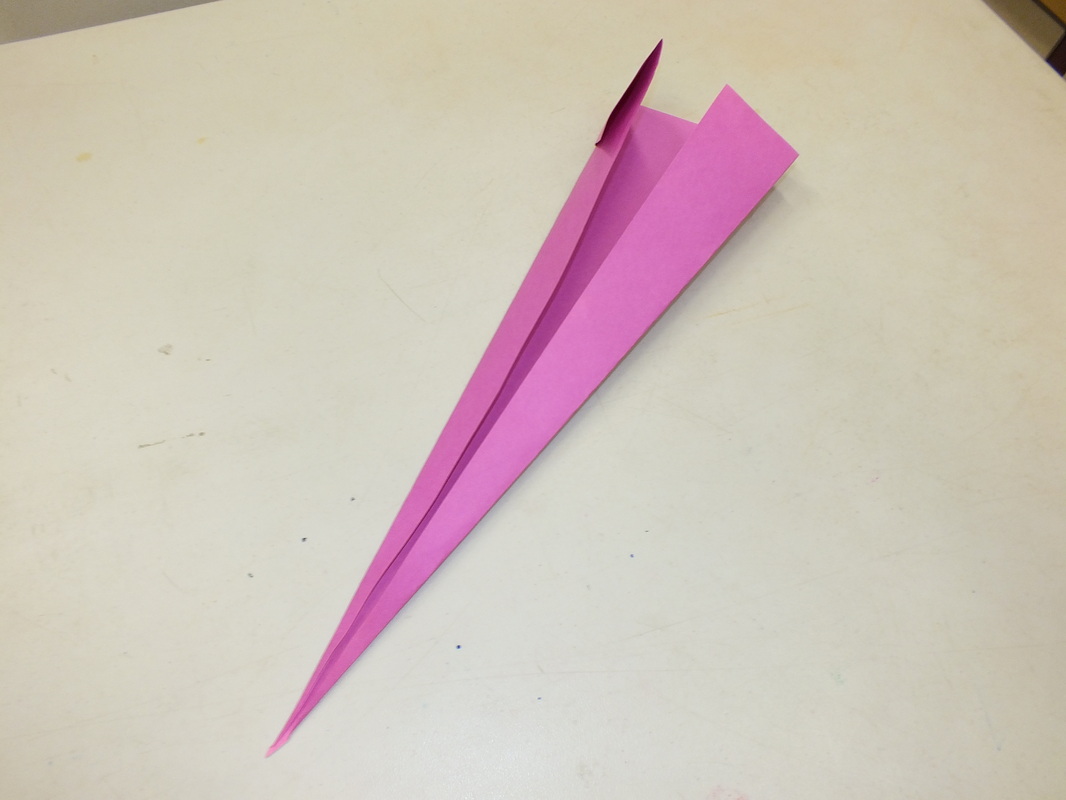
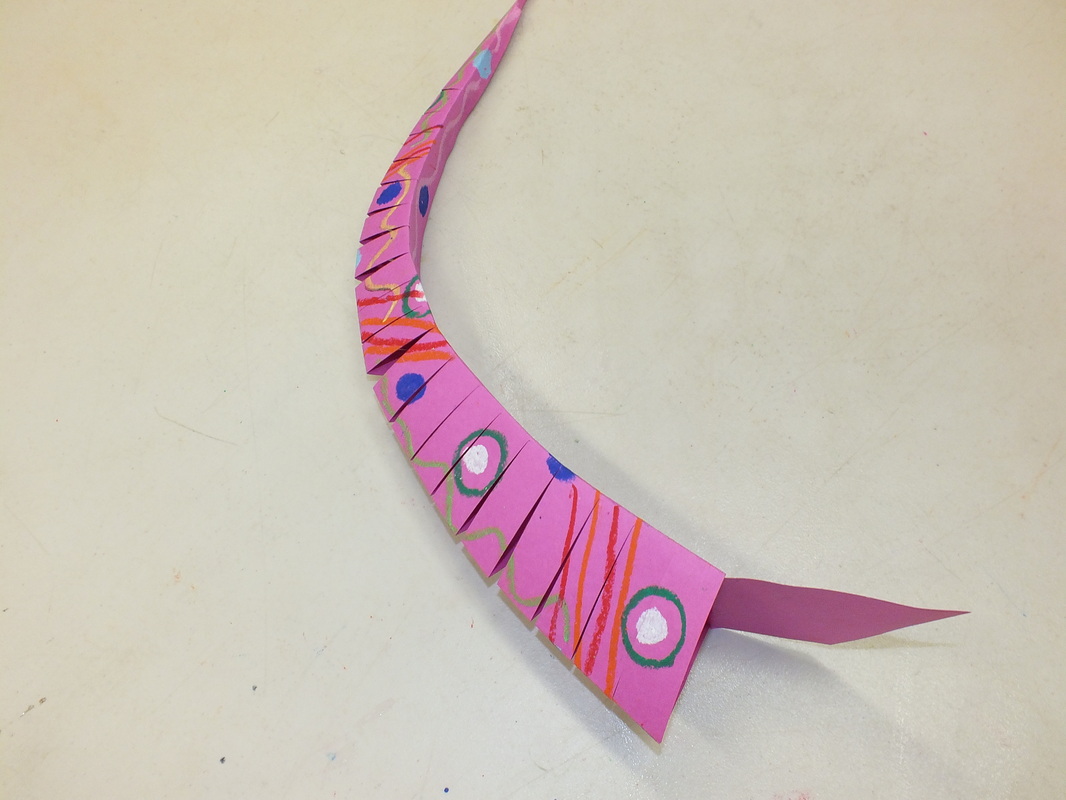
5. If you didn't trim the extra bit of paper at the end, you'll need to do it at this point, so the pyramided body can lay flat. With the cut slashes at the top of the pyramid, the kids will love how the body of the lizard can be bent!
1. Parents should precut the large 12x18" construction paper into diagonal halves. Each student should get one triangle for the body of their lizard. These should be cut from a variety of colors.
2. I suggest pre-folding the lizards for the students. It may be difficult for some third graders to manage the large paper with enough precision to get the tail point.
* Fold the triangle in half to the long point. There will be a bit of extra paper on one end - don't cut this off yet (though it can be trimmed once you have your additional fold marks, so that a tab of paper is left that you can use to attach the head later - see pictures below).
*Open up, then fold each side the long way to the center fold mark.
*Open the folds up once again to return to a flat triangle.
3. Pass out the pre-folded body triangles. With the paper flat, have the students use the oil pastels to color patterns and designs on one side.
4. When their design is complete, have the students fold the triangle in half along the pre-creased center line. Using scissors, cut through the folded edge to the next fold line. Overlap the two remaining uncut sides and glue them together to form a long pyramid.
5. If you didn't trim the extra bit of paper at the end, you'll need to do it at this point, so the pyramided body can lay flat. With the cut slashes at the top of the pyramid, the kids will love how the body of the lizard can be bent!
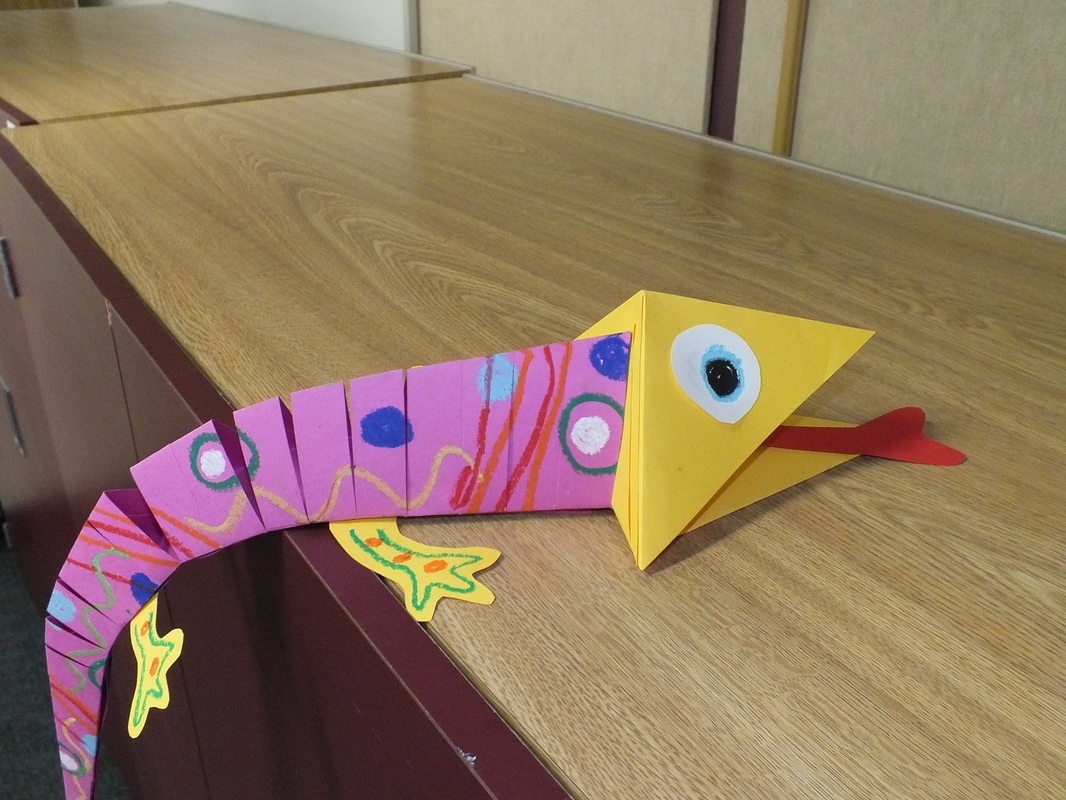
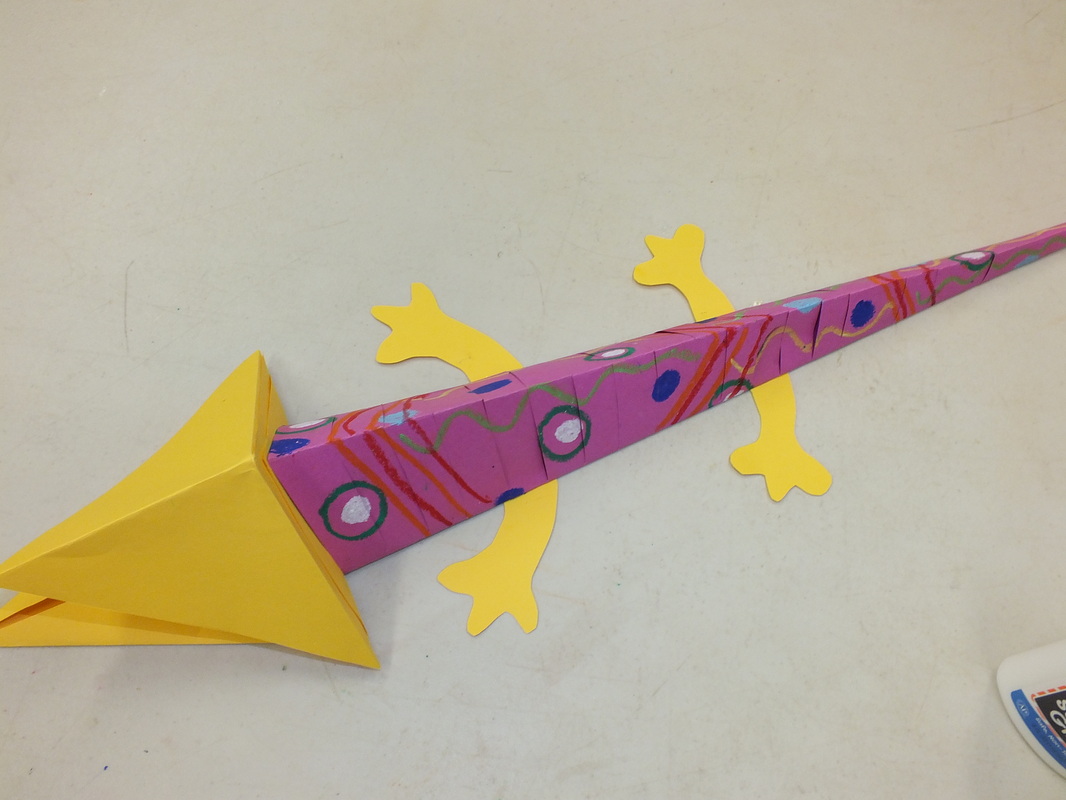
6. For the head, each student will need two 6" squares of colored paper, and it should be a different color from the body.
7. For the top of the head, fold the square corner to corner, diagonally. Unfold and do the same thing to opposite corners. Open up the paper and cut along ONE fold line from the corner to the center only (see picture below). By refolding along all lines, the two triangles next to the cut will be overlapped and glued, creating a pyramid shape.
7. For the top of the head, fold the square corner to corner, diagonally. Unfold and do the same thing to opposite corners. Open up the paper and cut along ONE fold line from the corner to the center only (see picture below). By refolding along all lines, the two triangles next to the cut will be overlapped and glued, creating a pyramid shape.


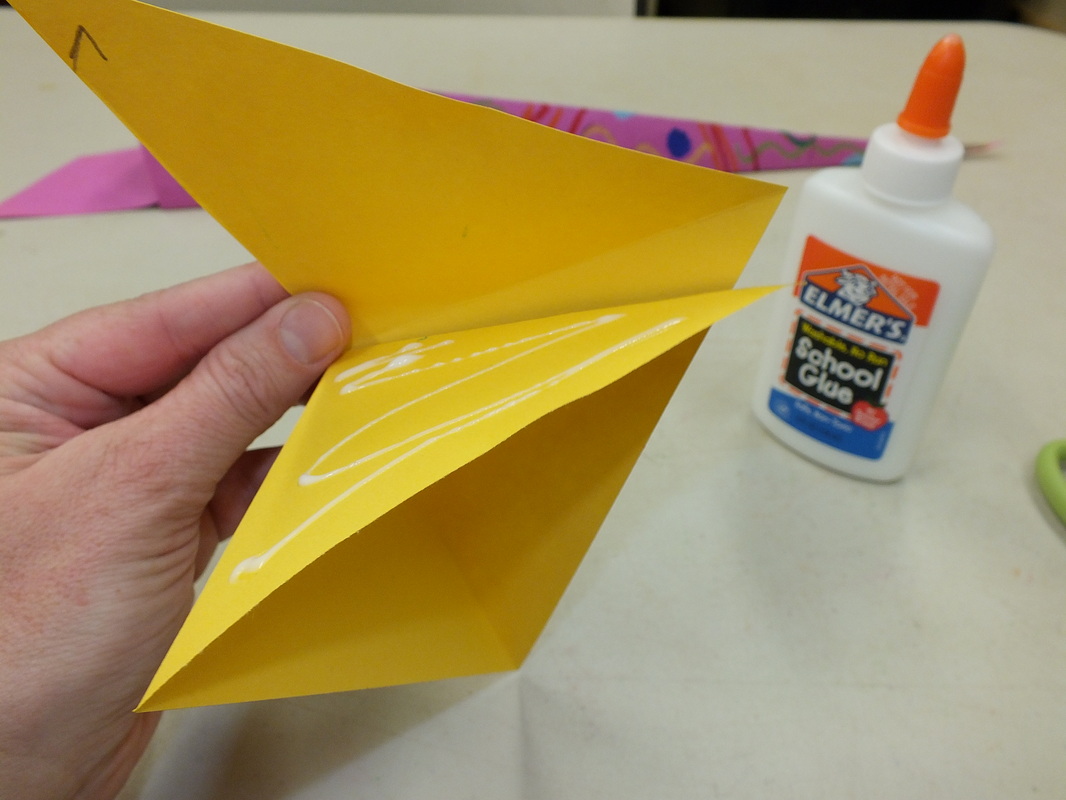
8. For the bottom of the head, fold the other square corner to corner, diagonally. Open back up, then fold each half to the center fold line (sort of like a paper airplane). The remaining area of paper should be folded up. Use this flap to glue the two sections of the head together. The bottom will stick out a little bit farther than the top.


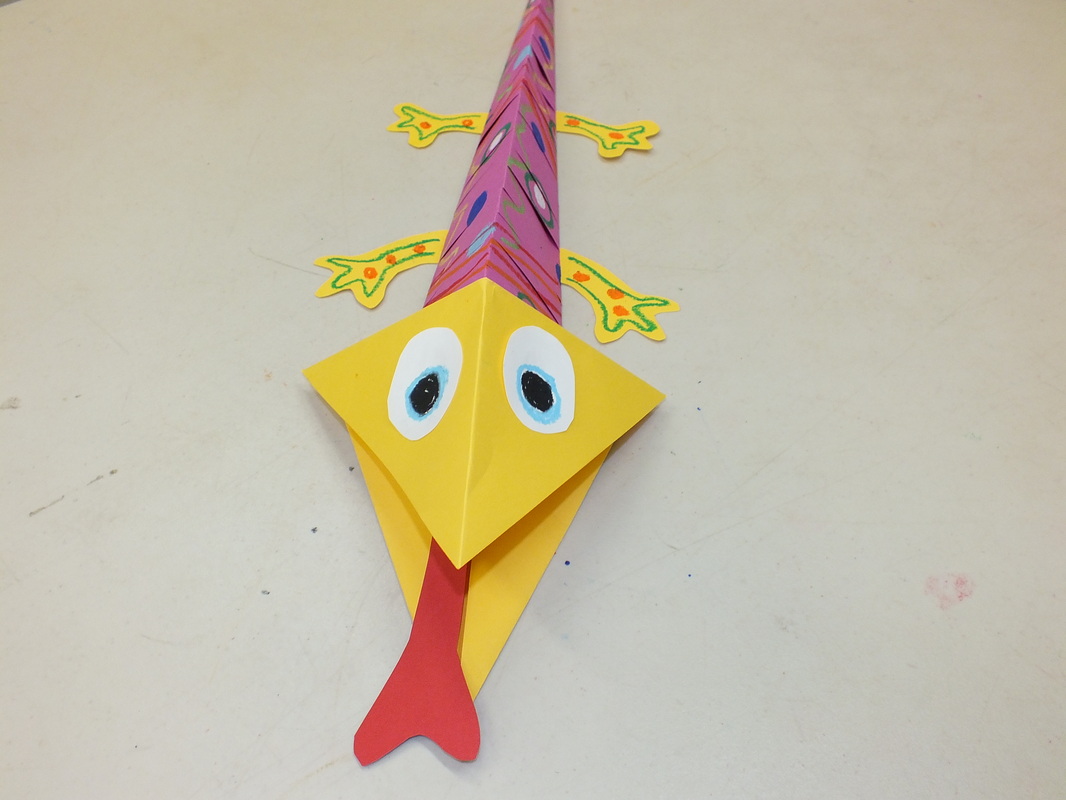
9. Next, use the flap from the body to glue the head in place.
10. To finish, offer the students a variety of paper scraps to create eyes, legs, and tongue for their lizard. They can sketch these out first, or cut freehand. Oil pastels can also be used to add details.
10. To finish, offer the students a variety of paper scraps to create eyes, legs, and tongue for their lizard. They can sketch these out first, or cut freehand. Oil pastels can also be used to add details.