Fifth Grade
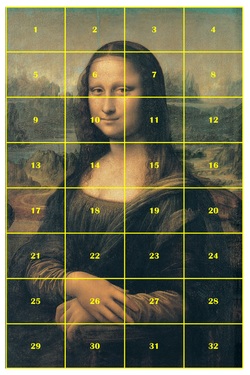
Mona Lisa Grid
Leonardo da Vinci was a great artist who lived from 1452 -1519 in a time called the Renaissance. This was a time when people were very interested in learning many new things, including about art. Leonardo was famous not only because he could paint well, but also because he was skilled at so many other things, too. He was an architect, a musician, sculptor, scientist, inventor, and mathematician. Leonardo designed plans for beautiful churches, bridges, even whole cities. He used his drawings to help him see how things would work. Leonardo filled up many notebooks with his drawings and ideas. Because he was worried about other people finding out about his discoveries, he wrote all his notes in a code (the code was fairly simple - you can read them if you hold them up to a mirror - and read Italian, of course). Leonardo used what he learned from nature and science to make his paintings look real.
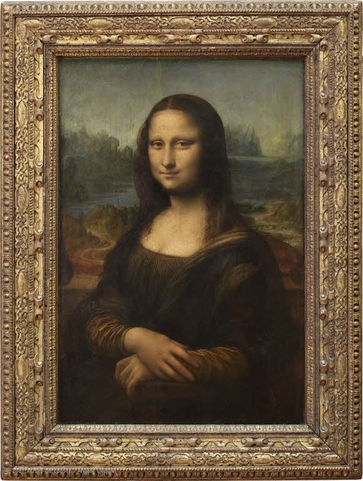
One of the things Leonardo invented was a way to make the figures he painted look more round and realistic, instead of flat and outlined. He smoothed everything out with a hazy glaze in a technique he called "sfumato" (sfoo-mah-toe), which means "smoky." He also used SHADOWS and HIGHLIGHTS to add to the realistic illusion. The people in Leonardo's paintings looked so much more life-like than many of the other artists of his time due to these techniques, both of which he used on his most famous painting, "The Mona Lisa." Notice how Mona Lisa's body is hazy all around the edges and almost seems to blend in with the landscape behind.
Also take note of the landscape--it is quite wild and mysterious, almost like it is out of a fantasy book. The two sides don't even seem to match up very well. Another thing people always like to point out about the Mona Lisa is her curious smile. What is she thinking about? Look at her eyes, too. They look right at you, which was kind of bold and daring for the time. Many people think the eyes follow you no matter where you are standing. So, part of the reason the "Mona Lisa" is so famous is not only because of the inventive and skillful techniques Leonardo used but also because of the many mysterious parts of the picture. What do you like about it?
Fun Facts about Leonardo da Vinci
- The term "Renaissance Man" means someone who is good at everything. Leonardo is considered to be the ultimate Renaissance man.
- Some people claim he invented the bicycle.
- He was very logical and used a process like the scientific method when investigating a subject.
- Only around 15 of his paintings are still around.
- The Mona Lisa is also called "La Giaconda" meaning the laughing one.
- Unlike some artists, Leonardo was very famous for his paintings while he was still alive. It's only recently that we've realized what a great scientist and inventor he was.
Downloads
|
A PowerPoint presentation that can be used for teaching this lesson.
| ||
|
For other schools: have this file color printed (we did it on cardstock), then cut into segments. Don't forget to number the segments on the back according to the grid.
| ||
the Project
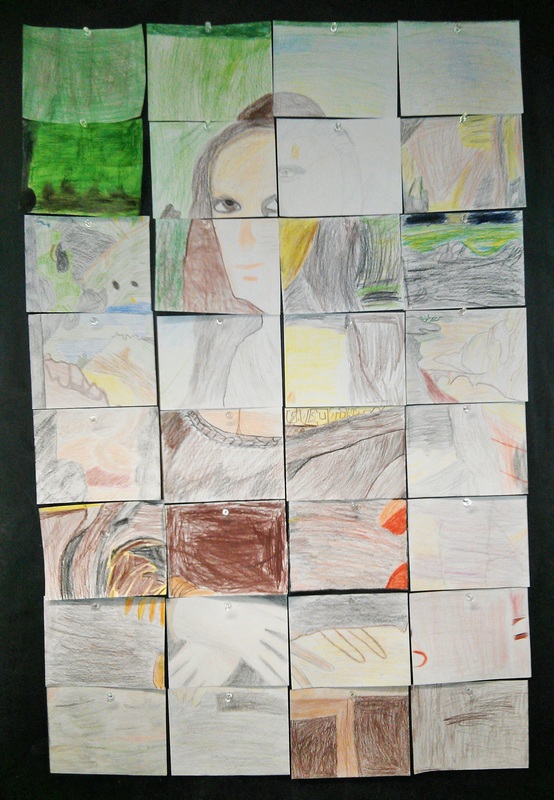
**This is a collaborative class project**

Materials:
- 5x6-1/2" white paper (you will need at least 32 of these, regardless of the number of students in class, but I recommend having extras in case people make mistakes and want to start again)
- one of the packets of the Mona Lisa segments (three sets in grade level folder).
- Colored pencils (or substitute another medium as desired)
Art Project:
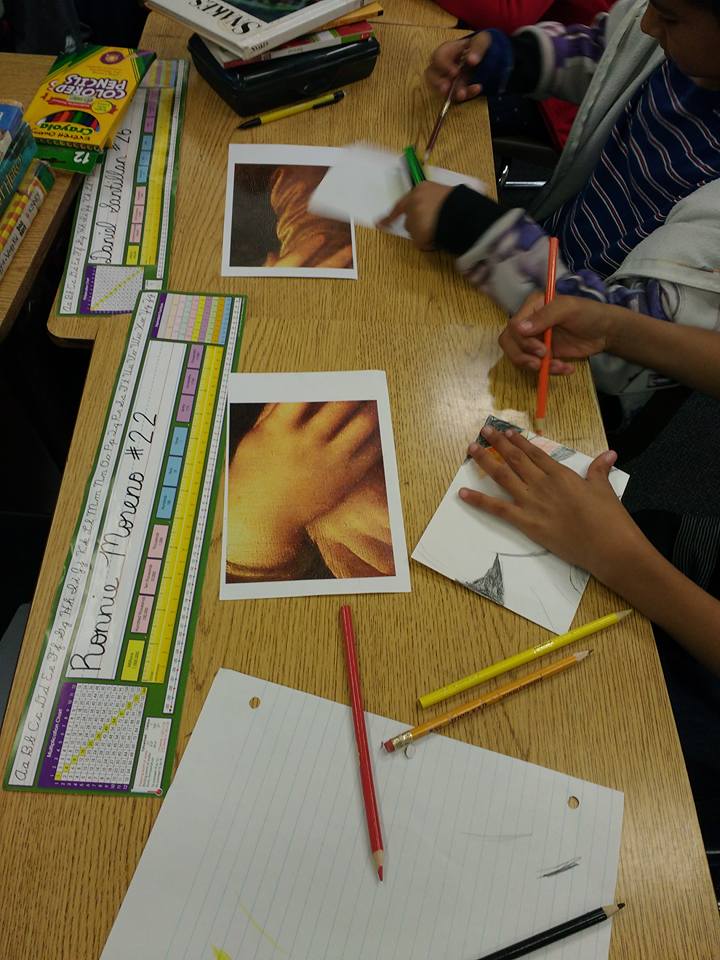
Give each student one of the Mona Lisa segments to replicate. There are 32 squares total. If you have less than 32 students, save some of the easy squares (such as 1, 4, 24, 28 and 32) for those who get done early to do a second one.
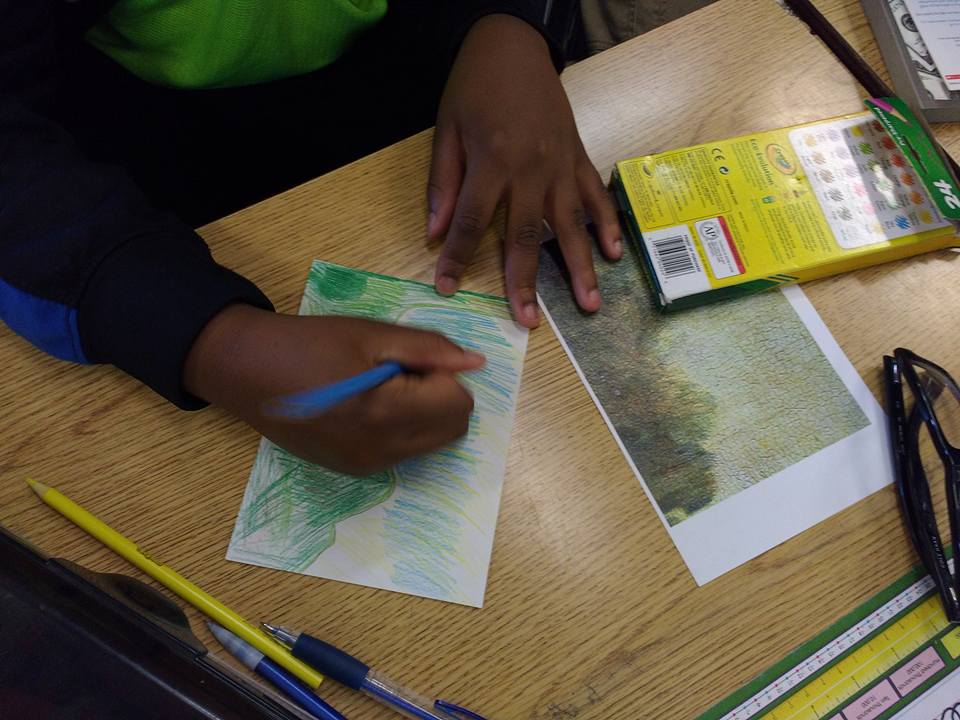
The white papers given to each student are the exact size as the Mona Lisa segments. Have them line up the placement of figures in their copy so that the whole image will assemble accurately. (They can lay their blank white sheet on top of the colored copy with just an edge showing, and mark with pencil where significant points are: fingers, hairline, shoulder, etc.)
Have them try to replicate colors and other details as well as they can, but they don't need to worry about the crackle details that have appeared in the original painting over time. Some will press harder with the pencils and some lighter, but that is okay. Some students get a little confused with almost "nothing" to draw (on the background segments for example) or when they can't quite tell what their detail is. Just have them go for it and not get too stressed out. They don't need to worry about being overly detailed. It will look great when all the segments are combined at the end!!
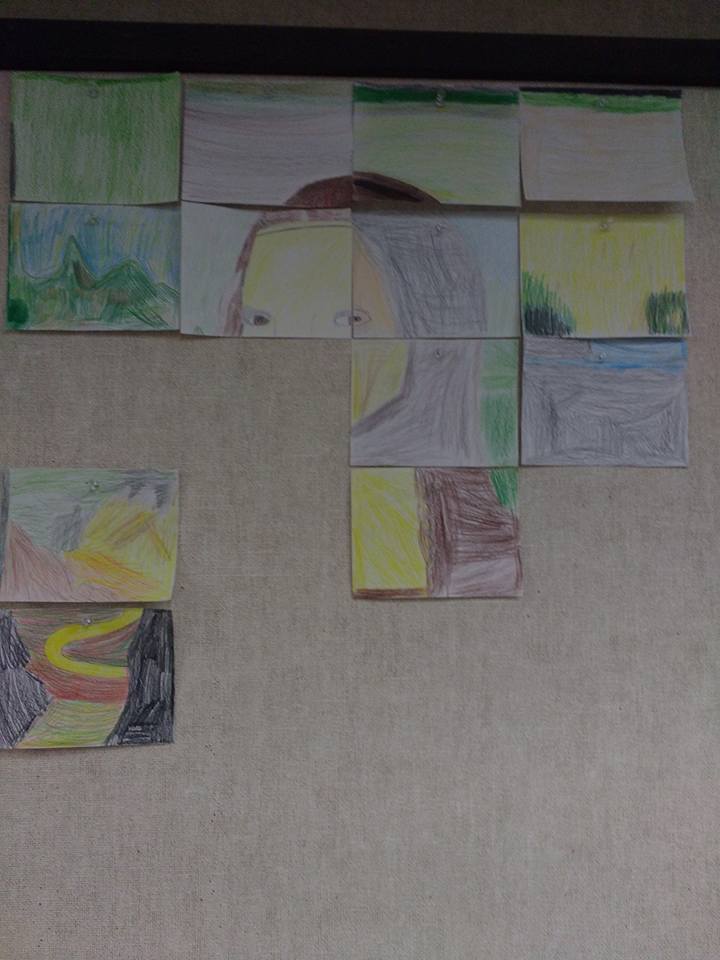
Ask them to write their name on the back, as well as the same grid number that is on the back of their Mona Lisa segment. This will help you hang them in the correct order for the finished product.
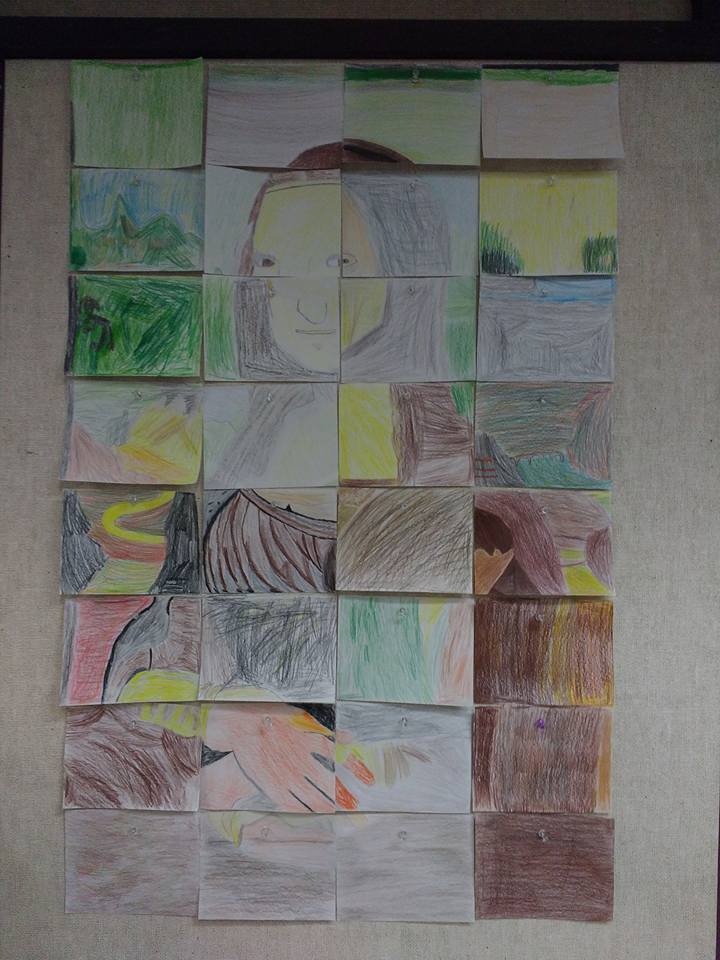
Our class was riveted as we hung the finished squares one by one. They were so excited when the sections lined up correctly (and even, in one case, where it didn't - it was kind of funny!). If your classroom does not have wall space to display this project, it may be possible to display in the school office or in the media center.
- 5x6-1/2" white paper (you will need at least 32 of these, regardless of the number of students in class, but I recommend having extras in case people make mistakes and want to start again)
- one of the packets of the Mona Lisa segments (three sets in grade level folder).
- Colored pencils (or substitute another medium as desired)
Art Project:
Give each student one of the Mona Lisa segments to replicate. There are 32 squares total. If you have less than 32 students, save some of the easy squares (such as 1, 4, 24, 28 and 32) for those who get done early to do a second one.
The white papers given to each student are the exact size as the Mona Lisa segments. Have them line up the placement of figures in their copy so that the whole image will assemble accurately. (They can lay their blank white sheet on top of the colored copy with just an edge showing, and mark with pencil where significant points are: fingers, hairline, shoulder, etc.)
Have them try to replicate colors and other details as well as they can, but they don't need to worry about the crackle details that have appeared in the original painting over time. Some will press harder with the pencils and some lighter, but that is okay. Some students get a little confused with almost "nothing" to draw (on the background segments for example) or when they can't quite tell what their detail is. Just have them go for it and not get too stressed out. They don't need to worry about being overly detailed. It will look great when all the segments are combined at the end!!
Ask them to write their name on the back, as well as the same grid number that is on the back of their Mona Lisa segment. This will help you hang them in the correct order for the finished product.
Our class was riveted as we hung the finished squares one by one. They were so excited when the sections lined up correctly (and even, in one case, where it didn't - it was kind of funny!). If your classroom does not have wall space to display this project, it may be possible to display in the school office or in the media center.