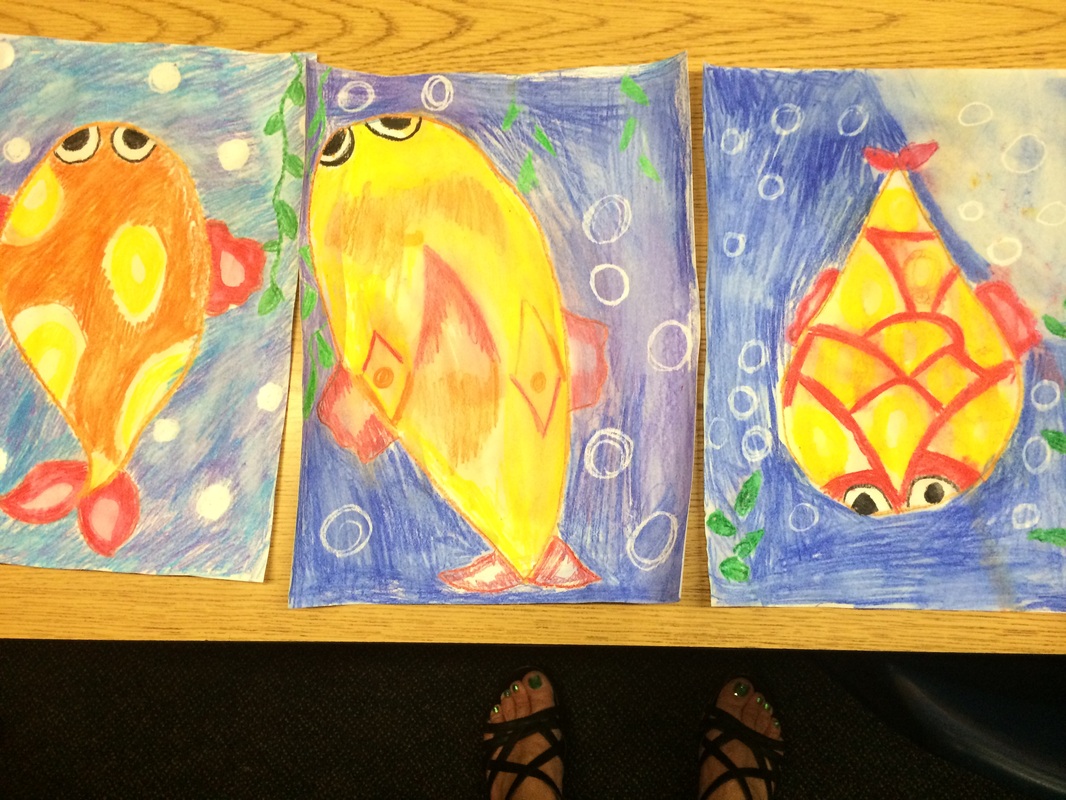
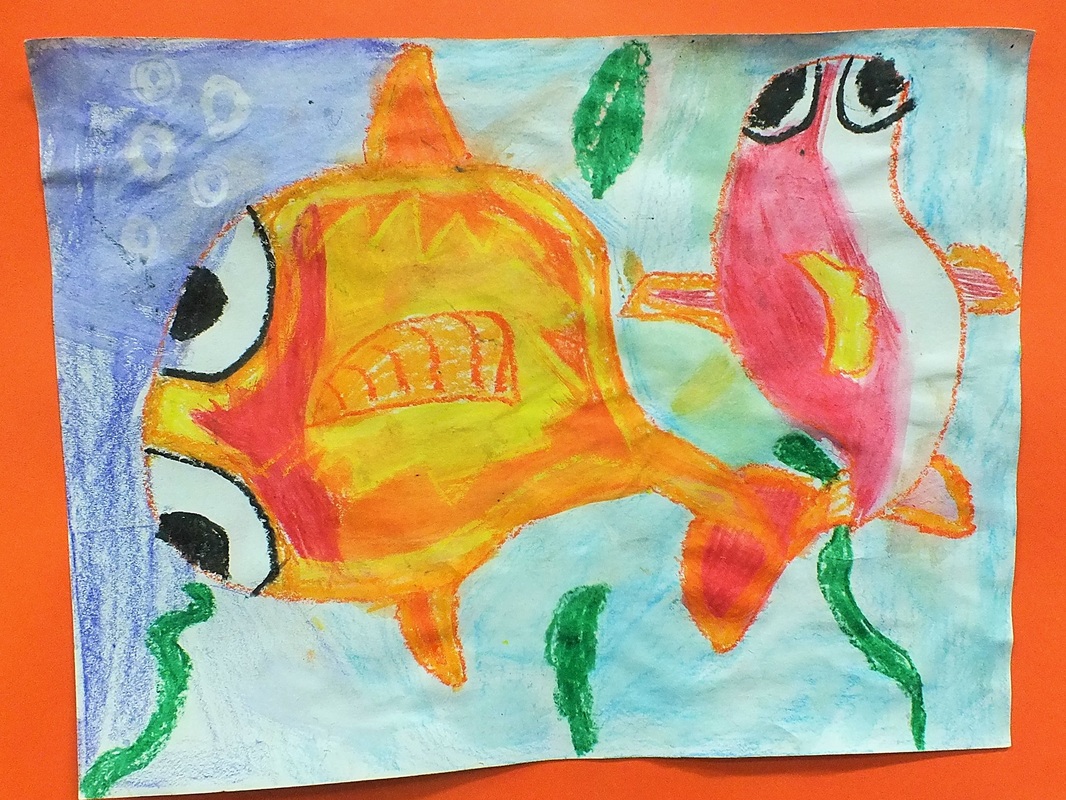
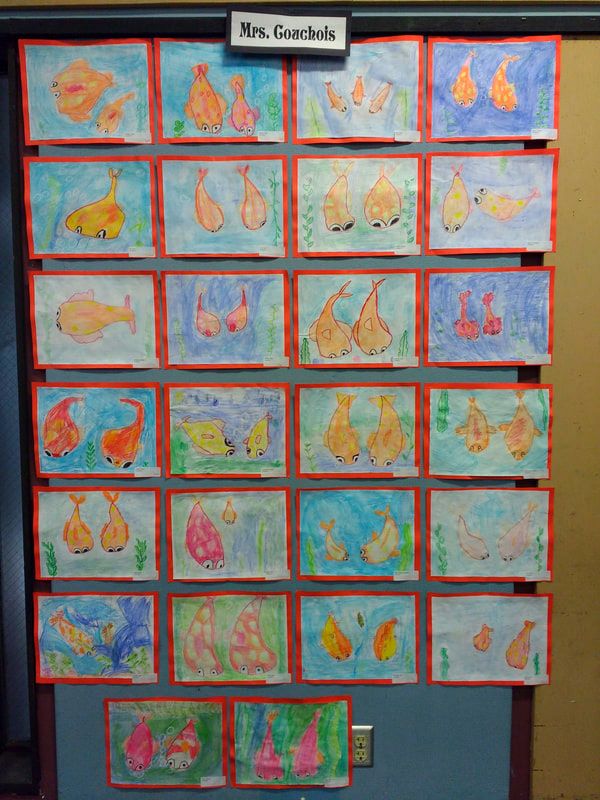
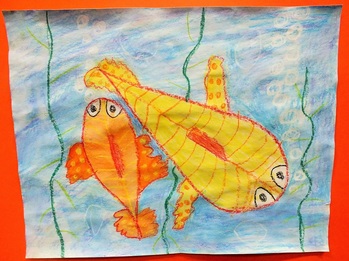
second grade
Japanese Koi
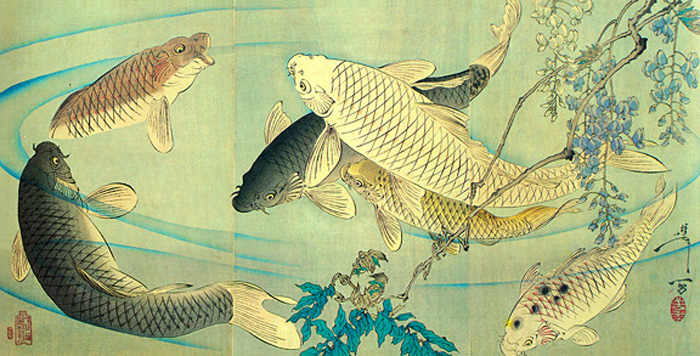
Utagawa Hiroshige (1797 - 1858) was a Japanese printmaker. Hiroshige was one of the last great masters of the color woodblock print. These prints are called ukiyo-e in Japanese (“pictures of the floating world”). A woodblock print is a picture that is carved into a block of wood, onto which ink and colors can be applied and then pressed onto a piece of paper. A print allows an artist to make multiple copies.
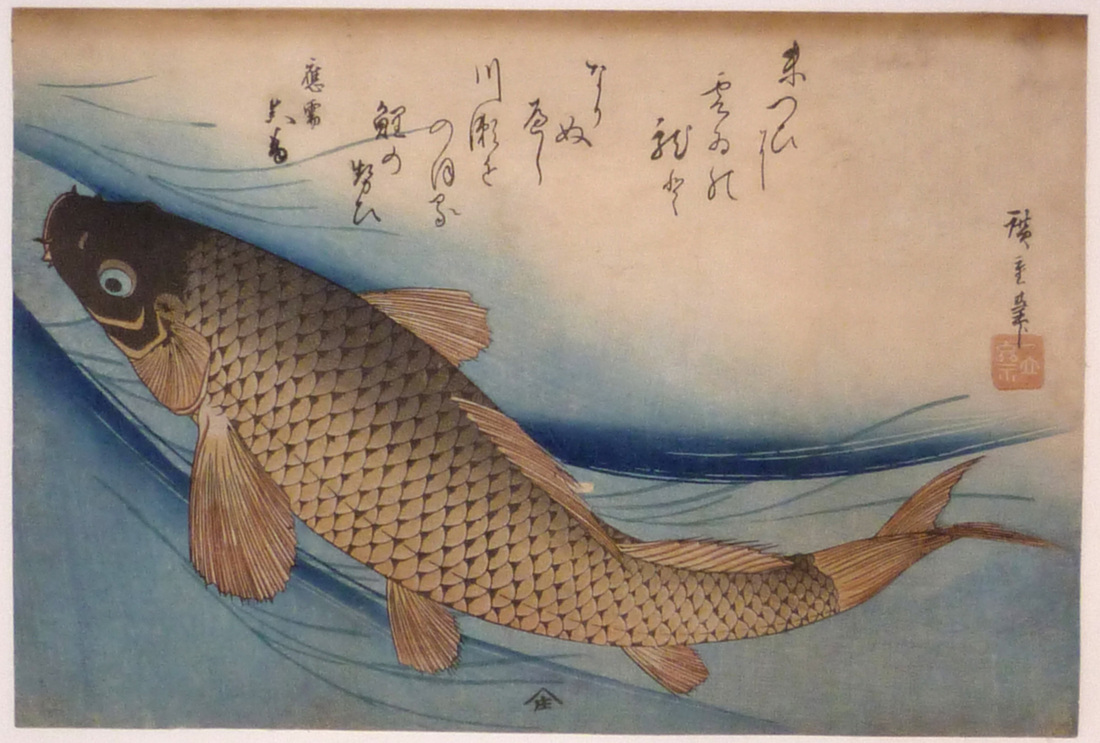
Hiroshige. "Koi."
Influenced by Hokusai's landscape prints (see 4th grade Great Wave project), Hiroshige is also best known for his own landscape series, especially scenes of places he actually travelled to. However, Hiroshige was also quite skilled in his depiction of birds and flowers (such as Japanese cherry blossoms). Here we see some of his prints of koi fish. Notice the subtle details and beautiful use of soft color. Hiroshige's art tends to be more calm and less dramatic than Hokusai's, so koi are a natural fit for his talents as they represent harmony and happiness.
The Project
Prep – 45 min. (included making sample)
Print –
Materials
9 x 12 piece of white construction paper per student
Box or 2 of watercolor pencils
Water containers (students can share)
Paint brushes
White crayons
Print –
Materials
9 x 12 piece of white construction paper per student
Box or 2 of watercolor pencils
Water containers (students can share)
Paint brushes
White crayons
Lesson
- Talk to students about print. Ask them what they see. Talk about what
Japanese artists liked to paint (nature, animals, landscape).
- Using
a piece of the white paper, show students how to draw a Koi fish. Using a
pencil show the students that today you will be using your paper in the
vertical direction. Put your name on the
back. On the front show students that
first you will draw your koi fish. It is
the shape of a tear drop or water droplet.
Draw a big one in the center of the page.
- Add
fins to the koi fish and eyes on the bottom of the head.
- Outline
the outside lines of the fish with orange or red crayon, or both. Go over lines of eyes with black crayon and
fill in center of eye with black crayon.
- Using
a green crayon, draw some sea grass or kelp coming up on either side of your
koi fish.
- Using
the white crayons (some students have them, but take some from the art room for
others) draw bubbles on either side of the fish. I know they are hard to see and don’t show
up, but they will!
- Explain
to students that they will be suing a new medium today, watercolor
pencils. These are like colored pencils,
but you get to paint the areas you color after you are done. The water in your paint brush will make the
watercolor pencil move and look like a painting.
- Time
to use the watercolor pencils! Using an
orange or red pencil color in a section of the fish. Show the students how they can make circles
and different shapes in their fish to color in.
Remind them that we are only using warm colors inside our fish. You can ask the students what the warm colors
are, they know! Red, Orange, and Yellow!
- After
you demonstrate coloring in a section of the fish, use your water and paint
brush to paint water over it and see what happens.
- Color some blue over the area where you
drew bubbles (the water) and paint that with water also. The students will be able to see how the
bubbles now appear. This is called wax resist, the crayon will resist the water
and not let it cover it! The students
can use the 2 blue color and purple for the water. The Cool Colors.
- Remind them that once their art work is
dry it will look very bright and pretty!
- Pass out paper and have students put
their name on the back.
- Have students follow you on the board
and only draw what you draw. This is
called a directed drawing lesson. (I drew it on white board with wipe off
markers so students could see)
- Draw koi fish with pencil –students draw
- Draw side fins- students draw
- Draw tail fin- students draw
- Draw eyes-students draw
- Draw green sea weed or kelp with crayon
– students draw
- Draw bubbles with white crayon, draw a
circle for each bubble and go over it a couple more times – students draw
- Now once students are done with the
above steps parents can pass out water color pencils to students. We are only using red, yellow, orange, blues,
and purples…..so only pass those out.
Students can share.
- Students can now fill in their fish and
water. Take time to add designs.
- When students are done with their
watercolor pencils (this will take the most amount of time) they can raise
their hand and parent volunteers can collect pencils and give them water and a
paint brush.
- Students now water color over their
whole page with water and paint brush.
They can wash out brush when done with warm colors, before they move on
to cool colors.
- Collect all supplies when done, wash out
brushes and leave on the counter in Art room to dry.
- Let art work dry on their desk or it
dries nice on back of classroom carpet.