third grade
Youtube Video Links -
History - youtu.be/rSHHGC9v384 Demo -
History - youtu.be/rSHHGC9v384 Demo -
Georgia O'Keeffe, Close-up Flowers
Georgia O'Keeffe (1887 - 1986) is an American artist best known for her large close-ups of single flowers, like irises and calla lilies. O'Keeffe once said that "Nobody has seen a flower--really--it is so small--we haven't time--and to see takes time.... I'll paint it big and they will be surprised into taking time to look at it." Not only did she make the flowers big, she zoomed in so close sometimes that it is hard to tell it is still a flower. The flowers almost look abstract. Notice how in the print "Grey Line with Black, Blue and Yellow," the subject is unclear, and although it looks flower-like, what you notice are the lines and colors. Did you also notice that O'Keeffe named the painting to reflect that? She did not name it after a flower, but after the visual elements that compose the picture.
Later O'Keeffe would say: "I found that I could say things with color and shape that I couldn't say in any other way--things that I had no words for."
Later O'Keeffe would say: "I found that I could say things with color and shape that I couldn't say in any other way--things that I had no words for."
the Project - Georgia O'Keeffe Minis
Prep
– 30 min. (includes time to make sample)
Print – Georgia O'Keeffe, Grey Line with Black, Blue, and Yellow
Materials
3 - 5" white construction paper squares for each student
Paint brush for each student
Paint palettes
Tempera paint: white, pink, red, yellow, green, blue, turquoise, orange
Q tips (they could also use the pointy end of their paintbrush)
Lesson
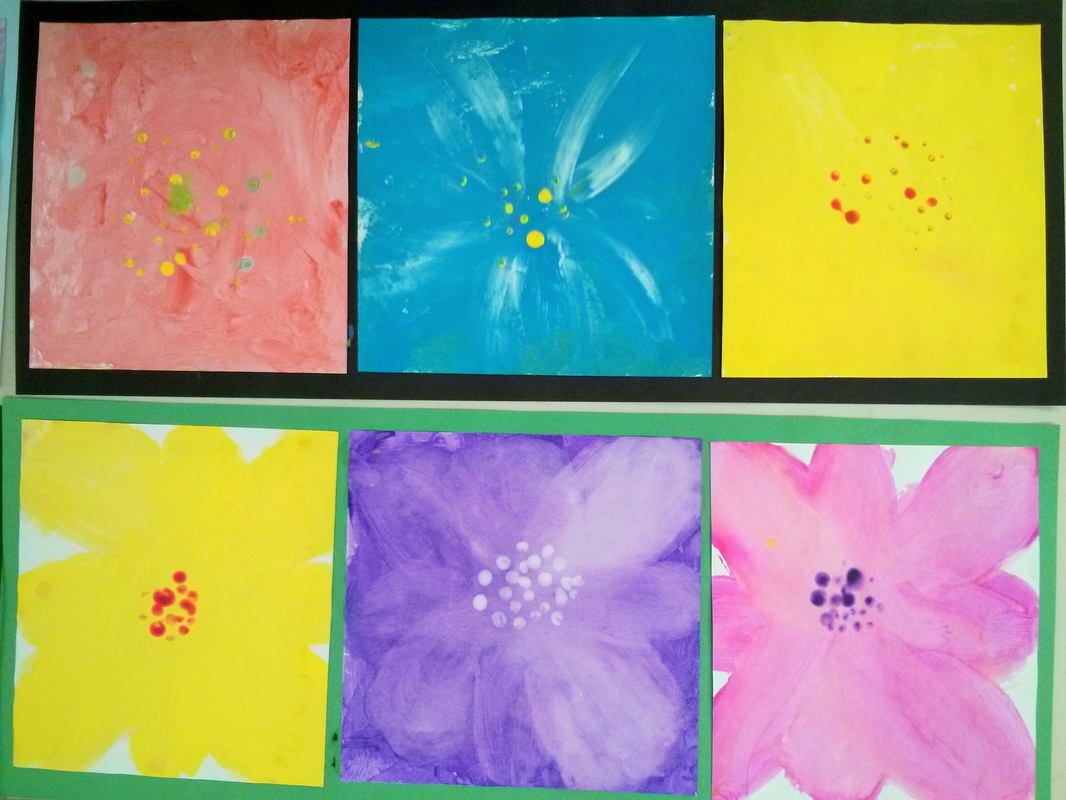
1. Show students the art print by Georgia O'Keeffe. Ask them what they think it is a picture of. They could answer any variety of things. Tell them that it is actually a picture of a flower, but zoomed in really close. Talk about the colors and the way they blend together in some places. Show them other pictures of close-up flowers by O'Keeffe and go over any of the information printed above.
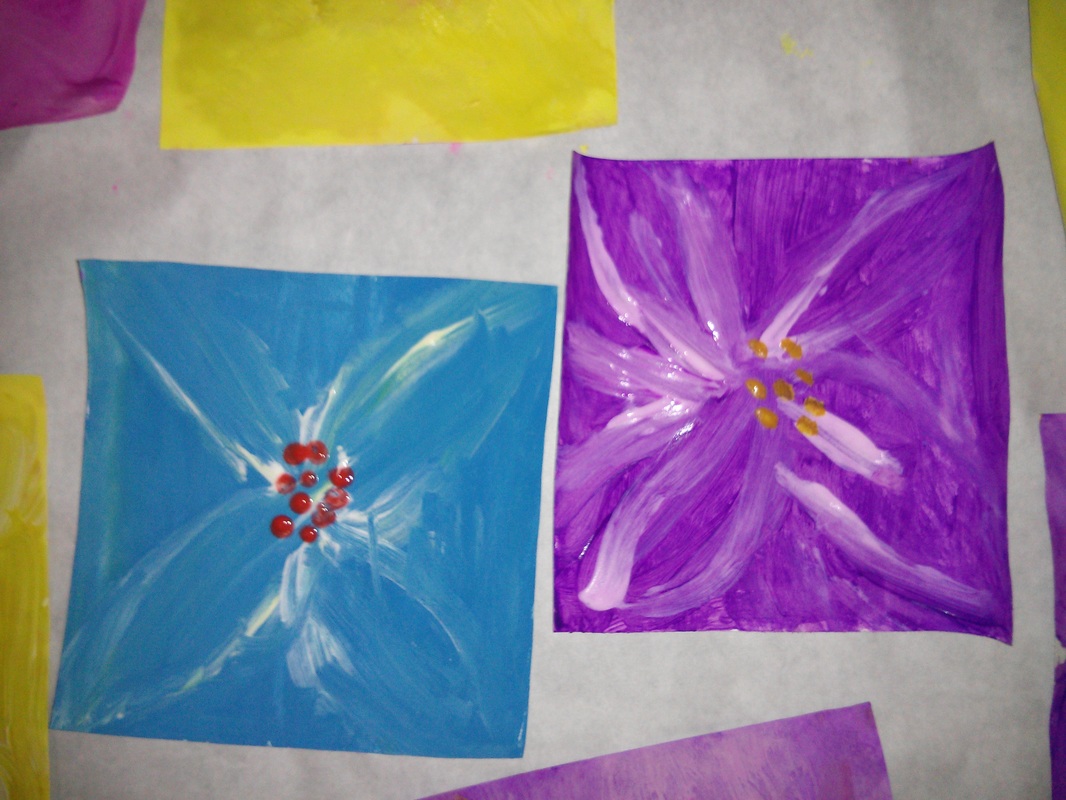
2. Tell them that instead of making the picture BIG like Georgia O'Keeffe did, we are going to use smaller pieces of paper to paint three different flowers. But, like O'Keeffe, we will be going close in, to the center of the flower.
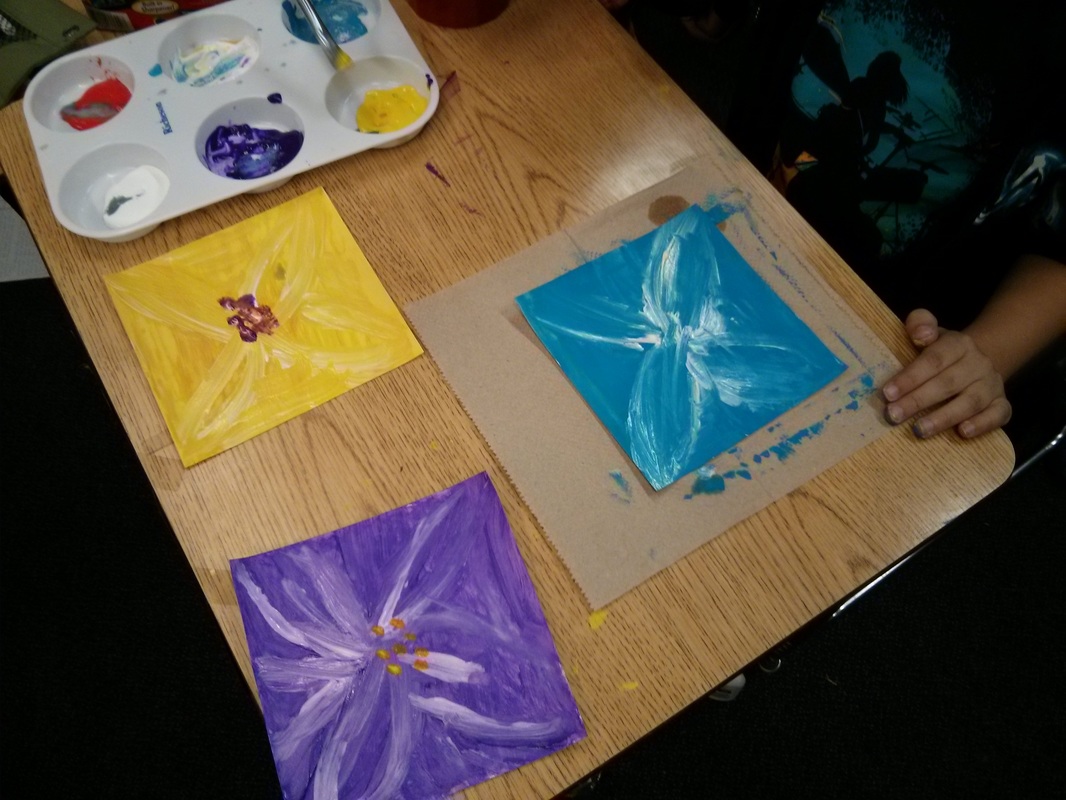
3. Model for the students how you will only use 3 colors for each flower, though each flower can be a different color. The one thing that will be the same each time is that they will use white paint to create accents and dimension on their flower. That is the exciting technique you will be showing them right now.
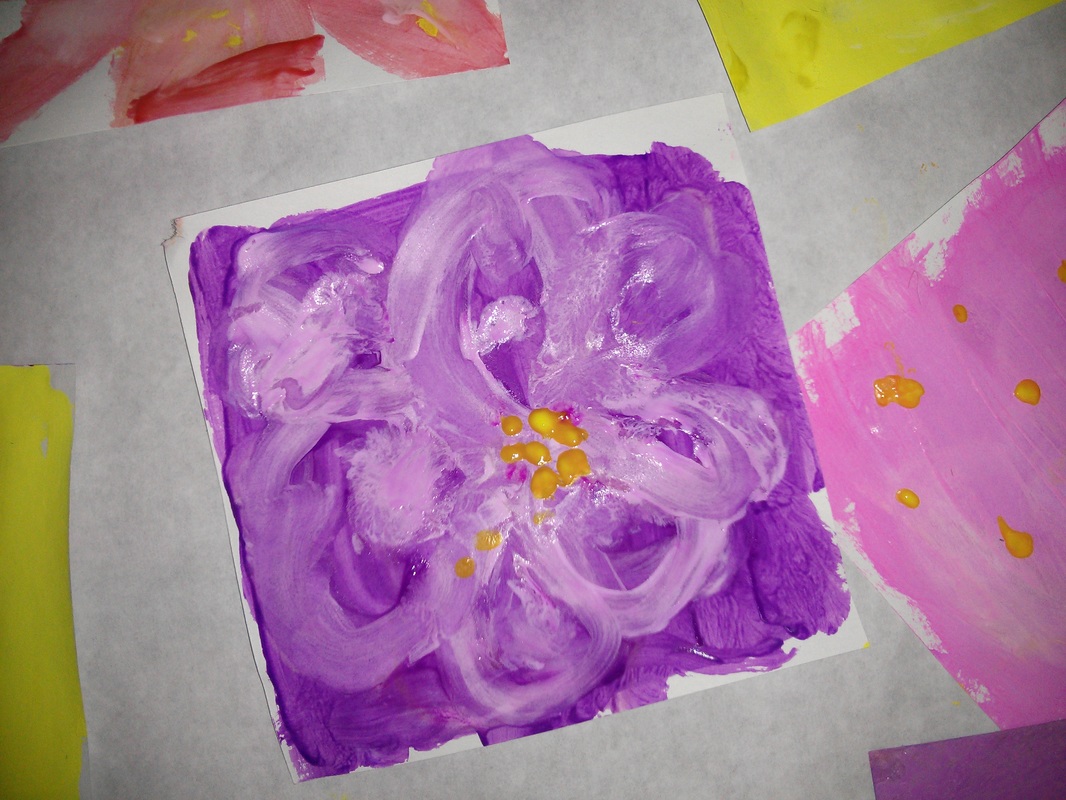
* step 1 will be to have them paint the entire square with a light wash of one of their colors. They may want to add a little water to thin the paint for this stage.
* step 2 will be to use their paint brush filled with more of the same color to add brush lines in the shape of petals. Remember that they don't have to show the whole flower, so they probably won't see the outside edges of the petals. But they can do it however they want.
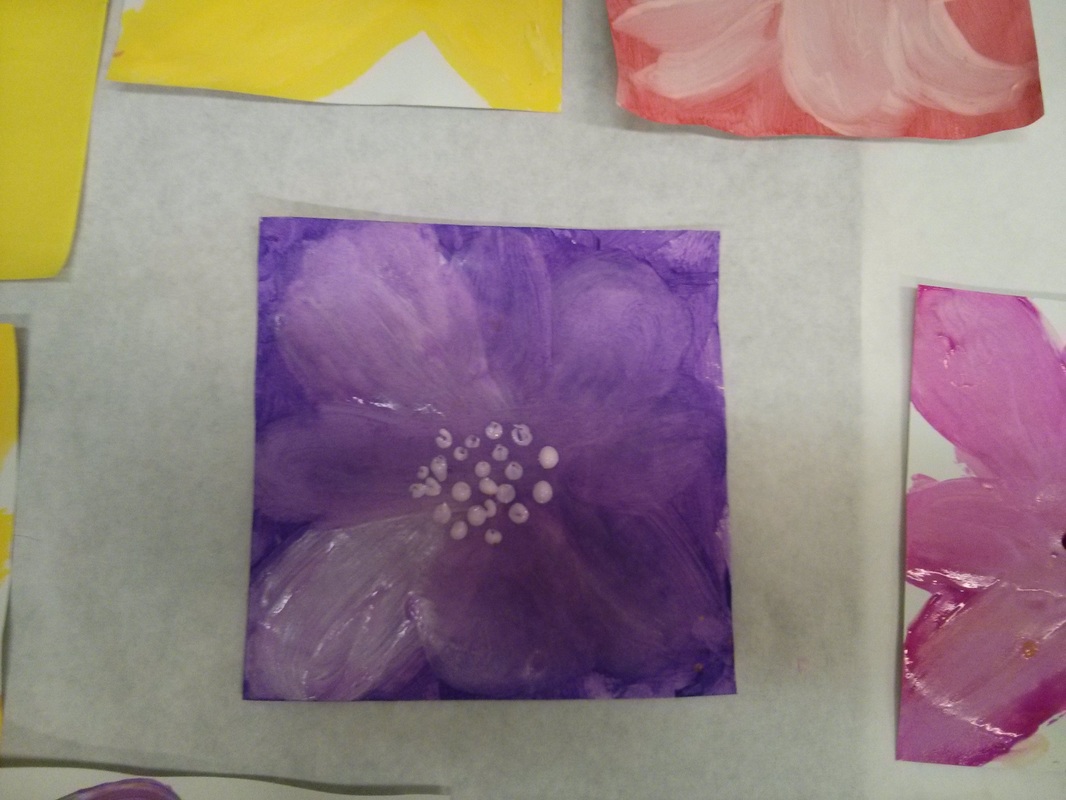
* step 3 will be to take their paint brush again, WITHOUT RINSING IT OUT, and dip it in the white paint. Starting at the center of the flower, move the brush outwards along their petals lines. The paint should still be wet. The white will start to blend with the first color. They can add more white as needed, or even re-dip the brush in the first color, as they go over all the petal lines in the picture and create a blended look. (Note: this is a technique that some will need individual demonstration for. Now is when you need some good parent helpers!)
Remember, you are not washing out your brush, but are blending the white with your color as you go. Work with the paint until you are happy with the colors you see and the use of white in your flower to show the petals.
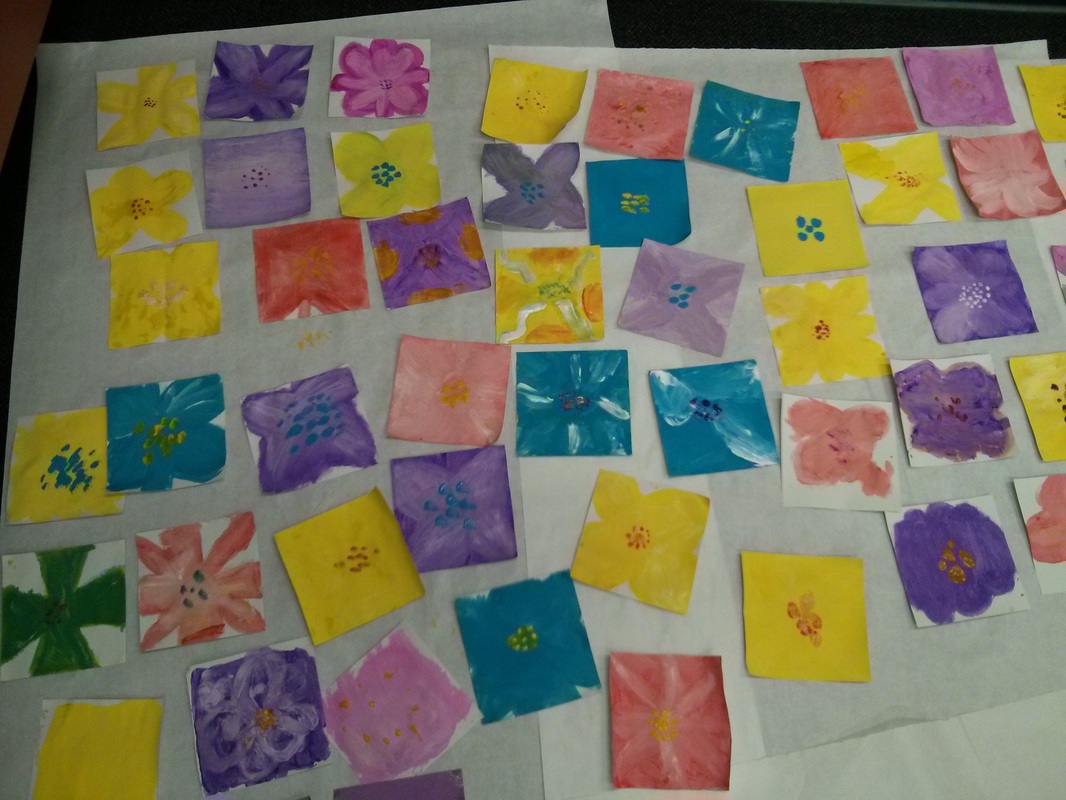
* step 4 will allow them to try it all again on their second and third squares. They can use the same color or try out different colors, but they will always use white paint for the blending. They can experiment with different petal shapes or brushstroke directions.
* step 5 will be to take a Q-tip (or the back end of their paintbrush) and dip it into a contrasting color from their petal background color to make several dots at the center, representing the center of the flower. Have them save this step until all three of their flowers are done so that they have a chance to dry a little bit before adding the dots.
Print – Georgia O'Keeffe, Grey Line with Black, Blue, and Yellow
Materials
3 - 5" white construction paper squares for each student
Paint brush for each student
Paint palettes
Tempera paint: white, pink, red, yellow, green, blue, turquoise, orange
Q tips (they could also use the pointy end of their paintbrush)
Lesson
1. Show students the art print by Georgia O'Keeffe. Ask them what they think it is a picture of. They could answer any variety of things. Tell them that it is actually a picture of a flower, but zoomed in really close. Talk about the colors and the way they blend together in some places. Show them other pictures of close-up flowers by O'Keeffe and go over any of the information printed above.
2. Tell them that instead of making the picture BIG like Georgia O'Keeffe did, we are going to use smaller pieces of paper to paint three different flowers. But, like O'Keeffe, we will be going close in, to the center of the flower.
3. Model for the students how you will only use 3 colors for each flower, though each flower can be a different color. The one thing that will be the same each time is that they will use white paint to create accents and dimension on their flower. That is the exciting technique you will be showing them right now.
* step 1 will be to have them paint the entire square with a light wash of one of their colors. They may want to add a little water to thin the paint for this stage.
* step 2 will be to use their paint brush filled with more of the same color to add brush lines in the shape of petals. Remember that they don't have to show the whole flower, so they probably won't see the outside edges of the petals. But they can do it however they want.
* step 3 will be to take their paint brush again, WITHOUT RINSING IT OUT, and dip it in the white paint. Starting at the center of the flower, move the brush outwards along their petals lines. The paint should still be wet. The white will start to blend with the first color. They can add more white as needed, or even re-dip the brush in the first color, as they go over all the petal lines in the picture and create a blended look. (Note: this is a technique that some will need individual demonstration for. Now is when you need some good parent helpers!)
Remember, you are not washing out your brush, but are blending the white with your color as you go. Work with the paint until you are happy with the colors you see and the use of white in your flower to show the petals.
* step 4 will allow them to try it all again on their second and third squares. They can use the same color or try out different colors, but they will always use white paint for the blending. They can experiment with different petal shapes or brushstroke directions.
* step 5 will be to take a Q-tip (or the back end of their paintbrush) and dip it into a contrasting color from their petal background color to make several dots at the center, representing the center of the flower. Have them save this step until all three of their flowers are done so that they have a chance to dry a little bit before adding the dots.

Art Project
-pass out paper, have them put their names on the back
-have parent volunteers come around with palettes and paint and ask them what colors they want. Every 2 students can share a palette since there are 6 spaces in each palette.
-a parent volunteer can put white in each palette, this will be the color all kids have
-once students have their paint, pass out 1 paint brush to each student
-remind students to paint from the center going out towards edges of paper to paint the paper with their main color
-have students then use white to add lines and variation to their flower, still working from the center out
-when students have all the color variation and feel they are done, have them raise their hands for a q tip
-have parent volunteers check the students art work to see they followed the directions and hand out q tips
-have students make the center of the flower with their last color dotting with q tips
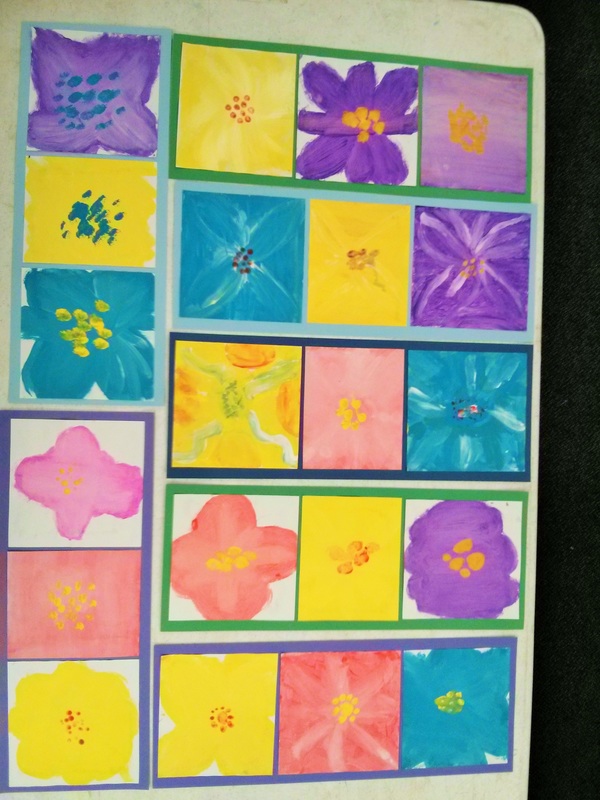
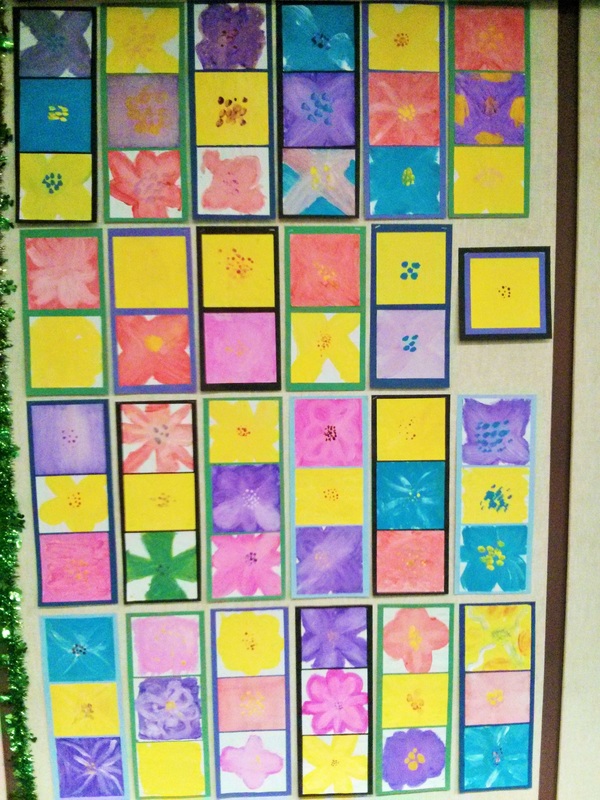
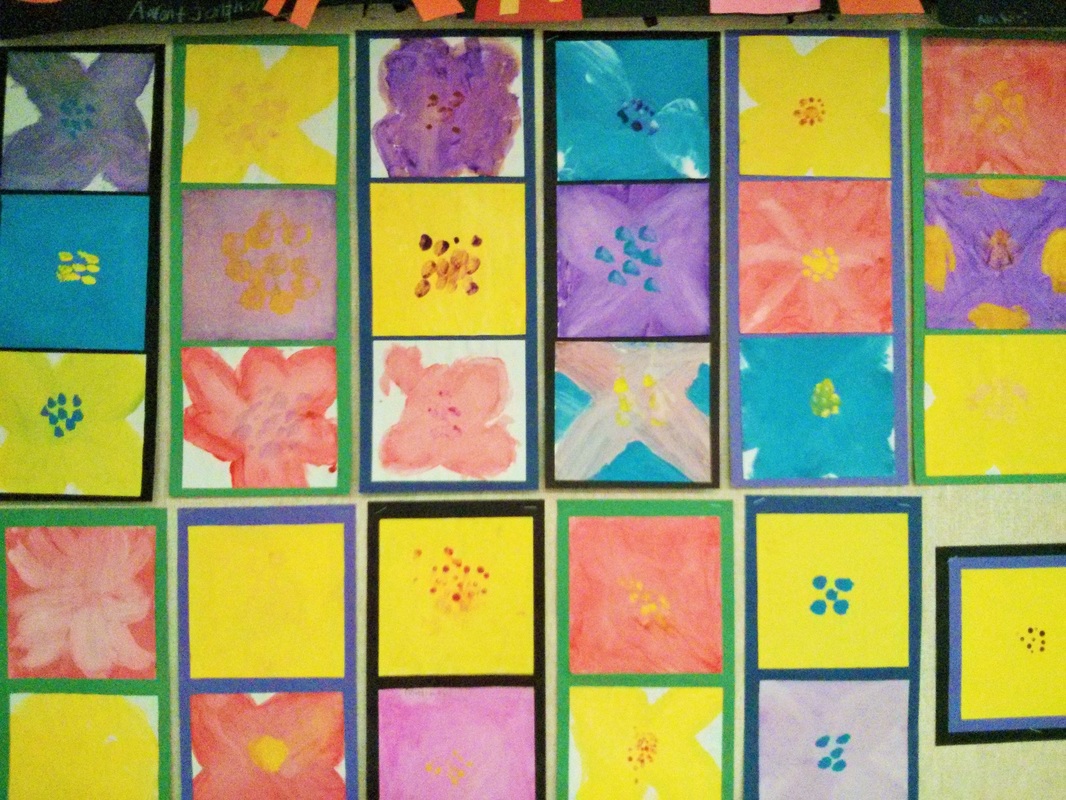
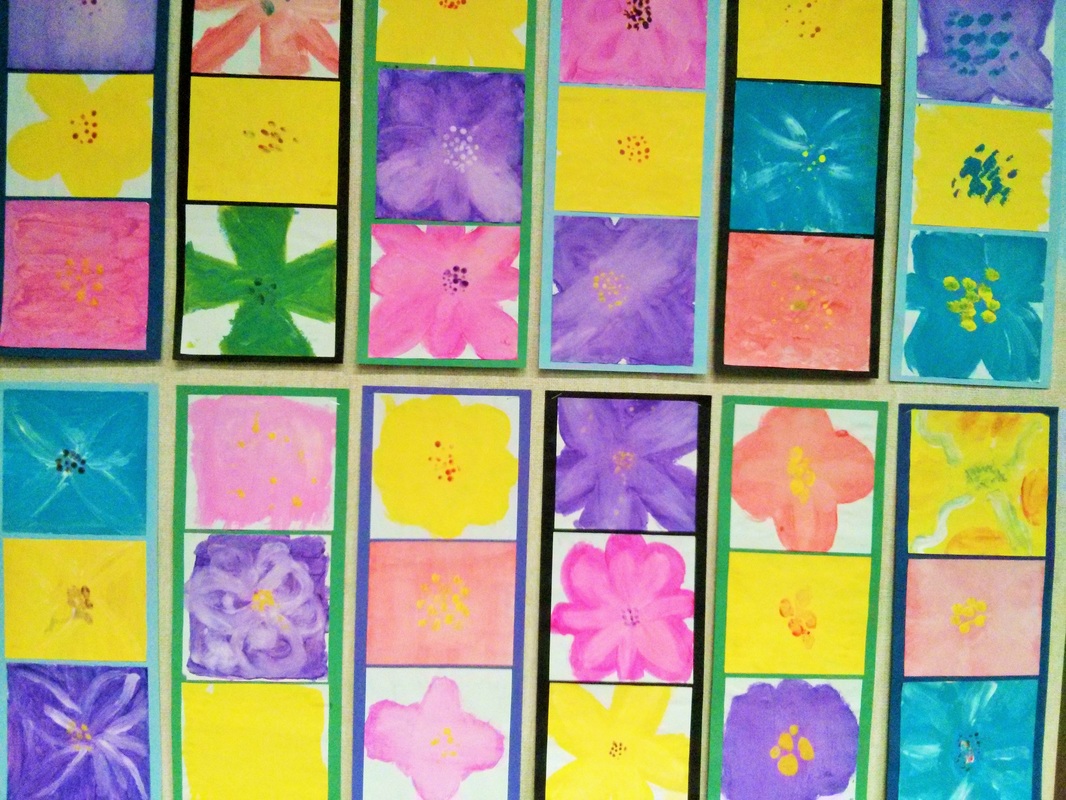
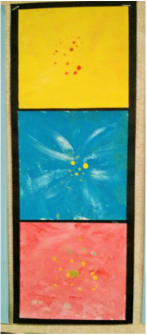
-lay out the pictures to dry, after which you may want to stack them and press them flat under a thick pile of books. The pictures will look lovely mounted, either with three in a row, or choose your favorite two paintings from each student to mount together and send the third home. However you choose to mount them, make sure you remember to transfer their name to the mounting paper.
*have a parent volunteer wash out the paint brushes and palettes and let them dry on the counter in the art room
*these would be a beautiful piece of art to save for the Art Showcase in May