Fifth Grade
Still Life
A still life is a painting or drawing of objects, often including fruit and flowers or bowls and glassware, arranged together in a specific way.
Still lifes became a popular subject in art beginning in the 1600's. All of the images in the slideshow are from that century (known as the Baroque). Artists liked to paint still lifes for many reasons, but probably the most important reason was to show off their technical painting skills. Notice how the pictures look incredibly realistic, with different textures for the fruit, flowers, food, dishes, etc. Also notice how each picture uses LIGHT. Baroque artists were obsessed with the quality of light in their art, and many of them would use light to help focus on their objects, using almost a spotlight effect with the backgrounds plunged in dark shadows.
As you look at the images, pay attention to where the light is coming from (from the side, from the front, etc.), and observe out how that light creates areas of brightness (HIGHLIGHTS) and darkness (SHADOWS). This is called color VALUE. Notice how this use of light helps makes the objects look three-dimensional. Remember that a painting is a flat, two-dimensional surface, but in order to make the objects seem more realistic, highlight and shadow can be used to create the effect of form and depth.
Another thing that was important to still life artists of the 1600's was paintings that had a moral message. Even still lifes. So although the picture looks like just a bowl of fruit or a vase of flowers, it almost always had a deeper meaning. Artists liked to use still lifes to remind viewers that time passes quickly, and eventually everything dies, so we need to do good things with the time we have. Look for these kinds of clues: sliced or peeled fruit (spoils quickly), cut flowers, spilled drinks, skulls, bugs (especially in the flower still lifes), time pieces (watches, clocks, hour glasses), etc. Remember that when any fruit or flowers are picked, they have a limited shelf life, especially without refrigeration, and baked goods without preservatives would also be fresh for only a day or two. Because of these messages and the dramatic lighting, many Baroque still life paintings can seem especially serious in tone or mood.
|
PowerPoint you can download to help teach this lesson:
|
| ||
the project
Prep - 45 min. (includes making sample)
Materials
-tempera paint (colors to match fruit, plus blue and tan/light brown for background and table, and white and black to tint and shade)
-9 x 12 white construction paper for each student
-medium paint brushes (for fruit and shadows)
-large paint brushes (for background and table)
-paint palettes (can be shared in a group)
-paper plate for each student to mix colors on
-water container
-paper towels (for wiping brushes)
-newspaper to protect desks (optional, as paint washes easily from desktops)
-plastic fruit (in 6th grade drawer), could choose several groupings to place around the room
-flashlight or small lamp to demonstrate light source and direction of shadows (your phone likely has a flashlight)
Lesson
1. Use a desk lamp or a strong flashlight to demonstrate how a source of light causes some areas of an object to look lighter and the opposite side to be darker, and to cause that object to cast a shadow.
2. Show the slide show of paintings above. Discuss how the element of art called VALUE (or light and shadow in a work of art) acts to create the illusion of depth and form. Have the students try to determine which direction the source of light is coming from. You can also point out that light can also do other jobs in art, such as directing the viewer where to look in a painting, helping communicate a narrative or message, and setting a mood in a work of art.
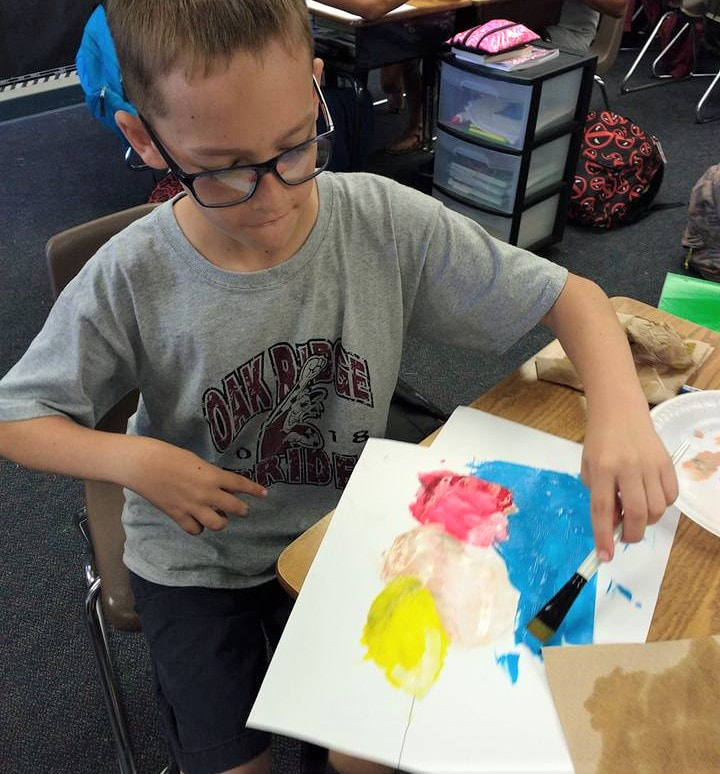
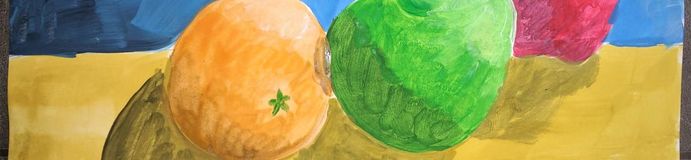
3. Show students your sample. Show them how you used very simple shapes like circles to draw the fruit. Point out that since the fruit are the focal point of the picture, they should be large enough to fill the whole center portion of the page.
4. Tell them about how they will use color gradations (VALUE) to create highlights and shadows, which make the simple circles look like they have dimension and volume. Although the paintings above depict light sources from various directions, for this project all students will create their picture as if the light is coming from the upper right side of the picture, as in the diagram of the light and sphere. (Or perhaps they can choose between right and left to have a variety.)
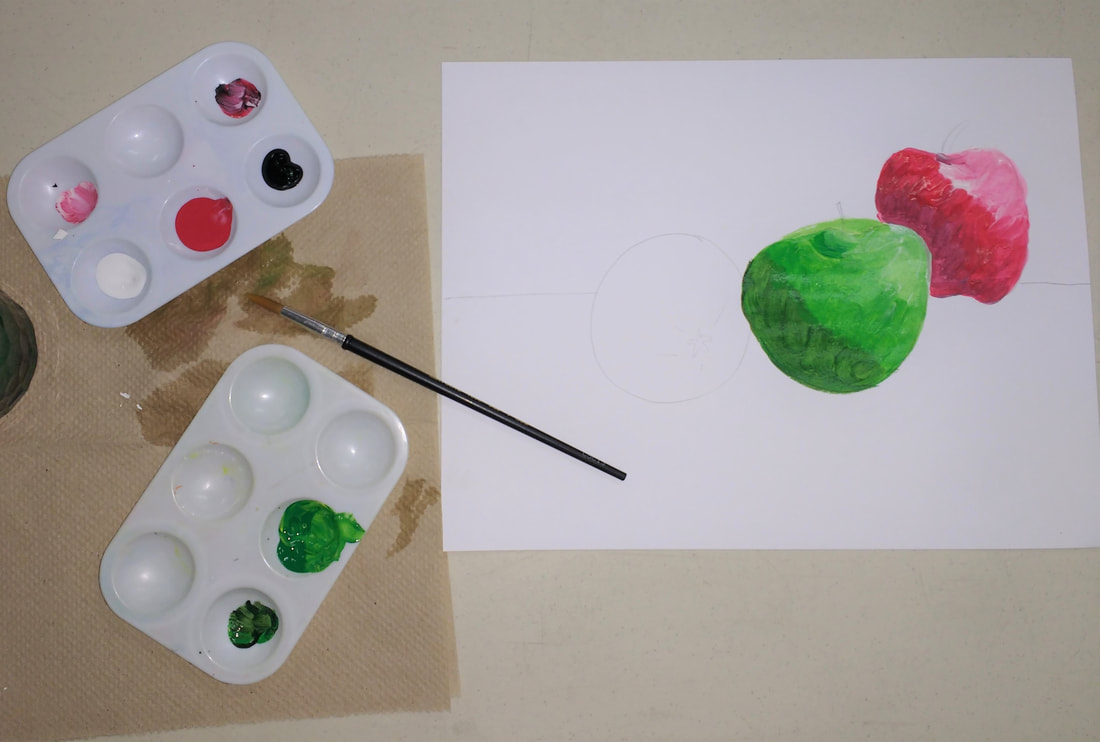
4. Choose a base paint color appropriate to each fruit and paint the whole object in this color. For example, if it is a lemon, paint the whole shape basic yellow. Next apply white paint to the area of highlight on the lemon. For the shadow, mix a drop of black paint (it doesn't take much) to the yellow paint. Rinse paintbrushes in between each color gradation. Go back with the pure color to the middle section again, and blend the edges. Make sure to keep distinct color areas with highlight and shadow.
5. Point out your horizon line on either side of your still life, so it is grounded rather than floating in the air. Paint the background blue, following the same highlight and shadow gradations of the background. The table can be painted tan, then mix the tan with a little black paint to create the shadows for the fruit.
1. Use a desk lamp or a strong flashlight to demonstrate how a source of light causes some areas of an object to look lighter and the opposite side to be darker, and to cause that object to cast a shadow.
2. Show the slide show of paintings above. Discuss how the element of art called VALUE (or light and shadow in a work of art) acts to create the illusion of depth and form. Have the students try to determine which direction the source of light is coming from. You can also point out that light can also do other jobs in art, such as directing the viewer where to look in a painting, helping communicate a narrative or message, and setting a mood in a work of art.
3. Show students your sample. Show them how you used very simple shapes like circles to draw the fruit. Point out that since the fruit are the focal point of the picture, they should be large enough to fill the whole center portion of the page.
4. Tell them about how they will use color gradations (VALUE) to create highlights and shadows, which make the simple circles look like they have dimension and volume. Although the paintings above depict light sources from various directions, for this project all students will create their picture as if the light is coming from the upper right side of the picture, as in the diagram of the light and sphere. (Or perhaps they can choose between right and left to have a variety.)
4. Choose a base paint color appropriate to each fruit and paint the whole object in this color. For example, if it is a lemon, paint the whole shape basic yellow. Next apply white paint to the area of highlight on the lemon. For the shadow, mix a drop of black paint (it doesn't take much) to the yellow paint. Rinse paintbrushes in between each color gradation. Go back with the pure color to the middle section again, and blend the edges. Make sure to keep distinct color areas with highlight and shadow.
5. Point out your horizon line on either side of your still life, so it is grounded rather than floating in the air. Paint the background blue, following the same highlight and shadow gradations of the background. The table can be painted tan, then mix the tan with a little black paint to create the shadows for the fruit.

Art Project
-pass out paper and have students write name and date on back
-using a pencil, students sketch out shapes of fruit. Remind them that they should draw the fruit approximately life size (i.e. the size a lemon or apple, etc. is in real life). Add a horizon line.
-pass out medium paintbrushes, water, and paper towels
-pass out palettes with colors appropriate to fruits chosen
-pass out paper plates to each student. Squirt a dab of white paint on one side and an even smaller drop of black paint on the other side.
-remind them that the light source is coming from the upper right, so be consistent of where their highlights and shadows are
-pass out large paintbrushes, plus tan and blue colors (I used turquoise and "curry" in the sample). Refresh water and paper towels as needed.
-paint the background areas.
-blue background should also have areas of highlight and shadow.
-mix tan color (for the table) with a bit of black paint, then paint shadows on the table for each piece of fruit.
-set finished paintings aside to dry.
-rinse all paintbrushes and palettes in classroom sink
-parent helpers should wash all paintbrushes and palettes when they return to art prep room. Lay paintbrushes flat on art prep counter to dry.