Kindergarten
Veteran's Day Paper Shield
Veterans Day is the day that we honor all the men and women that have served in the armed forces of our military. These men and women do a great many things for our nations while sacrificing much.
Veterans day began as Armistice Day. Armistice Day was when a ceasefire was signed before the end of World War I. It was held on the 11th hour of the 11th day of the 11th month in 1918. This day was not the end of the war, but it was the day the fighting stopped.
In 1938 Armistice Day was turned into a legal holiday. At first this holiday was to celebrate only the veterans of World War I, but in 1954 they decided to make it a holiday to honor All Veterans. There are Six groups that make up our Armed Forces.
The Coastguard, The Navy, The Army, The Air Force, The Marines, The Space Force
The Project
Prep - 1 hour
Print - Copy "USA" Template in Template Folder
Supplies
Prepare Directions
Print - Copy "USA" Template in Template Folder
Supplies
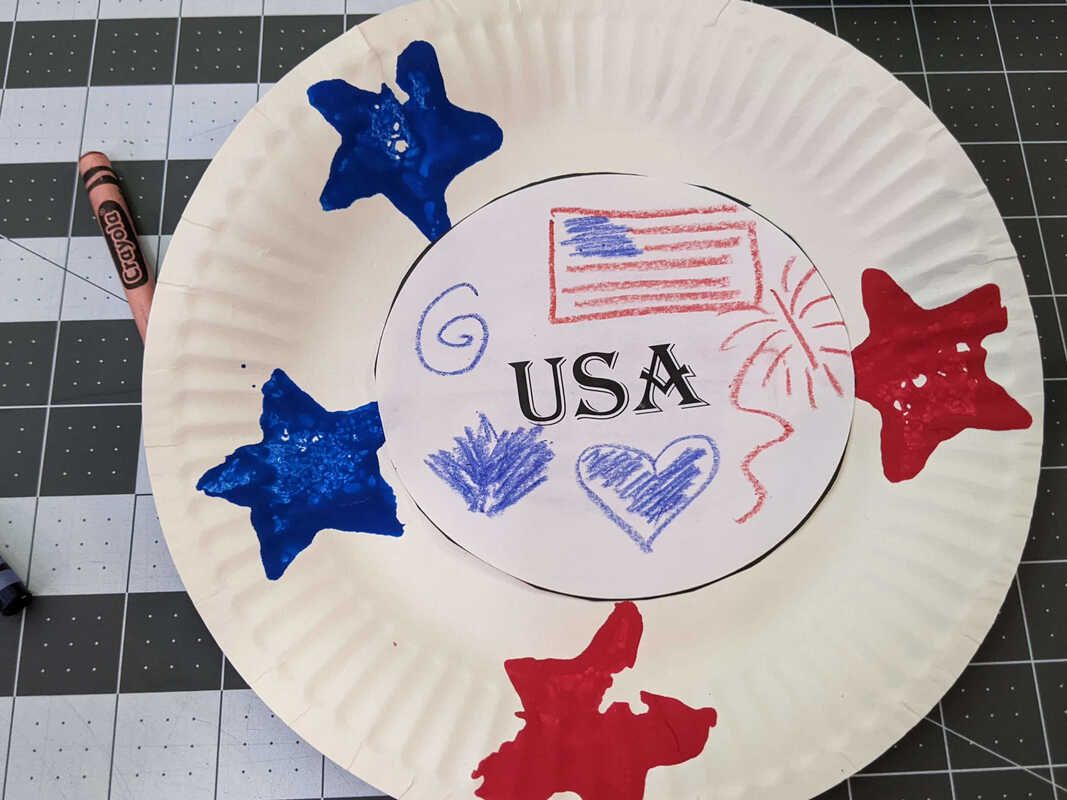
- Paper Plate
- Star Sponge Stamps
- Blue and Red Tempera Paint
- White Ribbon
- USA Template Cutout
- Scissors
- Glue Stick
Prepare Directions
- Prepare One Plate per Student. Using the Template, place 2 marks on the back of the plate. 4 inches apart and 1 inch long.
- Gently fold the plate in half and cut along the lines.
- Cut ribbon strips 10 inches long.
- Thread a ribbon through each plate and tape the ends of the ribbon together.
- Make sure there are enough “USA” printouts for each student to have one, then add a few more in case there is a mistake. You might even want to have a few fully cut out for the students that are struggling with the scissors.
- Make one large paint palette with two red and two blue for each table. The tables can share the star sponges.
Project Instructions
- Give each student a plate with the tied ribbon and a USA Cutout, a pair of scissors and glue stick.
- Have the students write their name on the back of the plate.
- Have the students color the sign with blue and red crayons.
- Next, the students will cut out the USA Sign.
- Have the students glue the colored USA Sign over the ribbon in the center of the front of the plate
- Then using the stars, they can stamp paint around the edges of their plate.
